01 09 10

search you little tarte

Thursday, September 29, 2011

What is The Best?


There are as many brisket recipes as there are apple pie recipes.  And everyone swears that their's is the best.  In fact, if I had a dime for every brisket recipe I've collected with the word "best" in the title, I could retire.

It's not that all these recipes aren't delicious, because I am sure they are.  But mostly I have found that many of my friends make their briskets just the way their mothers did.  Let's face it, we all love what we know best.  Unfortunately for me, my mother was no Julia Child, although she spent years feeding our family.  I have absolutely no recollection of her brisket, other than it being a little on the tough side, and as such I have never sought to duplicate it.  I am a woman without an inherited brisket recipe.

I have spent years and countless Jewish holidays trying to find my "best" brisket recipe.   I'm talking about the recipe I teach my kids to make and the one that they proclaim as the best.  As a result of my ongoing research, I've made dozens.

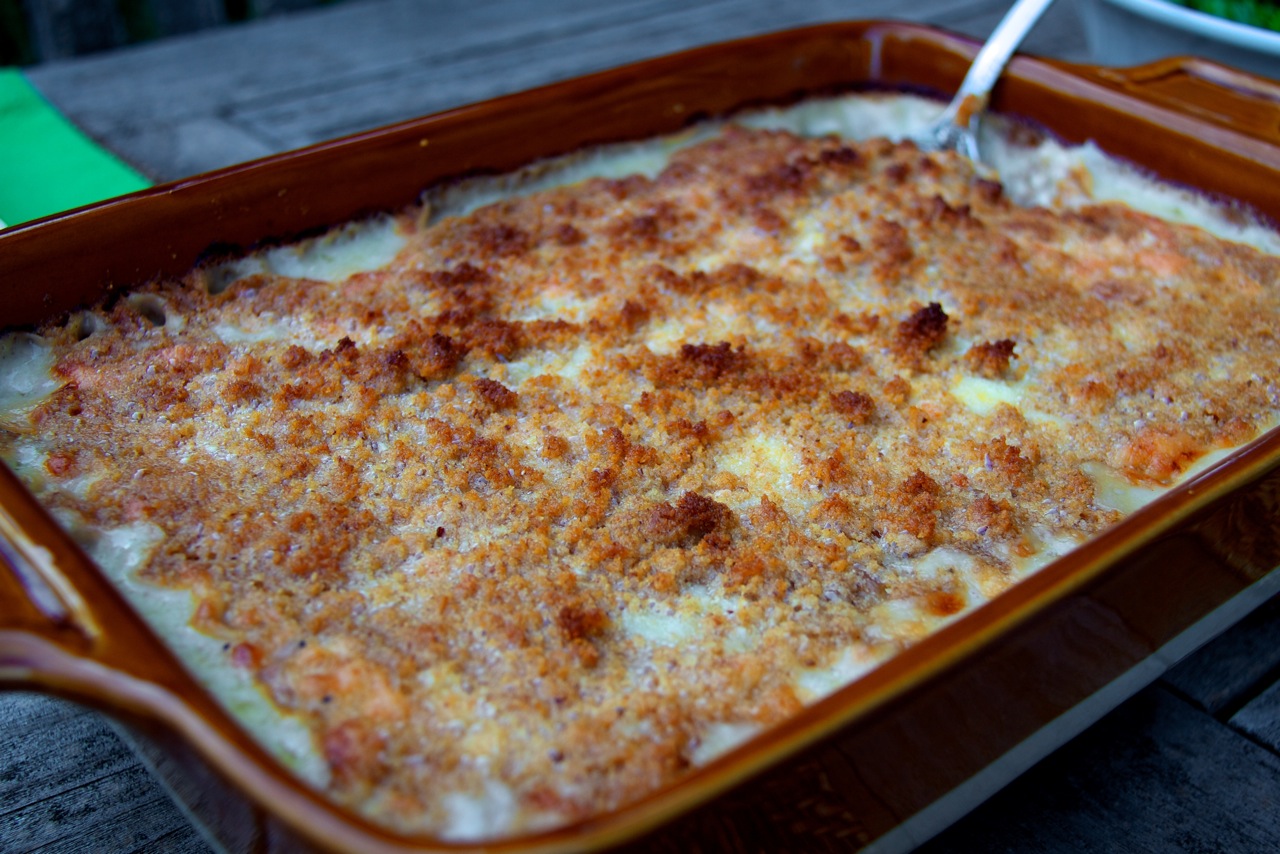
Just out of the oven

This recipe for Braised Brisket with Pomegranate Juice, Chestnuts and Turnips comes from The New York Times.  It a multi-day affair -- two days of marinating in a dry rub in the refrigerator -- followed by a four hour braise in the oven.  This is obviously not a brisket you're just going to throw together without a reason.

But, I have to tell you, this brisket was delicious.  Its exotic Middle Eastern seasonings elevate the meat far beyond your standard gadempta brisket.  It's probably not my go-to brisket, but it's certainly a recipe to make again.  And who knows.  Maybe one of my kids will proclaim this as the best.


Recipe:  Braised Brisket With Pomegranate Juice, Chestnuts and Turnips
The New York Times, September 20, 2011
Adapted from Michael Solomonov, Zahav, Philadelphia

Ingredients:


1 brisket, about 4 to 5 pounds, with thin layer of fat
2 1/2 tablespoons coarse salt, plus more as needed
3 tablespoons finely ground coffee
1 teaspoon ground cardamom
1 to 2 tablespoons vegetable oil, if needed
2 onions, peeled and diced
2 large carrots, peeled and diced
1 bulb garlic, peeled and halved
1 pound (3 to 4 medium) turnips, peeled and quartered
1 tablespoon ground cumin
1 tablespoon black pepper
1 tablespoon ground turmeric
1 fresh licorice root (available in Middle Eastern markets) or 1 licorice tea bag (available at health food stores and some supermarkets)
4 cups pomegranate juice
1 cup peeled chestnuts (roasted, frozen or vacuum-packed)
1/2 cup chopped dill
1 cup chopped flat-leaf parsley.

Directions:

Place the brisket in a shallow roasting pan fat side up; add 2 1/2 tablespoons salt, the coffee and cardamom; and rub all over the brisket. Cover lightly with foil and refrigerate for two days

Preheat a broiler. Place the pan with the brisket under it until the meat is evenly browned and much of the fat rendered, about 15 minutes. Remove, transfer brisket to a platter and turn oven to 300 degrees.

Pour the fat into a Dutch oven or other heavy covered pan large enough to hold the brisket. There should be about 1/4 cup fat; if needed, add vegetable oil. Place the pan over medium-high heat, and add onions, carrots, garlic and a pinch salt. Sauté until lightly browned, about 10 minutes. Add turnips, cumin, black pepper and turmeric. Cover and cook, stirring once or twice, for 5 minutes.

Add licorice or licorice tea bag, and pomegranate juice. Stir, scraping the bottom of the pan. Add brisket, bring to a simmer, and baste with the juice.

Cover the pan tightly and place on the middle rack in the oven. Cook until very tender, about 4 hours, basting every 45 minutes. Remove from the oven and discard licorice or tea bag and garlic halves. If desired, at this point, cool the brisket and vegetables, cover, and refrigerate overnight.

Just before serving, skim the fat and place the pan over medium-low heat. Add chestnuts and reheat just until steaming. Stir in dill and parsley. Transfer brisket to a cutting board and slice against the grain. Serve with vegetables and sauce.

Yield: 8 servings.

Wednesday, September 28, 2011

Couscous Gone Wild

Sometimes I just feel the need to break out of my cooking rut and do something different.  The problem is that I am also a devout recipe follower and I really like the comfort of making things that have been tried and tried again.

But every once in a while I feel bold and just go for it in the kitchen.  Tonight was one of those nights.  I went wild with the couscous and the final result could become a classic in our family.  And maybe in yours.

Recipe:  You Little Tarte's Couscous

Ingredients:

1 tablespoon olive oil
1 small red onion, diced
1/4 cup dried apricots, chopped
1/4 cup toasted sliced almonds
1 cup couscous
1 1/2 cups chicken stock
1/2 teaspoon lemon zest
3 tablespoons flat leaf parsley, chopped
3 scallions, chopped
Kosher salt and freshly ground black pepper to taste

Directions:

In a medium skillet, warm the olive oil.  Add the onion and apricots and saute until soft, about 5 minutes.  Set aside.  

In a medium saucepan, bring the chicken stock to a boil.  Add the onion and apricot mixture to the stock along with the couscous and the lemon zest.  Stir to combine.  Cover and remove from the heat.  Let sit for 10 minutes, or until the couscous has absorbed all the liquid.    Add the almonds, parsley, and scallions.  Stir with a fork to combine.  Season to taste with kosher salt and pepper.  Toss gently to combine.

Serve warm.


Tuesday, September 27, 2011

Happy Birthday Charlie

Charlie is 20 today.  I know.  How could I possibly have a 20 year old son?  It amazes me too.  It's not that I feel too young to have a 20 year old child, because I don't.  It's not even that I can't believe how quickly the years have gone, because I can.  I think the thing that really gets me is less about the years and far more about the fact that Charlie is a man.


Now this must seem obvious, that at 20 Charlie is a man.  But any parent will agree  that realizing your baby has somehow become an adult is something else entirely.  I can still remember how when we were remodeling our kitchen in Santa Monica, Charlie wore his Little Tikes tool belt everyday so he could be ready to "help out" at the drop of a hat.  I still remember so clearly how Charlie could never stay in his seat in Ms. Brown's class at the Mirman School.  Or how when Charlie was six, we took him to London and to dinner with one of Ted's partners.  That he was able to sit through dinner and not slop his food all over the place was amazing enough.  But he was quite the chatty Charlie at dinner.  Midway through dinner, when asked what he liked to do, Charlie announced that he loved golf and that he could "hit the ball pretty damn far."

I guess I am a little surprised at how quickly the years have gone.

Now that Charlie is away at school most of the time and so far away in Berlin this term, my time with him is much more limited.  Each time I see him it seems as though not only has he grown (yes, he seems taller to me every time I see him), but he seems so much more adult.  He is confident and so sure of himself.  He knows what he wants (kind of) and is formulating plans to get where he wants to go.  He is growing up.

It's killing me.

I am a big talker.  I always say that I feel as though I've done a good job every time my kids can walk away from me and not look back.  And I do feel like that.  It's just that he's really only looking forward and I'm doing all the looking back.

Monday, September 26, 2011

Janis' Apple Cake


Many years ago my friend Janis gave me this recipe for apple cake.  Since then it has become my go-to Rosh Hashanah dessert.  This cake keeps beautifully so you can make it a day or two ahead of time and it's just as delicious for days afterward.  It's even nice to serve for a weekend brunch.

Ready to go into the oven.

I have no idea where Janis originally got this recipe, but over the years I've fiddled with it a bit.  To to fair, Janis had already done some fiddling when she gave the recipe to me.   The cake originally called for 2 1/3 cups of sugar, which is a lot of sugar so Janis cut it back to 1 3/4 cups which seems to be perfect.  The recipe calls for 5 apples but I often through in an extra apple or two, just to make it extra apple-y.  I also add the zest of one orange in addition to the orange juice.

What better way is there to ring in the new year than with a little something sweet.


Recipe:  Janis' Apple Cake


Ingredients:


5 to 6 apples, peeled and sliced (I use Granny Smith apples)
5 tablespoons sugar
2 teaspoons cinnamon
3 cups all purpose flour, unsifted
1 3/4 cups sugar
1/2 teaspoon salt
1 1/2 teaspoons baking soda
1 1/2 teaspoons baking powder
4 eggs, unbeaten
1 cup vegetable oil
2 teaspoons vanilla
1/3 cup orange juice
Zest of 1 orange

Directions:


Preheat the oven to 350.

Toss the apples with 5 tablespoons of sugar and the cinnamon.  Set aside.

Combine flour, sugar, salt, eggs and oil in the bowl of an electric mixer.  Using the paddle attachment, mix for 1 minute on low speed and then increase speed to medium and continue beating for an additional 3 minutes.  Add the baking soda and baking powder and beat for one minute more at medium speed.

Grease a tube pan and fill with alternating layers of batter and apples (3 layers of batter and 2 layers of apples) beginning and ending with the batter.  Bake for 1 hour or until a tester comes out clean.

Sunday, September 25, 2011

Shuffling Off to Buffalo

A couple of times each year Kate has tennis tournaments in Erie, PA.  The really good news about Erie is that it's just over two hours from my house which makes it a very desirable tournament destination.

Nonetheless, while Erie does have its charm, it is less than, shall we say, exciting.  But there is a silver lining.  Erie is about an hour and a half from Buffalo, New York and the Anchor Bar.  The Anchor Bar is home to the original Buffalo chicken wings and it is well worth the drive.

This was the second time we have made the pilgrimage to the Anchor Bar and it was as good as I remembered it.  To be clear, these are the best Buffalo wings I have ever eaten.  They're crispy and spicy and just delicious.  The downside of a visit to the Anchor Bar is that I can guarantee that you will eat too much and you will feel sick.  I am still recovering from my dinner there last night.

Not only does the Anchor Bar have the best wings you've ever eaten, they also have all kinds of other main courses (none of which I have ever tried) and absolutely delicious onion rings (which I have had).  The ambiance is fun and very casual and the wait is always long.  In fact, I would not be surprised to learn that there is at least a one hour wait in the midst of a major snow storm.

If you ever find yourself anywhere near Buffalo, shuffle your way over to the Anchor Bar.

Friday, September 23, 2011

I've Created a Monster

Kate's "quick mac and cheese".

Yesterday afternoon I received a text from Kate asking me if I could make "a quick mac and cheese" for her to take to school on Thursday for lunch.  This was perplexing on a number of fronts.  First of all, I must make it look effortless because making macaroni and cheese isn't all that quick.  Second of all, why in the world did she need to bring a casserole of macaroni and cheese to school?  And third, and perhaps most troubling, what the heck was she doing texting in what must have been the middle of a class?

When I picked her up I was assured that she had texted in the middle of a free period and that she needed the macaroni and cheese because she was in charge of an entree for a group lunch.  She did not however acknowledge that it would take more than about 10 minutes to throw a "quick mac and cheese" together.

Oh well.

I am incapable of doing anything half way and I know this about myself.  Yes, I probably could have thrown something together but then it wouldn't have been as good as it could have been.  I also had a bunch of odds and ends in the cheese drawer so I figured this would be a good time to use them up.  I ended up making a massive amount of macaroni and cheese, more than Kate needed for school, so Ted and I got to have some for dinner.  I dressed ours up a bit with sliced tomatoes on top, which really helped cut the richness of the pasta.

The mac and cheese ready to hit the road.

The macaroni and cheese was a big success.  The girls loved it and I'm glad that I had the forethought to write down what I had put into it so that if I ever need a quick mac and cheese again I can recreate it.

Recipe:  Macaroni and Cheese


Ingredients:


1 pound large shell pasta
8 tablespoons unsalted butter
4 cups milk
1/2 cup flour
2 cups sharp cheddar cheese, shredded
1/2 cup parmesan cheese
1 cup marscapone cheese
1 tablespoon kosher salt
1/2 teaspoon freshly ground black pepper
1/4 teaspoon ground nutmeg
1 1/2 cups seasoned bread crumbs
1 large tomato, sliced (optional)

Directions:


Preheat the oven to 375.


Cook the pasta in a large pot of salted water.  Cook just shy of al dente because the pasta will finish cooking in the oven.  Transfer cooked pasta to a large bowl.

In a large saucepan over medium heat, melt 6 tablespoons of butter.  Add the flour and cook for a couple of minutes to remove the floury taste.  Slowly add the milk and whisk over medium heat until the thick sauce develops.  Sauce should coat the back of a wooden spoon.

Off the heat, add the cheeses, salt, pepper, and nutmeg.  Stir to combine well.  The cheese will melt in the hot white sauce.  Pour the cheese mixture over pasta and combine.  Transfer the mixture to a greased 9x13 baking dish.

Melt the remaining butter and combine it with the bread crumbs.   If you are using the tomatoes, evenly space them over the pasta.  Sprinkle the bread crumb mixture over the (tomatoes) and pasta.  Bake for 30-45 minutes, until the top is golden and the pasta is bubbling.

Wednesday, September 21, 2011

Revisiting a Favorite

As I've mentioned, I have enough cookbooks to stock a library.  I have a simple test when perusing cookbooks in the bookstore.  If I can open the book three times and there are three recipes that are appealing, I consider buying the book.  Sometimes I go for a fourth try if I'm undecided but usually I just stick with three.  I find that that system works well for me.

There are also series of cookbooks that I usually get excited about.  It used to be that Williams Sonoma published a series of cookbooks that were great.  They were small books, not the huge tomes that they've been going for in more recent years, and they tended to concentrate on just one thing -- chicken, quick breads, cookies, soups and stews.  You have the idea.

I used to cook from the Williams Sonoma Stews (1995) cookbook a lot.  I think that over the years I've made almost every recipe in that cookbook.  And they were all good.  One of my favorites was a recipe for a Portuguese stew, which I made so many times that it has sort of morphed into my own recipe.

In an effort to diversify my cookbook selection (and thus what we are eating for dinner), I've been pulling out cookbooks that have been languishing on the shelf for far too long.  I am trying to do the same thing, with far less success, with my clothes.  (There's a reason I haven't worn those shoes in three years.  They're a half size too small.)  But you have the idea.

So, here's my recipe for Portuguese stew, with a little help from my old friends at Williams Sonoma.

Recipe:  Portuguese Stew with Sausage
(Adapted from Williams Sonoma Kitchen Library, Stews, 1995)

*  This is a soupy stew.

Ingredients:


1 can cannellini beans, drained and rinsed
1 tablespoons olive oil
1 pound sausage (such as chorizo or hot italian (turkey or pork) sausage
1 large onion, cut in half and sliced thin
3 cups chicken stock
1 green bell pepper, seeded, deribbed, and cut lengthwise into strips 1/2 inch wide
2 cups cubed sweet potato
1 can (28 oz.) can whole peeled tomatoes, with juices
1/2 teaspoon dried thyme
1/4 teaspoon dried red pepper
1 bunch kale, with ribs removed
salt and freshly ground black pepper

Directions:


In a heavy bottomed stew pot (8 quart) over medium high heat, warm the olive oil.  Add the sausages and brown on all sides, about 5 minutes.  Using tongs, transfer to a dish and slice into 1/2 inch pieces.  Set aside.

In the same pot, over medium high heat, add the onion slices and saute until the brown bits from the bottom of the pot sling to the slices, about 5 minutes.  Add the chick stock and scrape the remaining browned bits from the bottom of the pot using a wooden spoon.

Return the sausage to the pot, along with the bell pepper, potato, tomatoes and juices, red pepper, kate and the reserved beans.  Stir well and simmer over medium low heat until the kate is tender and the potato is cooked through, about 30-45 minutes.  Season to taste with salt and pepper.

Spoon into bowls and serve.

Tuesday, September 20, 2011

Boozey-Cakes

I am a big fan of Smitten Kitchena blog written by Deb Perelman, a New Yorker with a very small kitchen.  The things this woman can turn out would be amazing even with a lot more square footage.  Deb often has recipes for things, like this chocolate cake, that just speak  to me.  Come on.  When have you evert thought of putting red wine in a cake batter and doesn't it just sound divine?

So, we had something to celebrate in our house the other night.  Kate got another star on Tennis Recruiting (don't ask) and I wanted to make it special for her.  The other day Kate had noted, when she saw this recipe on my desk, that it sounded good and that I should make it.  I am so proud.  My 16 year old daughter has recipe radar.

Anyway, I am sure that there are those of you who might question baking a boozey cake for a 16 years old.  It is true that a primary ingredient in this cake is red wine and that red wine maintains some of it's alcohol even through the baking process.  But it is also true that this cake sounded really good and my view was that she could have a small piece and Ted and I could eat the rest.  Problem solved.

This is a decidedly adult cake.  The tastes are very sophisticated and subtle and not your average chocolate cake.  The texture of the cake is to die for.  And, because it's pretty rich, a small piece is very satisfying.  The whipped mascapone and heavy cream added a nice contrast to the richness of the cake and I would definitely encourage to go for the extra calories and make it.  You only need a little dab and it really completes the cake.

The celebration was a huge success.  Kate loved the cake and so did Ted and I.  I think I'll have another piece.  It's got to be cocktail time somewhere.

Recipe:  Red Wine Chocolate Cake
(Smitten Kitchen)

Ingredients:


Cake:
6 tablespoons (85 grams) unsalted butter, at room temperature
3/4 cup (179 grams) firmly packed dark brown sugar
1/4 cup (50 grams) white granulated sugar
1 large egg + 1 large egg yolk, at room temperature
3/4 cup (177 ml) red wine, any kind you like
1 teaspoon (5 ml) vanilla extract
1 cup + 1 tablespoon (133 grams) all-purpose flour
1/2 cup (41 grams) Dutch cocoa powder
1/8 teaspoon baking soda
1/2 teaspoon baking powder
1/4 teaspoon table salt
1/4 teaspoon ground cinnamon (this is a great place for that fancy Vietnamese stuff you stashed away)

Topping:
1/2 cup mascarpone cheese
1/2 cup (118 grams) chilled heavy or whipping cream
2 tablespoons (25 grams) granulated sugar
1/4 teaspoon vanilla extract

Directions:

Make the cake: Preheat the oven to 325°F. Line the bottom of a 9-inch round cake pan with parchment, and either butter and lightly flour the parchment and exposed sides of the pan, or spray the interior with a nonstick spray. In a large bowl, on the medium speed of an electric mixer, cream the butter until smooth. Add the sugars and beat until fluffy, about 3 minutes. Add the egg and yolk and beat well, then the red wine and vanilla. Don’t worry if the batter looks a little uneven. Sift the flour, cocoa, baking soda, baking powder, cinnamon and salt together, right over your wet ingredients. Mix until 3/4 combined, then fold the rest together with a rubber spatula. Spread batter in prepared pan. Bake for 25 to 30 minutes, or until a cake tester inserted into the center comes out clean. The top of the cake should be shiny and smooth, like a puddle of chocolate. Cool in pan on a rack for about 10 minutes, then flip out of pan and cool the rest of the way on a cooling rack. This cake keeps well at room temperature or in the fridge. It looks pretty dusted with powdered sugar.

Make the topping: Whip mascarpone, cream, sugar and vanilla together until soft peaks form — don’t overwhip. Dollop generously on each slice of cake. It can also be covered and refrigerated for up to 4 hours.

Monday, September 19, 2011

My Bread: Day Two

Pane all' Olive...  The finished product

I am not a fan of Mondays.  Are any of us?  I guess there are those virtuous few who face the week with a "can do" attitude but it takes me until at least Tuesday to get on track for any real accomplishment.  Nonetheless, this morning I popped out of bed with purpose.  I had to check on my bread dough.

The dough had been rising for  little over 12 hours and was bubbly and sticky.  It wasn't quite doubled in size yet so I went upstairs to get dressed and clean things up around here.  By the time I got home from dropping Kate off at school, the dough was ready for its second rise.

After a brief second rise, it was into the oven for about 40 minutes.  After just 17 hours I had the most beautiful and tasty olive bread.
After the first rise.

And just out of the oven.
Good things come to those who wait.

Sunday, September 18, 2011

My Bread: Day One

Several months ago my friend Heidi told me about these artisanal breads she'd been baking in her home oven.  I was impressed.  Artisanal bread at home?  How did she get the crusty exterior and the soft, tender interior?

I have to admit, I was dubious.  It just didn't sound possible.  I knew you could bake nice bread at home -- I've done it dozens of time -- but real rustic bread?  I didn't think so.  Heidi emailed me the instructions for something called "My Bread".  The instructions said that all I would have to do is mix flour, yeast, salt, and water together and let it rise for 12-18 hours.  No kneading, just a turnout onto a floured board and a second rise of about 2 hours.  The trick to the crust was to bake the bread in a preheated (475) Le Crueset dutch oven.

Further investigation revealed that My Bread was actually a process developed by Patrick Lahey at Sullivan Street Bakery in New York and there was a cookbook that detailed exactly how to make the bread.

I have now made several different recipes from  My Bread and I have to tell you, one has been more delicious than the other.  And it's beyond easy.  The only thing you need is time.  It's a two day process but the finished product more than justifies the time.

The ingredients for pane all'olive.

The dough all set for the first rise of 12-18 hours.
This afternoon I got a loaf of pane all' olive (olive bread) started.  I got it mixed up at about 5:30 p.m.   I'll check it again tomorrow morning when I get up about 6:00 a.m.  

 Depending on where it is in the rising process, I'll either let the bread have a little more rising time or I'll turn it out for the second rise of about 2 hours.  Then I'll bake it and I'll look like a pro when I serve it at dinner.

Stay tuned tomorrow for the conclusion of My Bread.

Recipe:  Pane all' Olive
(Patrick Lahey, My Bread, 2009

Ingredients:


3 cups bread flour 
About 1 1/2 cups roughly chopped pitted olives
3/4 teaspoon instant or other active dry yeast
1 1/2 cups cool (55 to 65°F) water
Wheat bran, cornmeal, or additional flour for dusting

Directions:

In a medium bowl, stir together the flour, olives, and yeast. Add the water and, using a wooden spoon or your hand, mix until you have a wet, sticky dough, about 30 seconds. Cover the bowl and let sit at room temperature until the surface is dotted with bubbles and the dough is more than doubled in size, 12 to 18 hours.

When the first rise is complete, generously dust a work surface with flour. Use a bowl scraper or rubber spatula to scrape the dough out of the bowl in one piece. Using lightly floured hands or a bowl scraper or spatula, lift the edges of the dough in toward the center. Nudge and tuck in the edges of the dough to make it round.

Place a tea towel on your work surface and generously dust it with wheat bran, cornmeal, or flour. Gently place the dough on the towel, seam side down. If the dough is tacky, dust the top lightly with wheat bran, cornmeal, or flour. Fold the ends of the tea towel loosely over the dough to cover it and place it in a warm, draft-free spot to rise for 1 to 2 hours. The dough is ready when it is almost doubled. If you gently poke it with your finger, it should hold the impression. If it springs back, let it rise for another 15 minutes.

Half an hour before the end of the second rise, preheat the oven to 475°F (245°C), with a rack in the lower third, and place a covered 4 1/2-to-5 1/2-quart heavy pot in the center of the rack.

Using pot holders, carefully remove the preheated pot from the oven and uncover it. Unfold the tea towel and quickly but gently invert the dough into the pot, seam side up. (Use caution—the pot will be very hot). Cover the pot and bake for 30 minutes.

Remove the lid and continue baking until the olive bread is a deep chestnut color but not burnt, 15 to 30 minutes more. Use a heatproof spatula or pot holders to gently lift the bread out of the pot and place it on a rack to cool thoroughly.

Note: For this olive loaf, any pitted olive will yield something worth eating. (You don’t want to go to the trouble of pitting them yourself, because it is tedious and the results will not be as neat.) But what I turn to most often are pitted kalamata olives soaked in a pure salt brine—nothing else, just salt. A commonly available kalamata that I’m very fond of is made by Divina and can be found at many supermarkets and gourmet stores. You might think that because they’re black they will change the color of the bread, but they won’t, unless you carelessly dump some of the brine into the dough. Green Sicilian colossals, sometimes called “giant” olives, packed in pure salt brine, are another good option; they’re often available at Italian food stores.

Thursday, September 15, 2011

Easy Baker

There's nothing better than the real thing.  My Easy Bake Oven looked just liked this one.

I am heartbroken.  Hasbro has redesigned the Easy Bake Oven and it no longer bakes cakes with the heat from a 100 watt light bulb.  The oven now uses a traditional heating element which makes my favorite childhood toy operate more like a countertop appliance than, well, a toy.  It's heartbreaking.

My sister Jill was always the baker in my family.  She made "real" coffeecakes using Bisquick and the real oven.  I, on the other hand, was an Easy Baker.  I loved my Easy Bake Oven and spent most of my childhood peering into the oven's little slide-in slit, waiting to see if my round cake was fully baked.  I would serve those cakes with pride.  To me, they were just as gourmet as my sister's Bisquick creations.

Now Hasbro has gone and redesigned my beloved oven.  And it's not just the light bulb that's gone.  The new Easy Bake Oven oven is sleek and looks more like a space ship than an oven.  And it's purple.  Purple.  Who wants a purple oven when you can have aqua blue?  
The redesign.  It looks like a flying saucer.  None of the style of the original.  And what's with the purple?  The original aqua had a certain charm.

But what makes me so sad is that there was something so innocent about the original oven.  It did what it did and there were no fancy heating elements that avoided hot spots.  A good Easy Baker, such as myself, knew that you had to rotate the little pan halfway through the baking time, even though the instructions didn't tell you that you had to.  A good Easy Baker knew that if you didn't warm up the light bulb before baking, it sometimes took more than the recommended 15 minutes for the cake to bake.

And now, like so many other things, the Easy Bake Oven has become much more sophisticated.  I guess it was just a matter of time.

Wednesday, September 14, 2011

Roast On

I'm in a slump.  You would think that with the changing of the season I would be more enthusiastic about putting something interesting on the table.  Unfortunately, I'm just not in the mood.  Well, you know how "they" say that if you put a smile on your face you'll be happy?  Well, perhaps if I think I'm excited about making dinner maybe I will be.  And btw... who are "they" anyway.

In an effort to put myself in the cooking mood I sought refuge in the refrigerator today.  I took stock of what we had in there and came across a couple of bunches of really nice broccoli.  I am not a broccoli lover but it's good for you so I eat it.  Of course, I would love broccoli if it was smothered in cheese sauce but that would pretty much take away any health benefits.

Anyway, I was thinking about interesting preparations for broccoli that took it up a notch from just steaming it.  How about roasted broccoli drizzled with olive oil and balsamic vinegar and then tossed with a hand full of toasted pine nuts?   I toasted the pine nuts on the stove while the broccoli was roasting and then tossed the nuts and the broccoli together along with a little lemon zest to brighten up the flavors.  The end result was delicious and took just minutes.

My little roasted broccoli experience was so successful that I'm feeling like my slump might be lifting.  Who knew broccoli could be responsible for that!

Recipe:  Oven Roasted Broccoli


Ingredients:


1 pound broccoli, cut into florets
2 tablespoons olive oil
1 tablespoon balsamic vinegar
1 lemon, zested
1/4 cup pine nuts
Kosher salt
Freshly ground black pepper

Directions:


Preheat the oven to 400.

On a large sheet pan, toss the broccoli florets with the olive oil and balsamic vinegar.  Season liberally with salt and pepper.  Roast in the oven for 15-20 minutes, until tender.

While the broccoli is roasting, toast the pine nuts over medium heat in a dry skillet.  Set aside.

Toss the broccoli with pine nuts and sprinkle with the lemon zest.  Adjust the seasonings and serve warm.

Tuesday, September 13, 2011

As Fall Approaches

Cheesy Baked Farro hot out of the oven.

Over the summer I saw Giada demonstrate this recipe for Cheesy Baked Farro on her Food Network program.  It was so hot and so not baked anything weather, that I promptly forgot all about it.  Now as the weather is starting to feel a little more fall-like, this recipe came back to mind.

As much as I love macaroni and cheese and all its cheesy baked cousins, I try not to indulge too often.  I like recipes like this one on a chilly evening when I really want something that will stick to my ribs (and, by extension, to my hips and thighs).   It's rich and comforting and so delicious.

This is a very easy recipe and is a little unusual in that it uses farro instead of the classic macaroni.  It's a nice turn on traditional macaroni and cheese.

So although it's not quite fall yet, file this recipe away and give it a try as the leaves start to change color.

Recipe:  Cheesy Baked Farro
(Giada De Laurentiis)


Ingredients:


Vegetable cooking spray
Sauce:
1/2 stick (1/4 cup) unsalted butter
1/4 cup all-purpose flour
2 cups warm whole milk
Kosher salt and freshly ground black pepper
Farro:
2 1/2 cups grated Parmesan
1 cup grated Gruyere
1/2 cup fontina cheese, grated
6 cups chicken broth
2 cups faro or barley, rinsed and drained
1 teaspoon chopped fresh thyme leaves
Kosher salt and freshly ground black pepper
1/2 cup plain dried bread crumbs
Olive oil, for drizzling

Directions:


Preheat the oven to 400 degrees F. Spray a 13 by 9-inch baking dish with cooking spray.

For the sauce: In a 2-quart saucepan, melt the butter over medium heat. Add the flour and whisk until smooth. Gradually add the warm milk, whisking constantly to prevent lumps. Simmer over medium heat, whisking constantly, until the sauce is thick and smooth, about 8 minutes (do not allow the mixture to boil). Remove from the heat and season with salt and pepper, to taste.

For the farro: In a large bowl, add the cheeses and stir to combine. Remove 1/2 cup of the mixture and reserve. In a large stock pot, add the chicken broth and bring to a boil over medium-high heat. Add the farro, reduce heat and simmer, stirring occasionally, until the faro is tender, about 25 minutes. Drain, if necessary. Add the farro, thyme, and sauce to the bowl with the cheese. Stir until combined and season with salt and pepper, to taste. Pour the mixture into the prepared baking dish and top with the reserved 1/2 cup of cheese. Sprinkle the top with bread crumbs and drizzle with olive oil.

Bake until the top is golden brown and forms a crust, about 25 to 30 minutes. Remove from oven and let stand for 5 minutes before serving.

Monday, September 12, 2011

The Great Vanilla Experiment

Just starting out...
My kids constantly complain that we have nothing to eat in the house.  They say that all we have are "ingredients".  Of course, I point to a pantry full of food as well as a full refrigerator and freezer, but lately I've been thinking that they may have a point.  We do have a lot of ingredients but not very much prepared food, unless crackers count.

But here's the thing.  I like making everything from scratch.  First of all, I like knowing what's going into what we eat (but not in that "I'll only eat natural foods" kind of way), and I enjoy making it.  It gives me pleasure.  Is that so terrible?  Believe me, my kids could have far worse problems than having a mother who likes to cook.

Having said all that, I may have hit a high point (or low point, depending on how you look at things) in my make-it-myself cooking odyssey.  I am fermenting my own vanilla.

Before you go pointing fingers, let me just tell you that I go through a ton of vanilla.  I am constantly buying yet another bottle at my local Penzeys because so many baked items call for vanilla.  I don't like the cheap "imitation vanilla flavoring" sold at the grocery store so my vanilla habit is pretty pricey.

And I love a project.  While not a high effort project (the best kind in my opinion), making vanilla is kind of a science experiment.  And it's so easy I can't figure out why I've never done it before.  All it requires is vodka and vanilla beans.  That's it.  Put the vanilla beans in a jar, cover with vodka and let it sit in a cool, dark place for a couple of months.  The rest is fermentation.

Settling in for fermentation
As you use the vanilla you can add more beans and vodka.  Think of this first batch of vanilla as a starter and just keep adding to it over time.  An added bonus is that you can use the drunken vanilla beans in your cooking and baking.  Just make sure to add more beans to the jar.

I am developing quite a little stockpile of possible holiday gifts.  I have jam, pickles, and now I'll have vanilla.  But I have to admit, I may keep this just for us.
Now here are some ingredients I can get my arms around.

Recipe:  Homemade Vanilla


Ingredients:


25 whole vanilla beans (I used Madagascar beans available at Penzeys)
1 quart vodka


Directions:


Place the whole vanilla beans in a quart sized jar with a tight fitting lid.  Cover the beans with vodka.  Place in a cool dark place, like a pantry, for at least 2 months, but longer is better.

As you use the vanilla, continue to add more vanilla beans and vodka to the jar to keep it full.


Pickled


Today was a first.  I made pickles and it was so easy I may never buy them again.    I have to admit that I took a shortcut and used Mrs. Wages' seasoning for dill pickles, but even accounting for that, it would still have been a breeze.


Here they are.

The process is simple.  I bought beautiful mini persian cucumbers at Costco and sliced them in half.  I used quart canning jars and packed them tightly with the sliced cucumbers.  The pickling liquid, which was a mixture of water, the spices, and white vinegar, was boiled on the stove and then poured into the jars over the cucumbers.  After that, all that was left to do was stick the jars in a water bath for 10 minutes.  And now I have beautiful pickles.  Pickles!  Real pickles!

Here are some pictures just so you can see that they look like the pickles you can buy at the grocery store only these are homemade!  As you can tell, I am quite thrilled with my little pickling experiment.


From this,,,

To this.  I pickled some french green beans as well.

Recipe:  Pickles

Here's the good news.  There's not really a recipe if you do it the easy way.  I used Mrs. Wages' pickling spices.  The package instructions are very clear -- just add white vinegar and water and then boil.  You can pickle all kinds of veggies.  Give it a try.

Next time I do this I am going to try it from scratch and I'll let you know how that goes.  But for now, I'm quite pleased with the results!


Thursday, September 8, 2011

Bake Me a Cake As Fast As You Can

Icing to cake ratio:  1:2.  Perfect.

In my house it's easy to tell when summer has passed.  Berries are replaced with bananas and I become a banana cake/bread-making machine.  This is because I insist on buying my bananas at Costco.  You get something like 10 bananas for mere pennies.  Unfortunately, this frugality often results in rotten bananas. There's a limit to how many we can actually consume before they start to get mushy.  Ted questions whether the bananas at Costco are actually saving us money since I either have to throw them out or stock the freezer with banana bread.
           Make sure to gather all your ingredients together before starting.


The good news is that I love banana cakes and breads and so does my family.  They are also willing guinea pigs for lots of variations on the theme.  So this time I rewarded them with a banana cake with frosting.  They don't usually get frosting so this was a big treat.

The cake looks good even without the cream cheese frosting.

And it wasn't just frosting.  This was cream cheese frosting, the grand daddy of all frostings.  In fact, it's the cream cheese frosting that makes cakes like carrot and red velvet so appealing to me.  Who would eat red cake if it didn't have something so rich and creamy topping it off?

But back to the bananas.  This is a very quick cake that you can whip up in mere minutes.  It looks beautiful enough to serve guests too.  And, it'll use up all those past their prime bananas that you accumulate as a result of over zealous frugality at Costco.

Recipe:  Old Fashioned Banana Cake with Cream Cheese Frosting
(Barefoot Contessa How Easy is That, 2010)

Ingredients:

3 very ripe bananas, mashed
3/4 cup granulated sugar
1/2 cup light brown sugar, lightly packed
1/2 cup vegetable oil
2 extra-large eggs, at room temperature
1/2 cup sour cream (I used low fat)
1 teaspoon vanilla extract
2 cups all-purpose flour, after sifting
1 teaspoon baking soda
1/2 teaspoon kosher salt
powdered sugar for sprinkling on top
1/2 cup coarsely chopped walnuts (optional)
Cream cheese frosting ( optional, recipe follows)
Walnut halves, for decorating

Directions:

Preheat oven to 350 degrees. Grease and flour a 9 x 2-inch round cake pan, or line the pan with a piece of parchment or wax paper cut to fit inside the cake pan.  Spray the liner and sides lightly with cooking spray. 

Mix bananas, granulated sugar and brown sugar in bowl with an electric mixer on low speed until combined. Add oil, eggs, sour cream and vanilla. Mix until smooth. Add flour, baking soda and salt. With mixer on low,  mix just until combined. Stir in chopped walnuts if using. Pour batter into the prepared pan and bake for 40-45 minutes, until a toothpick inserted in the center comes out clean. Cool in pan for 5 minutes, turn out onto cooling rack.

Serve warm, sprinkled with powdered sugar, or cool completely and top with Cream Cheese Frosting. 

Recipe:  Cream Cheese Frosting

Ingredients:

6 ounces cream cheese, at room temperature
6 tablespoons unsalted butter, at room temperature
 1 teaspoon pure vanilla extract
2 1/2 cups sifted confectioners’ sugar (1/2 pound)

Directions:

Mix cream cheese, butter and vanilla in the bowl of an electric mixer fitted with paddle attachment on low speed until just combined. Don’t whip. Add sugar and mix until smooth.


Wednesday, September 7, 2011

A Thing of Beauty

The finished product:  Beef in Barolo


As the cooler months approach, it's getting to be time to make heartier dishes.  And heartier dishes often requiring searing meat to seal in their flavor and juices.

A beautifully seared piece of meat is a thing of beauty.  It should be dark and crusty all over.  It should not be charred or burnt, but it should have a nice crust on it.  I am a firm believer that well seared meat is the key to success in braising.

Searing meat is easy to do too.  I used to be afraid to really go to town with the searing.  It all started with the Balthazar recipe for coq au vin.  That recipe, which is hugely time consuming, called for searing the chicken legs until they were very dark brown.  I got them as far as a toasty brown and figured that that was enough.  When I cooked the stew the skin came out rubbery.  Obviously toasty was not dark enough.

Each time I made that recipe I went a shade darker.  Finally, after a couple of tries,  I made it to the dark sear that the recipe called for.  And let me tell you, it made a huge difference.

First roll the roast in seasoned flour.


Now I'm a searing fiend.  The other night I made a roast.  I rolled it in flour, heated the oil so that it was really smokin' hot, and let her rip.  The result was a gorgeous seared roast, ready to take a long slow bath in red wine.  My sear was so lovely that I took a picture.

The next time a recipe calls for searing the meat be bold and go for it.  Ten minutes on each side in
really hot oil.  It will be a thing of beauty.                   

Recipe:  Beef in Barolo                                                                                  
(The Italian Slow Cooker, © 2010 by Michele Scicolone)


Ingredients:

1/3 cup all-purpose flour


Salt and freshly ground pepper


1 3-pound boneless beef chuck or bottom round roast
3 tablespoons olive oil
2 ounces pancetta, chopped
1 medium onion, chopped
2 garlic cloves, finely chopped
1 cup dry red wine, such as Barolo
2 cups peeled, seeded, and chopped fresh or canned tomatoes
1 cup canned beef broth
2 medium carrots, sliced
1 medium celery rib, sliced
1 bay leaf
Pinch of ground cloves

Directions:

Combine the flour with salt and pepper to taste. Spread the mixture on a piece of wax paper and roll the meat in the flour.

In a large, heavy skillet, heat the oil over medium-high heat. Add the beef and brown it on all sides, about 15 minutes. Place the meat in a large slow cooker. Add the pancetta and onion to the skillet. Reduce the heat to medium and cook for 10 minutes, stirring occasionally, until the onion is tender. Stir in the garlic. Add the wine and bring it to a simmer, scraping the bottom of the pan.

Pour the mixture over the beef. Add the tomatoes and broth. Scatter the carrots, celery, bay leaf, and ground cloves around the meat. Cover and cook on low for 6 hours, or until the meat is tender when pierced with a fork.


Transfer the meat to a platter. Remove the bay leaf from the sauce. Slice the meat and spoon on the sauce.


Tuesday, September 6, 2011

Delivery Snafu

I was so excited when I woke up this morning.  Not only was it Tuesday, which is always better than it being Monday, today was the day that my new cooktop and oven were to be delivered.

As you know, I have been in a bit of an appliance crisis over the past couple of months.  First I had the dishwasher die.  Then the refrigerator started freezing everything on the left side next to the freezer.  Then the oven developed a mind of its own and couldn't hold a steady temperature.  To add insult to injury, the automatic pilot on the stove got fickle.  Oh, and did I mention that the microwave started acting funny too? Well, it did.  As I said, an appliance crisis.

But being a person of action, I took the bull by the horns.  I got a new dishwasher, a Miele in stainless.  (You may remember my conundrum over white versus stainless YLT 12/22/10.)  Then, in a somewhat misguided move, Ted bought me a refrigerator for my birthday (YLT 2/8/11).  And a few weeks ago, after numerous consultations with appliance repairmen, Ted and I made another pilgrimage to the appliance store to research the replacement double oven, cooktop, and microwave.  It was time to get this party started.

I agonized over which cooktop to get (Viking 6 burner) and which double oven to get (Wolf) and which microwave (who cares: whichever one fit in the slot in the cabinetry).  Finally all the decisions were made and we placed our order.

It seems like it's been months since we ordered, but delivery day finally arrived.  I was so excited.  I had started fantasizing about cooking a roast and using the fancy probe in my new Wolf oven.  I even bought the roast in anticipation of making it my inaugural meal.

That was not to be.  This morning I received a call from the appliance store telling me that although my oven had come in, they had delivered it someone else in error and that my oven would be in tomorrow.  They would try and schedule delivery for next week.

Obviously a delivery date of next week was not going to fly with me.  I had a roast!  I had plans!  I wanted my oven!  Why did the other people get my oven?

I was reasonable, kind of, and my oven and cooktop are going to be delivered and installed on Thursday. Not surprisingly, I am planning to check out the fancy probe feature on my new oven on Thursday night.

Monday, September 5, 2011

Plum is the New Peach

The finished product.
The summer is winding down.  I've made all manner of tarts and crumbles this summer.  Blueberries, raspberries, and all the rest of the berries have made numerous appearances.  Peaches have played a starring role in jam and on the grill.  But what about plums?

The crust...
I love plums.  I love how when you bite into one that is really juicy the skin offers a little resistance and just a burst of tartness.  I also like to cook with plums, although they are often forgotten in favor of their sexier relatives.

The other day I was in the market and they had beautiful Italian prune plums.  I bought a box with the perfect recipe in mind:  Ina's plum tart.  The beauty of this recipe is that it's delicious with regular black plums but I knew that with the smaller prune plums it would be out of this world.

I was right.  First of all, the tart was beautiful because the smaller plums make the flower pattern more intricate.  Second of all, this is a recipe that is so easy and looks far more complicated so you can impress everyone with your fancy looking tart.  Finally, it was a nice showcase for an often overlooked fruit.  Let's face it, everyone oohs and ahhs over peaches but never are plums quite the same kind of show stopper.

The intricate flower pattern...

And just before going into the oven.


Well, move over peaches because the plums are in the house.

Recipe:  Plum Tart
(Barefoot Contessa Parties!, 2001)


Ingredients:


2 cups all-purpose flour
3/4 cup finely chopped walnuts
3/4 cup light brown sugar, lightly packed
12 tablespoons cold unsalted butter (1 1/2 sticks), diced
1 egg yolk
2 pounds firm, ripe Italian prune plums, pitted and quartered lengthwise

Directions:


Preheat the oven to 400 degrees F.

Combine the flour, walnuts, and sugar in a large bowl. Add the butter and the egg yolk. Mix, either by hand or with an electric mixer, until crumbly.

Press 1 1/2 cups of the crumb mixture in an even layer into the bottom of a 9 1/2-inch springform or tart pan. Arrange the plums in the pan, skin side down, to form a flower pattern; begin at the outside and work your way in.

Sprinkle the rest of the crumb mixture evenly over the plums. Bake the tart for 40 to 50 minutes, or until it's lightly browned and the plum juices are bubbling. Remove from the oven and cool for 10 minutes. Remove from the pan and transfer the tart to a flat plate. Serve warm or at room temperature.


Thursday, September 1, 2011

Breakfast of Champions

Now that's a gorgeous omelet.  

The truth is, I love breakfast.  I'm not talking about the Go Lean I eat every morning during the week.  I'm talking about a big, blow out weekend breakfast with lots of calories.  No skimping for me when it comes to the weekends.  I'm not so much about brunch.  Somehow brunch always seems a little precious.  I love pancakes, waffles, omelets... the works.  Nothing fancy.  Just the basics done well.

Often it's just Ted and me for breakfast on the weekends.  My kids usually sleep right through it.  When they finally emerge, the breakfast dishes are long since washed and they are left the fend for themselves.   Of course, I would love to cook them breakfast.  And, if they would go to sleep at a reasonable hour then they wouldn't have to sleep half the day away.  But that's just my opinion.

But back to breakfast.  I grew up hating eggs.  This is probably because my mother used to make scrambled eggs so runny that it was unclear if they had actually touched a frying pan.  It wasn't until I was an adult, making my own eggs, that I discovered that (1) you could cook scrambled eggs so that they were no longer liquid, and (2) omelets were an option.

Now I love eggs, especially omelets.  There's nothing I like making for breakfast more than an omelet filled with all kinds of yummy things.  I am especially fond of a country omelet with potatoes in it.  I like adding bacon or sausage too.  And some fresh herbs.  It's so good and is a real one pan meal.

So, as Labor Day weekend approaches, I am planning a hearty omelet for breakfast.  Maybe I'll whip up a coffeecake too.  The possibilities are unlimited and I'm feeling hungry just thinking about it.

Recipe:  Country Omelet
( Barefoot Contessa Back to Basics)

*  Note:  I love this recipe because you don't have to flip the omelet.  It bakes in the oven and comes out perfectly.  This recipe makes enough to serve three.  If you're a small eater, you can probably get four nice wedges out of it.  It's a heart attack waiting to happen if you split it between two people.


Ingredients:


1 tablespoon good olive oil
3 slices thick-cut bacon, cut into 1-inch pieces
1 cup (1-inch-diced) unpeeled Yukon Gold potatoes
Kosher salt and freshly ground black pepper
5 extra-large eggs
3 tablespoons milk
1 tablespoon unsalted butter
1 tablespoon fresh chopped chives

Directions:


Preheat the oven to 350 degrees.

Heat the olive oil in a 10-inch ovenproof omelet pan over medium heat. Add the bacon and cook for 3 to 5 minutes over medium-low heat, stirring occasionally, until the bacon is browned but not crisp. Take the bacon out of the pan with a slotted spoon and set aside on a plate.

Place the potatoes in the pan and sprinkle with salt and pepper. Continue to cook over medium-low heat for 8 to 10 minutes, until very tender and browned, tossing occasionally to brown evenly. Remove with a slotted spoon to the same plate with the bacon.

Meanwhile, in a medium bowl, beat the eggs, milk, 1/2 teaspoon salt, and 1/4 teaspoon pepper together with a fork. After the potatoes are removed, pour the fat out of the pan and discard. Add the butter, lower the heat to low, and pour the eggs into the hot pan. Sprinkle the bacon, potatoes, and chives evenly over the top and place the pan in the oven for about 8 minutes, just until the eggs are set. Slide onto a plate, divide in half, and serve hot.