01 09 10

search you little tarte

Thursday, March 31, 2011

In Like a Lion and Out Like a Lion

New York Times

Today is March 31st although you would never know by looking outside.  My thermometer in the hall says that it's 35 degrees outside.  It may technically be spring but I don't think the northeast and midwest weather gods got the memo.

I have spent the last couple of days trying to keep warm.  To say I am unhappy about this would be a gross understatement.  I thought I was done with heavy jackets and socks.  I must admit, however, that I am holding fast to my "no socks, no heavy coats" declaration of a week or two ago.  This may not have been the smartest proclamation to make but I'm holding fast, hence my problem with staying warm.

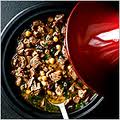
So, while I may be pretending it's spring, I have to admit that I was quite pleased to see a recipe for a lamb tagine in yesterday's New York Times.  Tagine sounded good to me.  What was particularly appealing about this recipe was that the author, John Willoughby, suggested not browning the lamb as a first step in the preparation.  This was music to my ears because it's a huge mess to brown meat and I just wasn't feeling it.

Well, as they say, the proof is in the pudding.  This tagine had an amazing depth of flavor.  I just love it when I can use technical phrases like "depth of flavor" and actually mean it.  This recipe had relatively few ingredients for a tagine but cooked all together they produced a surprisingly rich and complex flavor.  There I go spouting technical terms again but it's true.  The flavor was really satisfying.  The end result was a somewhat lighter tasting tagine, which makes this less a winter dish and more a springtime take on the classic.

Dinner warmed me up and I'm feeling more optimistic about spring actually arriving.  Until spring comes, there were two other no brown tagine recipes included in the article.  I think I may have to try one or both if the weather doesn't improve.

To read the entire article and check out the other recipes, go to Deep Flavor, No Browning Required.

Recipe:  Tagine Style Beef Stew
(New York Times 3/30/11)

Ingredients:


2 pounds lamb should, cut into 1-inch cubes
2 tablespoons unsalted butter
1 small onion, grated (about 1/3 cup)
4 cloves garlic, minced
1 teaspoon black pepper
1 teaspoon kosher salt
1 teaspoon ground cinnamon
1 teaspoon ground coriander
1 teaspoon ground cumin
1/2 teaspoon red pepper flakes
1/4 cup apricot preserves
1/3 cup red wine vinegar
1 20 ounce can chickpeas,. drained and rinsed
2 cups chicken stock
1/4 cup raisins
1/4 cup chopped fresh Italian parsley
2 tablespoons fresh lemon juice
Cooked couscous, for serving

Directions:


In a Dutch oven, melt the butter over medium-low heat.  Add the lamb, onion, garlic, cinnamon, salt, pepper, coriander, cumin, red pepper flakes, apricot preserves, and vinegar and cook, stirring frequently, until the aroma of the spices is strong, about 5 to 7 minutes.  Do not allow the meat to brown.

Add the chickpeas and stock, and bring just to a simmer, then reduce the heat to low, cover and simmer gently until the lamb is very tender, about 1 hour and 15 minutes.

Add the raisins and continue to cook, uncovered, until they are nicely plumped, about 10 minutes more.  Remove from the heat, stir in the parsley and the lemon juice, and serve with couscous.

Wednesday, March 30, 2011

Lemonlicious

The other day Kate and I were in the car and we made a bet.  It's not important what the bet was about, mostly because I lost, and the payoff was that I would bake Kate the dessert of her choice.  Frankly this wasn't a hardship for me since I bake at least once or twice a week.  I also knew that Kate's not all that creative when it comes to what she would choose.  It's not like she would have chosen Floating Island or Baked Alaska.  Fortunately I was right because I have absolutely no idea how to make a Baked Alaska.

Kate chose lemon squares.  I mean, could she have made a better choice?  I love lemon squares and I have a great recipe.  As far as I'm concerned, lemon squares are the perfect dessert.  They have that delicious shortbread crust and then the gooey, tart lemon filling.  It just doesn't get better than that.

So, this morning I got to work and made the lemon squares.  As always, they came out perfectly.  It took a lot of self control not to eat one for breakfast.  I let them cool completely, and they came out of the pan beautifully.  All in all, I'd say we both won this bet.

Recipe:  Lemon Bars
(Barefoot Contessa Cookbook, 1999)

Ingredients:


For the crust
1/2 pound unsalted butter
1/2 cup granulated sugar
2 cups flour
1/8 teaspoon kosher salt

For the filling
6 extra large eggs at room temperature
3 cups granulated sugar
2 tablespoons grated lemon zest (4 to 6 lemons)
1 cup freshly squeezed lemon juice
1 cup flour
Confectioner's sugar for dusting

Directions:


Preheat the oven to 350F.

For the crust, cream the butter and sugar and light in the bowl of an electric mixer fitted with paddle attachment.  Combine the flour and salt and, with the mixer on low, add to the butter until just mixed.  Dump the flour onto a well floured board and gather into a ball.  Flatten the dough with floured hands and press it into a 9 by 13 by 2 inch baking pan or sheet.  Chill for 10 minutes.

Bake the crust for 15 to 20 minutes, until very lightly browned.  Let cool on a wire rack.  Leave the oven on.

For the filling, whisk together the eggs, sugar, lemon zest, lemon juice, and flour.  Pour over the baked crust and bake for 30 to 35 minutes, until the filling is net.  Let cool to room temperature.

Cut into triangles or squares and dust with confectioner's sugar.

Tuesday, March 29, 2011

Drowning in Paper

As I am sure you can imagine, I have a lot of recipes.  I have hundreds of cookbooks, not one of which I can live without.  They are on bookshelves all over my house -- upstairs, downstairs, in the kitchen, and in the family room.  My friend Ellen is also a cookbook collector and she has so many that they're even under her bed.  I haven't gone that far yet but I'm close.

I also have drawers stuffed full of recipes I've clipped out of newspapers and magazines.  Then there are the hundreds of recipes friends and strangers have given me over the years.  I am literally drowning in paper.

For a person like me, an admitted "A" type personality, this level of disorganization is unacceptable.  You just never know when you're going to need a recipe.  Just recently a friend and reader, Wende, asked me if I had a recipe for braised radicchio and lo and behold I did.  While it was a miracle the I could actually find said recipe, if I had thrown it out, I could never have helped her out.

My real problem is that I am basically computer illiterate.  Yes, it's true that despite writing this blog everyday on a computer my technological expertise stops there.  I have no idea what I'm doing.  I have about 1,000 folders set up that each have one thing in them.  I have hundreds of pictures in hundreds of separate folders.  It's just a mess and I need help.

Ted is really good on the computer as is Kate.  They have offered to step in and help me out.  I don't think they actually know what they have signed on for.  Ted, being a lawyer, lives his life my complicated filing systems.  You should see the household files upstairs.  The Library of Congress isn't so organized.  Ted has "graciously" offered to clean out my mess of an online filing system and to set up a system that will work for me.  Kate has offered to consult.  I am sure her consultation will be mostly in the form of nasty comments about how bad I am at the computer.

So the point of all this is that I am about to empty my desk drawers of all those clipped recipes and organize them on my computer.  I'm going paperless, or at least I'm going more paperless.  This will be good for all of you because I expect that I will unearth lots of fabulous recipes I have completely forgotten about.  Despite my being somewhat behind the eight ball when it comes or recipe organization, I do have a good memory.  You know how every picture tells a story.  Well, so does every recipe.  Stay tuned...

Monday, March 28, 2011

It's Not Always Easy

(New York Times)

You may think that I am a fount of interesting dinner ideas.  The truth is that, like most of you,  I often struggle with what to make for dinner.  Sometimes I am, quite simply, lacking in inspiration. Those are the nights that I whip up a quick bowl of pasta and call it a day.

Other times I force myself to pull out the cookbooks and  make something -- anything -- just to get dinner on the table.  But sometimes, despite my best efforts, dinner is just dinner.  It's not always easy to make something that will please everyone.  And, let's face it, you can only do so much with chicken or beef.

So, it's at those times, when I have no ideas, that I flip through cookbooks and all those thousands of recipes I've clipped out of magazines and newspapers to find something new.  And sometimes I really hit pay dirt.

As I've mentioned in the past, I love Melissa Clark's recipes. They're never difficult to make and always reap big rewards at the dinner table.  This recipe for Potato Leek Gratin is no exception.  Served with  Scallops Provencal, this side dish was the star of the show.  The gratin was rich and creamy and a nice contrast to the simplicity of the fish.  As I said -- big rewards.

There's just one hitch.  At this late date in the season, the leeks will require some time to make sure they're perfectly clean.  Make sure that you really rinse them well or you'll end up with grit in your gratin.  So, take your time and clean the leeks well. Watching the dirt rinse off is somehow very satisfying.  Watching all that grit go down the drain is very calming and may offer you some inspiration for tomorrow night's dinner.

Recipe:  Potato Leek Gratin
(Melissa Clark, New York Times, March 16, 2011)

Ingredients:


2 tablespoons unsalted butter
2 large leeks, trimmed and halved lengthwise
1 1/2 pounds peeled Yukon Gold potatoes
1 teaspoon kosher salt
1/2 teaspoon ground black pepper
2 thyme sprigs
1 cup heavy cream
1 fat garlic clove, finely chopped
1 bay leaf
1/4 teaspoon ground nutmeg
3/4 cup Gruyere cheese, grated

Directions:


Heat the oven to 350F and butter a 2-quart gratin dish.  Wash the leeks to remove any grit and slice thinly crosswise.

Using a mandoline or a sharp knife, slice the potatoes into rounds 1/8-inch thick.  Toss with 3/4 teaspoon salt and 1/4 teaspoon  pepper.  Layer the rounds in the gratin dish.

Melt the 2 tablespoons butter in a large skillet oven medium heat.  Add leeks, remaining salt and pepper, and thyme.  Cook, stirring, until the leeks are tender and golden, 5 to 7 minutes.  Discard thyme and scatter the leeks over the potatoes.

Add the cream, garlic and bay leaf to the skillet, scraping up browned bits of leeks from the bottom of the pan.  Simmer gently for 5 minutes.  Stir in the nutmeg.

Pour the cream over the leeks and potatoes and top with the Gruyere.  Cover with aluminum foil and transfer to the oven.  Bake for 40 minutes, uncover and bake until the cheese is bubbling and golden, 15 to 20 minutes longer.  Let cool slightly before serving.

Sunday, March 27, 2011

If You're Ever in the Neighborhood...

Kate and I spent a scintillating weekend at a tennis tournament in Manasquan, New Jersey.  We were there once before, back in January, and this trip was a big improvement over the last one.  Manasquan is located on the Jersey Shore and when we were there the first time there were piles of snow 10 feet high.  This time it was sunnier and all the snow had melted.  It still wasn't beach weather and we didn't run into Mike the Situation or Snooki.  But the sky was blue and it was beginning to feel like spring, even though it was only in the mid 30's.  Hey, I'll take what I can get.

The tennis tournament went well, but the highlight of the weekend was easily our trip to Bobby's Burger Palace.  BBP is owned by Bobby Flay and, I have to tell you, they make a delicious hamburger.  We went for dinner the last time we were on the "shore" and this time it was just as good.  You know how sometimes a repeat visit isn't quite as good as you remember it?  BBP was just as good as the first time.  I had the classic American hamburger and Kate had the same, only she had hers "crunchified".  I have to say, the addition of potato chips as a topping for the burger was truly inspired and quite tasty.  Let's face it, what isn't better with potato chips?  The sides were good too.   Last time we had both onion rings and sweet potato fries but we decided to show some self control this time.  We had only the onion rings.

I usually don't write about restaurants but BBP is so good, very inexpensive, and a lot of fun.  The seating is at counters and the stools not only have a comfy back but they also have a nice place to put your feet.  It's all very casual, which is the way a burger place should be.

So, if you're ever in the neighborhood, give Bobby's Burger Palace a try.

For more information and locations, go to Bobby's Burger Palace.

Thursday, March 24, 2011

Polenta: The Recyclable Food

As I've mentioned in the past, we are not a leftover eating family.  I have about 100 nice little containers, some with lids and some without, for saving leftovers, but no one ever eats them once I stick them in the refrigerator.  I've gotten better at cooking less so we have less go to waste, but it's a process.  I figure that by the time I master cooking for three instead of four, Kate will be off to college and I'll have to start over again.  Maybe at that point Ted and I will just start eating out every night.  It would be so much easier.

Nonetheless, there is one gaping exception to the no one eats leftovers rule.  That would be polenta.  In fact, polenta can be prepared so many different ways that I find myself planning for leftovers when I make it in the first place.  It can be served creamy, fried, and grilled, to name just a few of the many variations on the theme.  It truly is the recyclable food.

I usually start out by making creamy polenta as a side dish for dinner.  Since there are usually only three of us, there's a lot left over.  I then take the leftovers and store them in a Saran lined loaf or 8x8 pan.  Cover the whole thing with more Saran Wrap and stick it in the refrigerator.  Don't worry if you don't use it immediately.  I think it lasts forever.  When you're ready to use it, just slice it up into whatever size pieces you want and either grill it in a grill pan (winter) or on the barbeque (summer).  Or you can fry it up, which is particularly yummy.   Either way, you have a whole different preparation and nobody will refer to polenta in the common refrain "all we ever have is . . . " (around here normally chicken).  Or, if you're feeling particularly feisty, you can serve the polenta with chicken and really mess with their heads.

You're a star and you've done virtually no work the second time around.  You can also use this as a barter for a new pair of shoes, handbag, etc.  Just point out how thrifty you're being.  This hasn't actually worked for me yet, but it may for you.  Even without the new bag, it's worth it.

Recipe:  Basic Polenta


Note:  Feel free to experiment.  Some tasty additions are Parmesan cheese, gorgonzola, and fresh herbs.


Ingredients:


6 cups low sodium chicken stock or water
2 teaspoons kosher salt
1 3/4 cups yellow cornmeal
3 tablespoons unsalted butter

In a large, heavy saucepan, bring the chicken stock to a boil.  Add the salt and gradually whisk in the cornmeal.  Reduce the heat to low and cook, stirring often, until the mixture thickens and the cornmeal is tender, approximately 10-15 minutes.  Remove from the heat and add the butter, stirring until it is combined well.

Wednesday, March 23, 2011

Martha Knows Pie

Martha Stewart was on the Today Show today pushing her book New Pies and Tarts.  There was a lot of discussion between her and Matt Lauer about how many cookbooks this one makes -- Martha "thinks" it's 76 (as though she isn't absolutely sure) -- and the fact that this is a somewhat updated take on her original Pies and Tarts cookbook published in 1995.

Now, I think Martha is a very talented person.  She made origami birds for Christmas decorations when she was in jail.  Who can quibble with that?  But her recipes?  I'm not so sure.

Nonetheless, there Martha was chopping and explaining how to make a savory pie on the Today Show.  Ann Curry was assisting.  And, you know what, it looked pretty good, even if it had zucchini in it and I don't like zucchini.  This gave me an idea.  I could substitute in things that I like and make a similar pie to serve as a side dish with dinner.  Just call me Martha!

Time to raid the vegetable drawer in the refrigerator.  Mushrooms, check.  Tomatoes, check.  Basil, check. Kalamata olives, check.  Fresh mozzarella, check.  You can see where I was going with this.

I made Martha's pastry and it came out surprisingly well.  It's pretty foolproof, although I do have to admit that I am Martha-like in my ability to roll out a pie crust.  It's a gift.  What can I say.  But the point here is, besides all my snarkiness, that it's an easy pie crust to make so don't be intimidated.

The end result was quite delicious.  The only things missing were origami birds decorating my dining room.  If you feel inspired to try your hand at origami with Martha, here's a how-to (Martha Stewart Origami Boxes).


Recipe:  Cherry Tomato, Mushroom, & Mozzarella Pie
(Adapted from Martha Stewart)

Ingredients:

For the crust
2 1/4 cups all purpose flour
1/2 cup grated Parmesan cheese
1 teaspoon kosher salt
3/4 cup unsalted butter, cold, diced
1 egg yolk for pastry and 1 egg yolk for wash
A little heavy cream or water for egg wash
1/4 cup ice water

For the filling
2 tablespoons olive oil
1 shallot, chopped
1 clove garlic, chopped
1 pint cherry tomatoes, 1/3 of them halved and the rest whole
1/2 cup grated Parmesan
4 ounces fresh mozzarella cut into 1 inch cubes
1/4 cup chopped basil
8 ounces mushrooms, sliced
1/2 cup Kalamata olives, pitted
1/4 cup all purpose flour
Kosher salt and freshly ground black pepper

Preheat the oven to 375F.

Combine the flour, butter, salt, 1 egg yolk, and Parmesan in the bowl of a food processor.  With the motor running, add the ice water through the feed tube until the dough just comes together.  Turn the dough out onto a floured board and form into a disk.  Wrap in plastic wrap and refrigerate for 30 minutes.

In a large skillet, heat the olive oil and saute the shallot until soft, about 3 minutes.  Add the garlic and saute for 30 seconds.  Add the mushroom and saute until soft, about 6 minutes.  Season with salt and pepper and set aside.

In a large bowl, combine the tomatoes, Parmesan, mozzarella, basil, olives, and flour.  Season with salt and pepper.  Add the mushroom mixture and mix well to combine.

Roll out the pastry dough into a 13 inch circle.  Line a shallow pie dish, leaving overhang.  Pour the tomato mixture into the crust.  Fold the overhang over the filled dish.  Lightly brush with the remaining egg yolk mixed with a touch of heavy cream and refrigerate for 30 minutes.  Bake for 70-80 minutes, until browned and bubbly.  Serve warm.

Tuesday, March 22, 2011

Breakfast of Champions

I am a breakfast eater.  There's nothing I like more than starting my day with something  I'll regret later.  I love french toast, pancakes, omelets, coffee cake and almost any other breakfast specialty you could mention.  Breakfast is my favorite meal.

When we lived in Los Angeles we used to have breakfast every weekend at John O'Groats on Pico Boulevard.  Ted and I started eating there before we were married and we watched Paul, the owner's son, grow up.  In turn, they all watched Charlie and Kate grow up.  It was and still is my favorite breakfast place.  In fact, whenever we go back to L.A., we eat there for old times sake and it's just as delicious as always.

As I've become a more competent cook I've started making breakfast at home on the weekends.  I'm happy to report that it's not all that hard to do and there is something to be said for breakfast in your pajamas.  All that is required is a little planning.  The rest is as easy as reading a recipe.

One of my favorite things to make for weekends is a coffee cake.  Maybe it's my Jewish heritage, but I love coffee cake, especially the ones with the crumbly streusel topping.  The great thing about coffee cake is that you can make it on Friday and have it all weekend, assuming everyone shows a little self control.

As the weather gets warmer and the fruit gets sweeter, one of my favorite additions to coffee cake is blueberries.  This particular coffee cake is one of my favorites because it incorporates not only blueberries but that yummy streusel topping I love so much.

Why, you may ask, am I writing about coffee cake on a Tuesday?  I'm doing this today so that you can plan your coffee cake baking for the weekend.  You probably have most of the ingredients you'll need in the house but you may need to nip out to pick up the berries or some sour cream.  You can whip this baby up on Friday and it'll be delicious all weekend long.

Recipe:  Blueberry Crumb Cake
(Barefoot Contessa at Home, 2006)

Ingredients:
For the Streusel


1/4 cup granulated sugar
1/3 cup light brown sugar, lightly packed
1 teaspoon ground cinnamon
1/8 teaspoon ground nutmeg
1/4 pound unsalted butter, melted
1 1/3 cups all-purpose flour

For the cake


6 tablespoons unsalted butter, at room temperature
3/4 cup granulated sugar
2 extra large eggs, at room temperature
1 teaspoon vanilla
1/2 teaspoon grated lemon zest
2/3 cup sour cream
1 1/4 cups all purpose flour
1 teaspoon baking powder
1/4 teaspoon baking soda
1/2 teaspoon kosher salt
1 cup fresh blueberries
Confectioner's sugar for sprinkling

Directions:


Preheat the oven to 350F.  Butter and flour a 9-inch round spring form pan.
For the streusel


Combine the granulated sugar, brown sugar, cinnamon, and nutmeg in a bowl.  Stir in the melted butter and then the flour.  Mix well and set aside.

For the cake


Cream the butter and the sugar in the bowl of an electric mixer fitted with the paddle attachment on high speed for 4 to 5 minutes, until light.  Reduce the speed to low and add the eggs 1 at a time, then add the vanilla, lemon zest, and sour cream.  In a separate bowl, sift together the flour, baking powder, baking soda, and salt.  With the mixer on low speed, add the flour mixture to the batter until just combined.  Fold in the blueberries and stir with a spatula to be sure the batter is completely mixed.


Spoon the batter into the prepared pan and spread it out with a knife.  With your fingers, crumble the topping evenly over the batter.  Bake for 40-50 minutes, until a cake tester comes out clean.  Cool completely and serve sprinkled with confectioner's sugar.


Monday, March 21, 2011

Ted Goes to the Market: An Adventure in Shopping

A couple of weekends ago I was away at a tennis tournament with Kate.  The tournament started on Friday evening and Ted was very busy at the office so he was unable to join us.  It was just us girls and a wild weekend in Erie, Pennsylvania.

While I love watching Kate play tennis, my idea of an exciting weekend is not located in Erie.  I also dream of the day when I'll go away for a weekend and not have a case of water and a case of Gatorade traveling along with me.  Nonetheless, Ted and Pebbles, our English bulldog, were at home for the weekend without us.

At some point over the weekend Ted found his way to the grocery store.  This is remarkable for a couple of reasons.  First of all, I left a house full of food.  And, second, I wasn't aware that he even knew where the grocery store was.  Nonetheless, Ted went shopping and among his purchases was a bag of blood oranges.

Now, don't get me wrong.  I love blood oranges.  They're delicious but they're not something I would just pick up without a plan.  Did Ted buy them just because they looked interesting or was he planning to actually make something with them?  It's funny because there they were in the refrigerator, and he never said a word about them.

So, the other day I was trying to make some room in the refrigerator and there were those damn oranges just sitting there without a purpose.  I started thinking about what I might do with them.  I could make juice,    That would be nice.  Or I could make a salad and section them off and throw them in.  Or I could make blood orange curd.  Now I was cooking with gas.

The color of a blood orange is gorgeous, a dark purply color.  The taste is divine as well.    Unfortunately, I am sad to report that the color and taste did not translate well to blood orange curd.  I have no idea why, but the cooked color was sort of greyish yellow and the curd didn't have a lot of taste.  I am convinced that there must have been a technical difficulty in my preparation because it should have worked and it should have been delicious.  I think it's back to the drawing board with this recipe.

So, in the end those blood oranges were a bit of a science project.  Not to worry.  Kate and I are off to scenic Manasquan, NJ next weekend.  Maybe Ted will go shopping again.

Sunday, March 20, 2011

Steak and Sides

Once the weather starts getting nice, we fire up the barbeque.  Ted is a master on the grill, and he largely takes over making the main course during the warm months.  It's like a vacation for me because all I have to do is the prep work, make all the side dishes, and clean up.  Okay, so it's not quite a vacation, but at least I don't have to scour the broiler pan.  Listen, I take what I can get.

Today, while not summer like, it was sunny and dry.  These are two key components for grilling as far as I'm concerned.  Ted isn't quite hardcore enough to grill in the snow, but he has been known to barbeque in the rain under the cover of our large umbrella positioned precariously over the grill.  Nonetheless, it was sunny and a perfect day to start the "grilling season" and so we did.

I'm going to begin by telling you that while Ted is a really good griller, I'm no Bobby Flay.  I have absolutely no need to make roasted potatoes on the grill nor do I think I need to bake a cake there either.   What I do really love though, are grilled meats and fish, and that's where Ted really shines.  He can cook a steak like nobody's business -- seared and crusty on the outside and perfectly pink on the inside.

So, we started the season with grilled steaks, and they were perfect, as always.  It's not quite caprese weather, so I made a wedge salad, which is my current favorite salad anyway.  A baked potato finished it all off.  The only thing missing was a fruit pie but I was feeling lazy and the summer fruit isn't really ready for its close-up yet.

I think we're doing well.  It's only March and I'm feeling like the lazy days of summer aren't all that far off. Let the grilling begin!

Recipe:  The Wedge Salad
Adapted from Emeril Lagasse
Serves 4


Ingredients:


2 heads iceberg lettuce
1 large beefsteak tomato, diced
1/2 pound thick sliced bacon, cooked crisp and drained, crumbled (optional)
1/2 pound blue cheese, crumbled
1/3 cup fresh lemon juice
1 teaspoon Worcestershire sauce
1/2 teaspoon Tobasco sauce
1/2 teaspoon kosher salt
3/4 teaspoon freshly ground black pepper
1 cup olive oil
1/2 cup buttermilk, shaken

Directions:


Combine the blue cheese, buttermilk, Worcestershire, hot sauce, salt and pepper in a medium size mixing bowl.  Using the back of a fork, mash the mixture together to form a thick paste.  Drizzle in the olive oil, stirring continuously with the fork until the mixture is creamy.  Add the buttermilk and mix well.  Cover and refrigerate for 1 hour.

Cut the head of lettuce into 4 wedges.  Spoon about 1/4 cup of the dressing over each wedge.  Garnish with a diced tomato and crumbled bacon.  Serve immediately.


Thursday, March 17, 2011

Top 'o the Morning

Today is a day dedicated to wearing t-shirts with pithy sayings like "Kiss Me I'm Irish" and to drinking beverages like green beer.  It's also the day that corned beef gets showcased somewhere other than on a bar mitzvah deli platter.  It's St. Patrick's Day.

I have made a corned beef only once and it was enough for me.  It just wasn't all that successful.   Ted advised me, after I dealt with all that greasy water, that he didn't really like anything but really thin sliced corned beef or corned beef hash.  I don't need to be told twice and corned beef hasn't darkened our doorstep since.  I have since limited my corned beefiness to the Smallman Street Deli.  Ted often orders the hash when we go out to breakfast but that's about it.

But I was feeling festive this morning, and I decided to have a corned beef redux but not like the last time.  I decided that since Ted likes corned beef so much when he eats it out at restaurants, I could do better.  And, to make matters much easier, I was at Trader Joe's the other day, and they had very lean looking precooked corned beef that would be perfect for the hash.  All systems were go!

And I figured that, if I was making the hash, why not whip up an Irish soda bread too.  I don't even need an occasion to enjoy soda bread.  It's dense and good with stews and soups.  Nonetheless, today is St. Patrick's Day and I wanted to be authentic.

The end result was breakfast for dinner, kind of.  I served the whole thing with a salad, which I think made it seem more like dinner.  Who cares -- it was good and, in case you were wondering, my corned beef hash was delicious.

Recipe:  Corned Beef Hash


Ingredients:


1 pound piece corned beef, cut into chunks
1 pound baking potatoes, peeled and cut into 1/4-inch dice
1 cup chopped onion
1 large red bell pepper, cut into 1/4-inch dice
2 tablespoons unsalted butter
kosher salt and freshly ground black pepper

Directions:


Cook the potatoes in boiling salted water until just tender, about 5 minutes, then drain.  Pulse corned beef in a food processor until coarsely chopped.

Saute the onion and bell pepper in butter in a large skillet over medium high heat, stirring, until lightly browned, 6 - 8 minutes.  Add the blanched potatoes and saute over medium high heat, stirring occasionally, until browned, about 10 minutes.  Stir in corned beef, season with salt and pepper to taste, then cook, stirring occasionally, until browned.  Serve hot.

Recipe:  Irish Soda Bread
(Ina Garten, Barefoot Contessa at Home, 2006)

*  Note:  I was out of currants so I used the same amount of golden raisins.

Ingredients:


4 cups all purpose flour, plus extra for currants
4 tablespoons sugar
1 teaspoon baking soda
11/2 teaspoons kosher salt
4 tablespoons cold unsalted butter, cut into 1/2-inch dice
1 3/4 cups cold buttermilk, shaken
1 egg, lightly beaten
1 teaspoon grated orange zest
1 cup dried currants

Directions:


Preheat the oven to 375F.  Line a baking sheet with parchment paper.

Combine the flour, sugar, baking soda, and salt in the bowl of an electric mixer fitted with the paddle attachment.  Add the butter and mix on low speed until the butter is mixed into the flour.

With a fork, lightly beat the buttermilk, egg, and orange zest together in a measuring cup.  With the mixer on low speed, slowly add the buttermilk mixture to the flour mixture.  Combine the currants with 1 tablespoon of flour and mix into the dough.  The dough will be very wet.

Dump the dough onto a well floured board and knead it a few times into a round loaf.  Place the loaf on the prepared sheet pan and lightly cut an X into the top of the bread with a serrated knife.  Bake for 45 to 55 minutes, or until a cake tester comes out clean.  When you tap the loaf, it will have a hollow sound.

Cool on a baking rack.  Serve warm or at room temperature.

Wednesday, March 16, 2011

Two Things I Don't Usually Do

I don't usually get too excited about recipes from the Pittsburgh Post Gazette.  I also don't usually defrost meat in the microwave.  Today I did both.

I don't have anything against the Post Gazette.  I just want to make that clear at the beginning.  It's just that the recipes don't usually light my fire.  I'm not sure why.  That's just the way it is.  But today there was a really interesting article about Elizabeth David, a cookbook author who first became popular 60 or so years ago.   Apparently she has been called the Julia Child of Britain.  How had I never heard of her?  Featured in the article were several recipes, all of which sounded really good and I was intrigued.

I don't really have anything against the microwave either.   My general view is that the microwave is good for only a couple of things, among them making popcorn, quick steaming vegetables, and tempering chocolate.  We mostly have a microwave because if we didn't neither of my kids would be able to "cook" for themselves.  But today I used the microwave for defrosting a couple of pounds of stew meat I had hidden in my freezer.  A happy coincidence -- the recipe and the microwave.

So, let me tell you about this recipe.  Beef and Wine Stew With Black Olives, or, if you want to be fancy and French, you can call it Boeuf a la Gardiane, is deceptively simple and calls for a very few ingredients.  It cooks for 3-1/2 hours and that's what makes it so meltingly delicious.  It doesn't hurt that it has three of my favorite ingredients in it -- olives, red wine, and brandy.  What could be bad?  In short, it was divine. It was much lighter than a winter stew, probably because it really just relied on the wine and the brandy and a lot of hours to give it its flavoring.  I could go on but instead I'm going to urge you to try this.

I do want to tell you one more thing.  I'm definitely going to be on the lookout for Elizabeth David's new cookbook, At Elizabeth David's Table:  Classic Recipes and Timeless Kitchen Wisdom.  And I'm definitely going to read the Post Gazette's food section a little more closely from now on.  You just never know.

Recipe:  Beef and Wine Stew With Black Olives (Boeuf a la Gardiane)
Elizabeth David, At Elizabeth David's Table:  Classic Recipes and Timeless Kitchen Wisdom, 2011)

*  Note:  The directions from the original recipe were a little vague so I have written the recipe as I prepared it.  I served the stew over buttered egg noodles.

Ingredients:


2 pounds top round stew meat, cut into 1-1/2 inch cubes
2 tablespoons unsalted butter
2 tablespoons olive oil
4 tablespoons brandy, heated
1 cup red wine
Kosher salt and freshly ground black pepper
Fresh thyme, Italian parsley, and bay leaf, tied into a bouquet
1 strip or orange peel
1 large clove garlic, crushed
1 cup pitted Kalamata olives

Directions:


Heat the olive oil and the butter over a medium heat.  In a large dutch oven, brown the meat on all sides. Pour the warmed brandy over the browned meat, set it to light, and shake the pan until the flames go out.  (The flaming will burn off the excess fat in the pot.)  Add the red wine and scrape up the browned bits from the bottom of the pot with a wooden spoon.  Season with a small amount of salt and pepper, add the orange peel, bouquet, and garlic.  Lower the heat to a very low simmer, place two sheets of parchment paper over the stew, and cover with a tight fitting lid.   Cook for 3-1/2 hours.

Once the stew is done cooking, add the olives, adjust seasonings, and garnish with thyme sprigs.  Serve hot.

Read the article about Elizabeth David at:
 http://www.post-gazette.com/pg/11075/1129407-478.stm#ixzz1GltadFif

Tuesday, March 15, 2011

Don't Fence Me Out


(Photo courtesy of Salt)
Sometimes something is so amusing that you forget how inconvenient or annoying it is.  That's what happened to me the other day.

It was  lovely outside, and I managed to get all my errands done early in the day.  Having a couple of hours to myself before I had to pick Kate up and take her to tennis, I decided to test out a recipe for polenta pound cake that I got from Salt (Salt).  This is a great baking blog that's worth a look.  Nina always has inspiring ideas and really delicious recipes.  I love this blog so much that I have an email subscription and you should too.  But back to the cake.  I got to work mixing and measuring and had the cake in the oven in no time.

Now I had an hour and a half to wait while the cake was baking.  No problem because there's always a lot to do around my house.  At some point, it occurred to me that the trash cans needed to be wheeled to the curb. I had plenty of time before the oven timer went off so it was a good time to get that done.

Pebbles was in the backyard enjoying the early spring sun.  I left the back door open and rolled the trash can to the sidewalk.  I closed the gate because I didn't want Pebbles to follow me to the curb.  I took the trash out and rolled the can back to the gate.

This is where it got interesting.  The gate was locked!  How did that happen?  That gate is never locked.  I looked through the slats of the gate and there was Pebbles looking very confused.  "Why is mom looking through the gate and not coming in" was what she would have been thinking, if dogs had thoughts like that.

Now I was in trouble because not only could I not get back into my house, there was a cake in the oven.  Uh oh,  What was I going to do?

I started by walking around to all the exterior doors of the house and of course they were all locked.  This was not good and the clock was ticking.  I was getting desperate.  As far as I could tell, there was only one option left.  I had to climb the back fence to get into the yard.

Now, those of you who know me know that I am not a fence climber.  Not only that, I was hardly dressed for it.  So, picture if you will, a 51 year old woman, dressed in a crisp white blouse, perfectly pressed skinny jeans, and Manolo Blahnick flat boots hoisting herself over a fence.  Thank heavens there was no one there to see it because I'm sure it wasn't graceful.

As I was teetering on the top of the fence, Pebbles decided that it wasn't a good idea that someone was climbing our fence to get into the yard.  I had become an intruder and she was barking up at me with gusto.  I'm looking down at the barking dog and the soggy leaves and mud and all I could thing was "please don't let me damage the boots."

I managed to make a somewhat graceless landing and the boots and all of my middle aged bones survived the impact.  I dodged my hysterical dog in time to hear the timer on the oven go off.

Crisis averted.  It's a good thing that the cake was really good.


Recipe:  Polenta Pound Cake
(Salt, adapted from Frank Stitt's Bottega Favorita)


Ingredients:
2 cups all-purpose flour


1/2 teaspoon baking soda


6 large eggs, separated


1/2 pound (2 sticks) unsalted butter, softened


2 cups sugar


1 teaspoon finely grated lemon zest


1 cup yellow cornmeal, plus more for dusting the pan


1/4 teaspoon vanilla extract


1 cup sour cream


Directions: 


Preheat the oven to 350F.  Grease a 9 1/2 x 3 inch round cake pan, then dust with cornmeal. Set aside.


In bowl of standing mixer fitted with whisk attachment, beat the egg whites until they form stiff peaks.  Transfer to another bowl and wipe out the mixer bowl.


Add the butter, sugar, and lemon zest to the mixer bowl and beat at medium speed until light and fluffy, approximately 10 minutes.  Add the egg yolks one at a time, beating until incorporated after each addition.  Add the cornmeal and beat until incorporated, scraping down the sides of the bowl as necessary.  Beat in the vanilla extract.  Add the flour mixture in 3 batches, alternating with the sour cream, starting and ending with flour.  Fold in the beaten egg whites.  Pour the batter into the prepared pan.


Bake for 1 1/2 hours, or until skewer comes out clean.  Cool on rack for 15 minutes, then remove cake from pan and cool completely on rack.


Monday, March 14, 2011

Spring in My Step

I am feeling good.  The sun is shining, the birds are chirping, and I have put my winter coats away for the season.  Now all I can do is hope that last week's snow was a last blast of winter and that I won't be sorry to have relegated my winter wear to the back of the closet.

In celebration of the nice weather, today the gardening service came and did a spring clean out.  They blew away leaves from last fall and trash that had accumulated in the snow over the winter.  The house looks great.  Now all I have to do is call the window washer to come and wash all the winter grime away.  Spring is springing all over!

So, tonight when I made dinner I was feeling like we should have something a little fresher than just another piece of meat.  I was paging through some cookbooks when I remembered Ina's delicious Lemon Fusilli with Arugula.  And, big surprise, I had everything I needed to make it already in the house.

This is a terrific recipe.  It's quick and just screams springtime.  It's also a nice lunch later in the week because this recipe makes a generous amount.  So, even if it rains later in the week, I can still have a little spring in my step.

Recipe:  Lemon Fusilli with Arugula
(Ina Garten, Barefoot Contessa at Home, 2006)

Ingredients:


1 tablespoon olive oil
1 tablespoon minced garlic (2 cloves)
2 cups heavy cream
3 lemons
kosher salt and freshly ground black pepper
1 pound dried fusilli pasta
1/2 pound baby arugula
1/2 cup freshly grated Parmesan cheese
1 pint grape or cherry tomatoes, halved

Directions:


Heat the olive oil in a medium saucepan over medium heat.  Add the garlic and cook for 60 seconds, then add the cream, the zest and juice of 2 lemons, 2 teaspoons salt, and 1 teaspoon pepper.  Bring to a boil, then lower the heat and simmer for 15 to 20 minutes, until it starts to thicken.

Bring a large pot of water to a boil, and add 1 tablespoon of the salt and the pasta, and cook al dente according to the directions on the package, about 12 minutes, stirring occasionally.  Drain the pasta and return it to the pot.  Immediately add the cream mixture and cook over medium low heat for 3 minutes, until the pasta has absorbed most of the sauce.  Pour the hot pasta into a large bowl and add the arugula, Parmesan, and tomatoes.  Cut the last lemon in half lengthwise, slice it 1/4 inch thick crosswise, and add a few slices to the pasta.  Toss well, season to taste, and serve hot.

Ladies Who Lunch

I'm going to start this post out by saying that I'm not much of a luncher.  I go out occasionally but mostly I have lunch at home in between my errands.  It's not that I don't like going out to lunch, because I do.  It's just that the day seems to slip away so quickly that taking an hour or two out on a regular basis is a luxury I don't have these days.  Now, if I didn't spend every afternoon from 3:00 until 6:30 schlepping Kate to tennis, you can bet I would be lunching all the time.

But I do love lunch and I especially love chicken paillard.  I'm not sure if it's technically a lunch food or if it's more of a dinner food, but I love how sophisticated it seems at any time of the day.  I always picture well dressed women selecting it off a menu at Bergdorf's or at a chic little French bistro.  It's neat and tidy, with the simple piece of chicken and the salad right on the same plate.  Nothing gloppy or requiring of three napkins.  Chicken paillard is, to me, the ultimate "ladies who lunch" selection.

Here's my recipe for chicken paillard.  I like it with an arugula salad that has been tossed with a little lemon vinaigrette.  If you prefer a different kind of greens, by all means, use those instead.  Either way, chicken paillard is simple and elegant, just like you.

Recipe:  Chicken Paillard


Chicken
4 chicken breasts, boneless and skinless and pounded to an even thickness
1 cup all purpose flour
4 eggs, beaten with a splash of milk or water
2 cups panko bread crumbs
kosher and freshly ground black pepper
Olive oil for cooking

Salad
Salad greens for 4 (I like arugula)
Grape tomatoes
1/2 pound mozzarella cheese, boccancini, cut in half
1/4 cup freshly squeezed lemon juice
1/2 cup olive oil
1/2 teaspoon kosher salt
1/4 teaspoon freshly ground pepper

To prepare the chicken paillard:
Prepare a breading station with three dishes, one for the flour, one for the eggs, and one for the panko.  Season the chicken pieces well with salt and pepper.  Coat the breasts in the flour first, then the egg, and then the panko.  Refrigerate the chicken for about 10 minutes to dry out the breading before you fry them.

Preheat the oven to 300F.

Using a large saute pan, heat a couple of tablespoons of olive oil over medium high heat.  When the oil is hot, fry the chicken in batches for 2 -3 minutes on each side, being careful not to move them in between turning them over.  Place cooked chicken on a baking sheet to keep warm until you are done frying all the chicken.

To prepare the salad:
Pour the lemon juice into the bottom of your salad bowl.  Add the olive oil in a stream, whisking to combine well.  Add the salt and pepper.  Add the salad greens, tomatoes, and mozzarella to the bowl on top of the dressing.  When you are ready to serve, toss the greens with the dressing.

To serve, place one chicken breast on each plate and top with the salad.

Thursday, March 10, 2011

Kate's Birthday - Part Deux

Kate had a great birthday celebration, the highlight of which was probably a high spirited game of butts up today at tennis.  Butts up is where the person who is celebrating their birthday stands on the base line on one side of the court with their back to the net.  Everyone else stands on the baseline on the other side.  The object of the game is for everyone to take a turn and let their best serve rip in the general direction of the birthday person's butt.  It inspires lots of hoots and hollers and sometimes a welt or two.

Kelly, one of Kate's coaches, presented her with a phone book to sit on while driving and encouraged everyone to stay off the road now that Kate will have her learner's permit.  Kate thought the phone book was hysterical.  Frank was on vacation so he missed all the fun and the cupcakes.  Kate's not sure how Frank feels about butts up but she knows that he'll be sad to hear there were cupcakes and he missed them.

As you can see, tennis has its own sense of humor.

But it appears the celebration is not quite over.  Tomorrow at school the 10th grade is having a good bye lunch for Izzie, a girl who has been visiting Ellis from Chile for the last six weeks.  Since it's Kate's birthday this week, she offered to bring brownies for dessert for the whole 10th grade.

Isn't it nice how Kate offers my services?

 I got to it and worked my brownie magic.  30 double chocolate brownies and 30 peanut butter brownies.  They look delicious, if I do say so myself.  Kate says that Ellis is as much about food as it is about education, and I think she could be right.  I think I like that.

So, here's to day two of the birthday celebration.  I think turning 16 deserves at least two days, don't you?

Recipe:  Outrageous Brownies
Ina Garten

* Note:  See below for Peanut Butter Swirl  Brownie variation

Ingredients:

1 pound unsalted butter
1 pound plus 12 ounces semisweert chocolate chips, divided
6 ounces unsweetened chocolate
6 extra-large eggs
3 tablespoons instant coffee granules
2 tablespoons pure vanilla extract
2 1/4 cups granulated sugar
1 1/4 cups all-purpose flour, divided
1 tablespoon baking powder
1 teaspoon kosher salt
3 cups walnut pieces, chopped

Preheat the oven to 350.  Butter and flour a 12 by 18 by 1 1/2 inch sheet pan.

Melt together the butter, 1 pound of chocolate chips, and the unsweetened chocolate in a medium bowl over simmering water.  Allow to cool slightly.  In a large bowl, stir (do not beat) together the eggs, coffee granules, vanilla and sugar.  Stir the warm chocolate mixture into the egg mixture and allow to cool to room temperature.

In a medium bowl, sift together 1 cup of flour, the baking powder, and salt.  Add to the cooled chocolate mixture.  Toss the remaining 12 ounces of chocolate chips in a medium bowl with 1/4 cup of flour, then add them to the chocolate batter.  Pour into the prepared sheet pan.

Bake for 20 minutes, then rap the baking sheet against the oven shelf to force the air to escape from between the pan and the brownie dough.  Bake for about 10 to 15 minutes more or until a toothpick comes out clean.  Do not overbake.  Allow to cool completely, refrigerate, and cut into large squares.

Variation for Peanut Butter Swirl Brownies:

Omit the nuts from the batter.  Once you have poured the batter into the sheet pan, spoon 3/4 cup peanut butter over the top of the chocolate mixture.  Then, using a knife, swirl the peanut butter through the chocolate mixture.

Bake as above.

Wednesday, March 9, 2011

Happy Birthday Sweet 16

Thursday is a big day in our house.  Kate is turning 16 and that means just one thing.  She can get her learner's permit and we better all get off the road.

Kate has already announced that she wants Ted to be her primary driving instructor, not me.  I guess that's because when Charlie was learning to drive, on more than one occasion I screamed out in terror "slow down... you're going to kill us".  Charlie was also troubled by the fact that I spent most of our time together in the car slamming my foot on the imaginary brake peddle on the passenger's side.  Imagine that.

Ted is a very calm driving instructor.  It is beyond me how he can avoid abject panic as our teen driver runs a red light or turns right from the left lane.  He is a better person than I am, or at least a better driving instructor.

So, if I'm not going to be in charge of driving instruction, at least I can be in charge of the birthday dinner.  I asked Kate what she wanted for dinner for her birthday and, Kate being Kate, she replied that she wanted something with lobster.  Lobster?  Yes, lobster.

Kate has spent every summer since she was 7 years old at camp in Maine.   This is the first summer she will not be at camp because last summer was her final year.  But she still sees herself as a "Mainer" and I guess they eat a lot of lobster up there.  Let me tell you, we Pittsburghers don't eat much lobster  but it's her birthday so I think I can make it happen.

I first thought of making lobster pot pie.  I've made it before and it was decadently delicious.  But there's a new lobster in town and that's lobster mac and cheese.  I've never made it but how hard could it be.  Not very, it turns out.

So, while I may have been exiled from the front seat of the car while Kate is learning to drive, I can make a celebration that might be just as nice as getting her learner's permit.

Recipe:  Lobster Mac & Cheese
Ina Garten

Ingredients:

1 pound cavatappi pasta
12 ounces Gruyere cheese, shredded
8 ounces sharp cheddar cheese, shredded
1 quart milk
1/2 cup all-purpose flour
1 1/2 pounds lobster meat, cooked
1/4 teaspoon black pepper
1/4 teaspoon ground nutmeg
Kosher salt
vegetable oil
4 tablespoons unsalted butter
1 1/2 cups fresh white breadcrumbs (5 slices, crusts removed)

Preheat the oven to 375.

Drizzle the oil into a large pot of boiling water.  Add the pasta and cook according to package instructions, 6 to 8 minutes.  Drain well.

Meanwhile, heat the milk in a small saucepan, but don't boil it.  In a large pot, melt 6 tablespoons of butter and add the flour.  Cook over low heat for 2 minutes, stirring with a whisk.  Still whisking, add the hot milk and cook for a minute or two more, until thickened and smooth.  Off the heat, add the Gruyere, cheddar, 1 tablespoon of salt, the pepper, and the nutmeg.  Add the cooked pasta and the lobster and stir well.  Place the mixture in 6 to 8 individual gratin dishes.

Melt the remaining 2 tablespoons of butter, combine with the fresh breadcrumbs, and sprinkle on the top.  Bake for 30 to 35 minutes, or until the sauce is bubbly and the macaroni is browned on top.

Tuesday, March 8, 2011

A Last Stab at Winter

It's much warmer here and I feel as though I have made it through the winter.  In celebration, I ordered a couple of pair of sandals online and they have arrived.   They are very cute and of course I've told Ted that they're "all I'll need for spring and summer".  Of course, he knows better than to believe me.   I have scheduled my first pedicure of the season and soon my winter feet will be a thing of the past.  I'm feeling good.

But of course, Mr. Winter is not ready to say good bye quite yet.  Sunday was cold and damp and there was snow on my lawn.  Certainly not sandal weather but it was a good night for chili.

I have to admit, I like chili but I'm not a big chili maker.  Honestly, if it didn't completely offend my sensibilities as a cook, I would be tempted to use one of those prepared spice packages.  So, when I saw  Devon Fredericks making this chili with Ina Garten the other day on Barefoot Contessa,  I decided it was worth the trouble of all that chopping, measuring, and simmering.  I wasn't wrong.

This chili is so good that it actually won a chili making award for Ms. Fredericks.  It's so good that I think I'll pop this recipe into my chili recipes file folder.  Of course, that assumes that I have such a folder and that's a discussion for another day.  Perhaps a posting called "A First Stab at Spring".

Recipe:  Devon's Award-Winning Chili
(Devon Fredericks, 2010)

Ingredients:

5 pounds beef brisket, cut into 1-inch cubes
1/4 cup olive oil
2 cups chopped yellow onions
6 large garlic cloves, minced
2 tablespoons chili powder
1 tablespoon red pepper flakes, crushed
1 tablespoon cayenne, or to taste
2 tablespoons ground cumin
2 green peppers, seeded and diced
1 bay leaf
1/2 cup strong coffee
6 cups tomatoes, chopped with their liquid
Salt and freshly ground black pepper
2 (15-ounce ) cans kidney beans
2 tablespoons chopped basil

Serve with:
* Sour cream
* Grated cheddar
* Diced tomato
* Tortilla Chips
* Guacamole

Pat the brisket cubes dry with paper towels.  Heat the oil in a very large heavy-bottomed pot and quickly brown the meat, in batches, on all sides.  Transfer the brisket to a separate bowl and set aside.  Saute the onion and garlic in the same oil over medium heat until limp, but not brown, about 8-10 minutes.  Add the chili powder, pepper flakes, cayenne pepper and cumin and saute for 1 minute.  Add the green peppers, bay leaf, tomatoes with their juice, the reserved meat, 1 tablespoon of the salt and 1 teaspoon of the pepper and bring to a boil.  Reduce the heat, cover the pot with a tight fitting lid and simmer for 2 1/2 hours, stirring occasionally.  Taste and season with salt, to taste.  Add the coffee, cover the pot and simmer for 1 more hour.

Add the kidney beans and basil and warm through.  Transfer the chili to a large serving bowl and serve with sour cream, grated cheddar, diced tomato, tortilla chips and guacamole.

Monday, March 7, 2011

Let 'Em Eat Pancakes

One of the really nice things that came out of the Red Pack Tomato Bowl, besides all those antioxidants, was that lots of new readers heard about us and came and visited the blog.  One of those readers was Louise.  Louise writes a great blog called Months of Edible Celebrations (Months of Edible Celebrations).   This is a seriously fun blog that celebrates food celebrations.  And who among us doesn't love a good celebration?  Months of Edible Celebrations is chock full of tasty tidbits and lots of interesting historical background on all kinds of food related things.

Louise is a regular reader of You Little Tarte.  Over the weekend, she sent me a message reminding me that  National Pancake Week started on Sunday and that National Pancake Day is Tuesday.  This is definitely something I am happy to know about.  I love pancakes.  Ted loves pancakes.  Kate loves pancakes and Charlie did love pancakes when he still lived at home.  I'm not sure what Carleton College's pancakes have done to his love of pancakes.  Nonetheless, as far as I am concerned, this is a week worth celebrating.

Here's the thing.  Pancakes are a happy food.  I mean, what could be happier than a little, fluffy cake smiling up at you from your breakfast plate.  Even if you're cranky, pancakes can melt you heart and make you see all the possibilities  the day has to offer.  Well maybe that's an overstatement, but pancakes certainly are more fun than a bowl of All Bran with skim milk.

Unfortunately, I didn't know it was National Pancake Week on Sunday morning when I made breakfast.  Instead I made french toast.  The good news is that November 28th is National French Toast Day.  I'll have to mark my calendar.

Recipe:  You Little Tarte's Crunchy French Toast
(aka I Should Have Made Pancakes French Toast)

Ingredients:

4 large eggs
1 cup whole milk or half and half
1 1/2 teaspoons sugar
1 teaspoon vanilla
1/2 teaspoon fresh lemon or orange zest
1 teaspoon honey
1 teaspoon kosher salt
1/2 loaf challah, cut into 3/4 inch slices
1 1/2 cups corn flakes, coarsely crushed
Butter for pan
Maple syrup for serving

Combine eggs, milk, sugar, vanilla, zest, honey, and salt in a large bowl.  Whisk well to combine.  Pour into a shallow pan large enough to accommodate the bread when soaking.  Put the crushed cornflakes in another shallow dish.  Soak the bread for about 3 minutes and then roll in the crushed cornflakes.  Place on a platter in a single layer while the griddle or frying pan is heating.

Over medium heat, melt about a tablespoon of butter in the frying pan/griddle.  When the butter is frothy, add the bread.  Cook until golden brown on one side, about 3-4 minutes, and then flip.  Cook until the second side is golden brown as well.  Repeat the process with the remaining pieces of bread, adding more butter, if necessary.

Serve hot with maple syrup, if desired.

Sunday, March 6, 2011

Going Coconuts

I love Wednesdays.  It's the day the New York Times has its Dining section.  I wait all week for it and Dining, unlike almost everything else in life, never disappoints.  It's like porn... food porn.

Dining is always filled with articles and recipes that ignite my creative spirit, or at least my copy-cat spirit.  It makes me want to shoot over to the Union Square Farmer's Market in New York to pick up some small batch goat cheese and an artisanal bread to go with it.  Unfortunately, the only place I can shoot over to is the neighborhood Giant Eagle, but I'll take what I can get.  Wednesday night is always a good night for dinner around here because the Dining Section almost always has something that "I simply have to try".

Also in Dining are the weekly articles by my current favorite food writer, Melissa Clark.  I just love her column A Good Appetite.  First of all, I love Melissa's approach to food.  She'll try anything and then make it better.  She's not a food snob which I really like.  She often writes about things like pound cake and St. Louis Gooey Cake, which are certainly not  snobby foods.  The point is, Melissa Clark writes about food that I am likely to want to make and eat.

Melissa's most recent article was all about coconut oil.  I have to tell you, she is a brave soul.  I have seen coconut oil on grocery shelves and have rejected it out of hand.  First of all, like most of us, I assumed it was a bad oil, and second of all, it has the consistency of paraffin wax.  And, while I would be lying if I were to tell you I was a health junkie, the whole waxy thing was a big turn off for me.

Nonetheless, according to the article, recent research concludes that coconut oil isn't really an evil oil.  The long and short of it is that not all saturated fats are created equal.   Coconut oil, while not quite as beneficial as olive oil, isn't as bad as some others.  And, let me tell you, it adds a really fantastic taste, if you like coconut.  (NYT 3/2/11).

So, having read Melissa's article extolling the virtues of coconut oil, I zipped out and dropped $8 on a jar of virgin coconut oil.  I came home and whipped up (yes, it was quick) the Coconut Oil Pound Cake with Almonds and Lime Zest.  I have to tell you.  It was really good.  Dense and fragrant, it's a keeper.  The recipe for that cake, along with a few others, is included in the NYT link, above.

This got me to thinking.  I love pound cake and I love coconut.  Why not enhance the coconut flavor and make this a coconut pound cake instead.  I changed the ingredients up and below is my own take on pound cake with coconut oil.  Either cake is delicious.  You be the judge.  I think you'll love both.  I do.

Recipe:  You Little Tarte's Coconut Vanilla Bean Pound Cake

Ingredients:

1/2 cup sweetened shredded coconut
1 cup granulated sugar
1/2 cup virgin coconut oil
3/4 cup whole milk
3 large eggs
Seeds of 1 vanilla bean
1 3/4 cups all-purpose flour
1 3/4 teaspoons baking powder
1/4 teaspoon kosher salt
1 teaspoon coconut extract

Heat the oven to 350 and grease a 9-by-15-inch loaf pan.

Melt the coconut oil in a small pan.  Pour it into a large bowl and whisk in the eggs, sugar, milk, vanilla bean seeds, and coconut extract.

In another bowl, combine the flour, baking powder, and salt.  Fold the dry ingredients into the wet ingredients to combine.  Pour the mixture into the prepared loaf pan.  Sprinkle the shredded coconut all over the top of the batter.

Bake until golden brown and a toothpick inserted in the center comes out clean, about 60 minutes.  Allow to cool on a wire rack for 10 minutes, before removing from the loaf pan.  Cool completely before serving.

Thursday, March 3, 2011

Cookies in a Hurry

Recently we have had enough Girl Scout cookies in the house to feed all of Pittsburgh.  Nonetheless, as good as they are, those cookies don't quite hit the spot like something homemade.  The truth is, sometimes I'm just in the mood for a homemade cookie.  And there's nothing quite as nice as a really quick recipe that doesn't require a lot of ingredients to take care of my cookie craving.

This recipe for Nutella cookies is very different from the last one I passed along (Nutty for Nutella 1/27/11) but very nice as well.  It calls for just four ingredients, all things you are likely to have in the house and is a snap to make.  They're a bit crispier than the other recipe and ground up would also make a delicious crust for a pie or a cheesecake.

Four ingredients and seven minutes to bake.  A lifesaver when you are craving a homemade cookie.

Recipe:  Quick Nutella Cookies
(A Busy Nest, 2011)

Ingredients:

1 cup Nutella
1/2 cup granulated sugar
1 cup all purpose flour
1 whole egg

Preheat the oven to 350.

Blend all ingredients together in a bowl.  Form the dough into 1-inch balls and place on a parchment lined cookie sheet.  Press down firmly with the bottom of a glass until the balls are flatted but still have rounded edges.  Bake for 7-8 minutes or until set.  Cool on wire rack.

Wednesday, March 2, 2011

Spring Cleaning 1

Well, today it was 45 degrees and spring is in the air.  Sort of.  I have banished my coats to the back of the closet in favor of cardigan sweaters.  I am wearing chic little flats without socks.  I'm not going to say that I was warm and toasty all day because in truth, I was a little chilly.  But I'm an optimist.

Back when I lived in Los Angeles, land of sunshine and palm trees, 45 degrees would have meant a turtleneck sweater and a jacket.  But now that I have endured nine winters here in Pittsburgh, 45 seems pretty nice for March 2nd.

So, as we approach spring, it's getting to be time for spring cleaning.  Since I'm not quite ready to tackle my closet, I started with my kitchen freezer.  I hadn't come up with anything interesting for dinner so I dug around to see what was hidden in there.  I hit the jackpot when I came across a beef tenderloin.  Who just has a beef tenderloin hanging around?  Dinner is served, baby.

Further investigation in the refrigerator revealed a pound of mixed wild mushrooms.  This was shaping up to be quite a little feast.  A bag of baby yukon gold potatoes from the pantry and I was cooking with gas, literally.

I think my first foray into spring cleaning was pretty successful.  Maybe when I tackle my closet I'll come up with some forgotten treasures.  Or, even better, maybe I'll come up with an excuse to go out and buy something new.

Recipe:  Beef Tenderloin
(Adapted from Williams Sonoma)

1 beef tenderloin, 3 pounds, tied
2 tablespoons whole grain mustard
1 1/2 tablespoon olive oil, plus more for searing
1 1/2 teaspoon dried thyme
Kosher salt and freshly ground black pepper

Preheat the oven to 425.

Whisk together the mustard, olive oil, and thyme.  Set aside.   Pat the tenderloin dry and season generously with salt.  In a large skillet, heat enough olive oil to coat the pan.  When oil is very hot, sear the meat on all sides and on the ends, about 2-3 minutes on each side.   Transfer to a cutting board and brush with the mustard mixture.  Place in a roasting pan.

Roast the meat for 20-30 minutes, until a meat thermometer reads 125-130 degrees.  Remove from the oven, cover loosely with foil, and let rest for 10 minutes.  Slice and serve with sauteed mushrooms (below).

Sauteed Wild Mushrooms

See blog dated 2/21/11 Born to be Wild (Mushrooms)

Tuesday, March 1, 2011

Proud to Eat Pasta

I've come out of the closet.  For several years, I was a closet pasta and bread eater.  Atkins and South Beach proclaimed eating pasta to be bad so I took my carb habit into the closet.  I'm not proud of myself, but I couldn't take all the nasty stares.

Here's the thing.  I love bread and I love pasta.  Always have, always will.  And you know what, take a look at those sexy Italian women.  They eat pasta everyday and they look fabulous.  So why do without?   I know plenty of women who haven't eaten anything "white" in years and they don't look half as good as they should given all that food denial.  Clearly it isn't worth passing up the bread basket, now is it?

So around my house pasta is a favorite on the dinner menu.  And lately I have been trying out some of the simplest preparations to rave reviews.  Tonight I made Spaghetti all'Amatriciana for dinner.  It's such an easy, classic preparation and is hugely satisfying.   It just requires a couple of ingredients, all of which should be in a fairly well stocked pantry and refrigerator.  In about 15 minutes you will  have a meal that is sure to please.

Recipe:  Spaghetti all'Amatriciana
(Adapted from Mario Batali)

Ingredients:

Kosher salt
1/4 cup extra virgin olive oil
4 ounces pancetta, diced small
1 medium onion, cut in half and then sliced into 1/4-inch wide slices
1/4 cup tomato pasta
1 1/2 teaspoons hot red pepper flakes
3/4 cup strained tomatoes, simmered and reduced by half
1 pound spaghetti
1 cup freshly grated Parmigiano-Reggiano, plus extra for serving
1/2 cup flat leaf parsley, roughly chopped

Bring a large pot of water to a boil and add 3 tablespoons of kosher salt.

Meanwhile, combine the oil, pancetta, and onion in a large skillet and cook over medium-high heat, stirring frequently, until the pancetta is lightly browned and the onions are soft, about 6 minutes.  Stir in the tomato paste and the red pepper flakes and cook until fragrant, about 1 minute.  Stir in the reduced tomato sauce and remove the skillet from the heat.

Cook the pasta according to package instructions.  Drain, reserving 1/2 cup of the pasta water.

Add the pasta and 1/4 cup of the pasta water to the skillet and stir and toss over medium heat until the pasta is well coated.  If the sauce is coating the pasta too thickly, add a little more of the pasta water.  Stir in the cheese and the parsley.  Serve hot with additional grated cheese on the side.