01 09 10

search you little tarte

Sunday, January 27, 2013

Empty No More


Everyone has their thing (or things) that bug them.  Some people can't stand mess.  Others can't stand too much tidiness.  Everyone has their thing.

For me, I hate an empty cookie jar.  It's depressing.  It just seems so wrong to have a nice jar standing empty, when it should be filled with delicious treats.  Maybe it harkens back to when my kids were little, and the cookie jar was my big bribe for following directions or behaving well.  (Yes, I was one of those mothers who bribed with food.  So shoot me.)  Who knows why, but the need to have a full cookie jar has stuck.

It would be easy enough to always have cookies on hand if I was one of those people who bought cookies at the market or the bakery.  But alas, I am not.  I am a baker and my kids have, for the most part,  grown up on homemade cookies, with the occasional exception of Oreos and Mint Milanos.

The funny thing is that they've never been annoyed by their homemade desserts.  Why, you may ask, would anyone ever be annoyed or disappointed by anything homemade?  Well, let me tell you a little story.

Back when Ted was a little kid, his mother used to bake bread.  She used this bread to make sandwiches to put into his school lunches.  This bread was crumbly, probably not very well suited to the rigors of peanut butter and jelly.  The sandwich would fall apart every time, and there were the other kids with their intact sandwiches made with Wonder Bread.

What kid wouldn't prefer a sandwich that stayed together in favor of a crumbly one?

But I digress.  We were out of cookies.   I'm not sure anyone else noticed, but it was bugging me.  I recently picked up a new cookbook put together by a mom to fund kids cancer research.  Why not give those chocolate chip cookies a try?


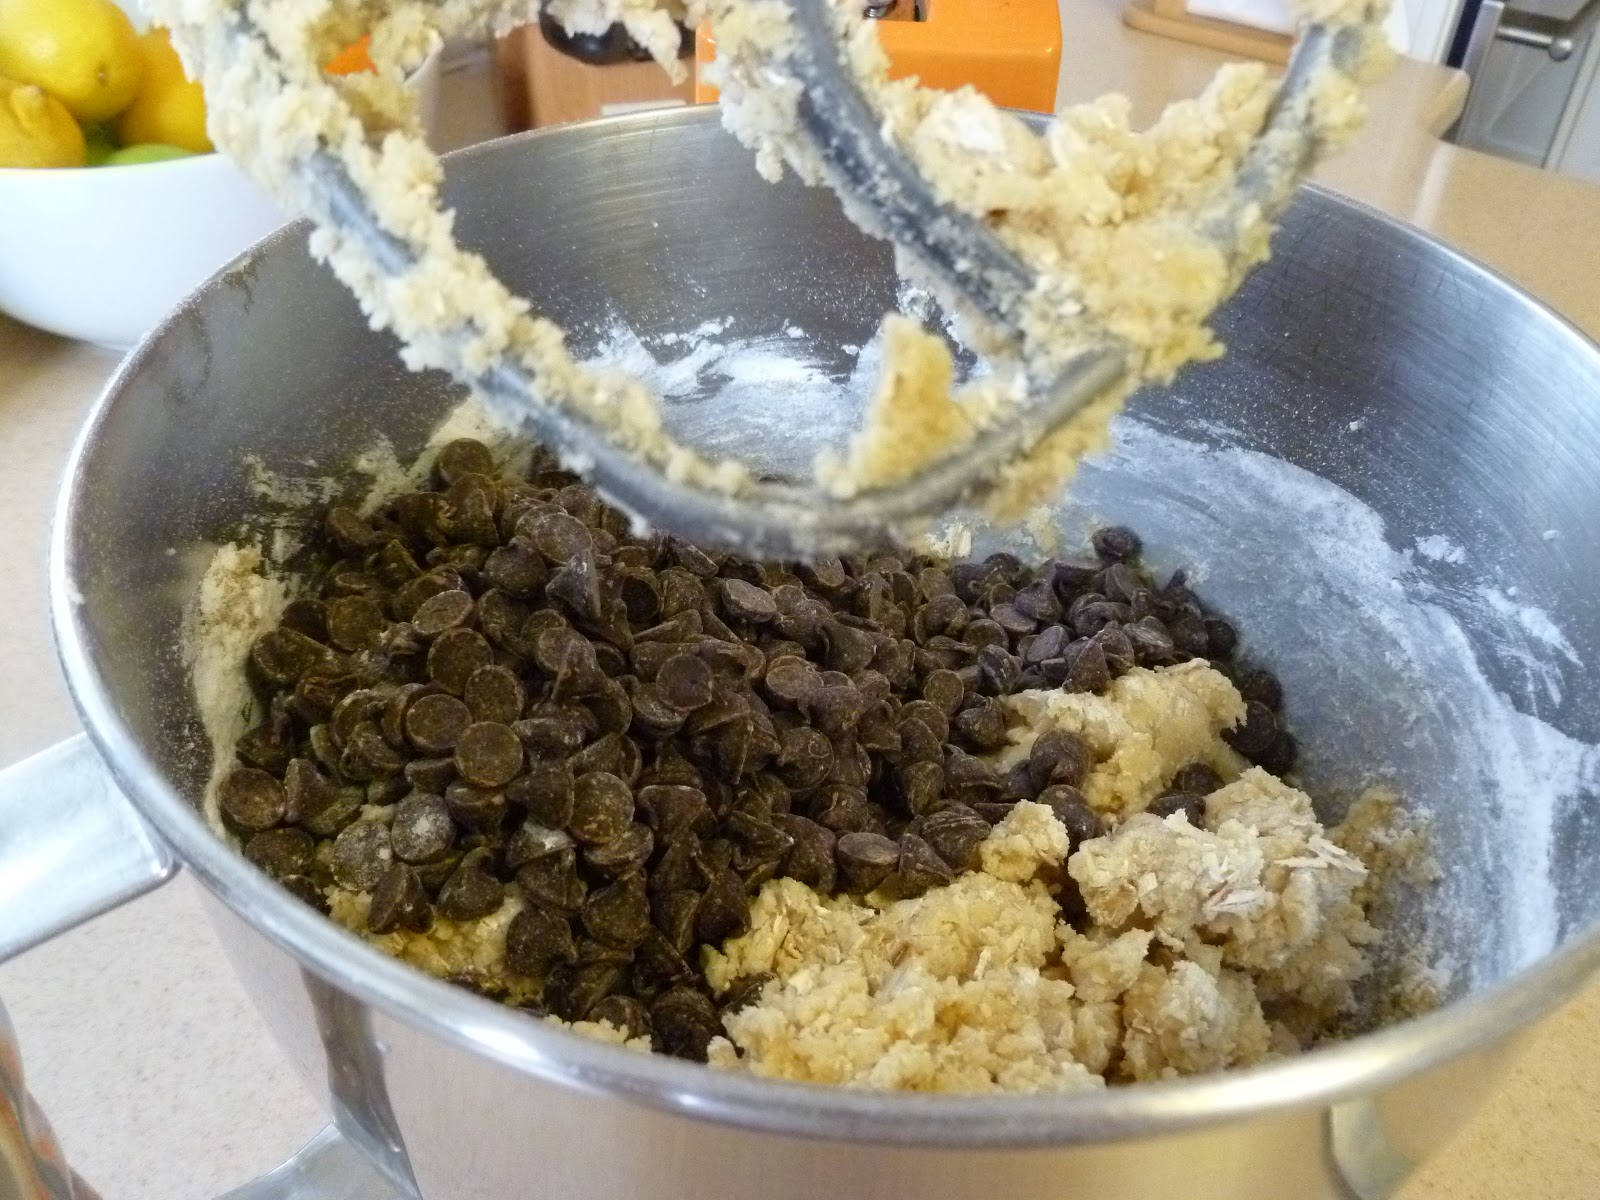
They came out great.  The addition of oats to the batter made the cookies a little more substantial, and their inclusion allowed me to pretend that these cookies were healthy.

And, our cookie jar is no longer empty.

Recipe:  Chocolate Chip Oatmeal Cookies

Adapted from Cookies For Kids’ Cancer Best Bake Sale Cookbook, by Gretchen Holt-Witt.
Makes 3 to 4 dozen cookies.

Ingredients:

2 sticks (226 g) unsalted butter, room temperature
1 cup (110 g) light brown sugar
1/2 cup (88 g) granulated sugar
1 large egg, room temperature
1 large egg yolk, room temperature
1 tablespoon vanilla extract
2 cups (240 g) unbleached all-purpose flour
1 cup (80 g) old-fashioned oats
1 teaspoon baking powder
1 teaspoon baking soda
1 teaspoon kosher salt
3 cups (525 g) chocolate chips (semi-sweet, or mix of white and semi-sweet)

Directions:

Place the rack in the middle of the oven and preheat to 325° F/165° C.

In the bowl of the stand mixer, beat the butter, brown sugar, and granulated sugar until smooth and creamy. Add the egg, egg yolk, and vanilla, one at a time, beating well between.

In the medium mixing bowl, whisk together the flour, oats, baking powder, baking soda, and salt. Add to the butter mixture and beat until everything is incorporated. Scrape down the sides of the bowl and mix in the chocolate chips.

Shape the dough into rounded teaspoon-size balls and place them about 2 inches apart on the prepared baking sheet, and gently press each down. Bake in the preheated oven until the cookies start to brown at the edges, about 12 to 15 minutes. Cool on the baking sheet about 5 minutes, then transfer to a wire rack to cool completely. Repeat with the remaining dough. Store in an airtight container.

Thursday, January 24, 2013

Soup and Sandwich


It's been cold here.  Really cold.  And when it's cold, there's nothing more satisfying than a bowl of soup.  At least that's what I think.

So yesterday, as I was doodling around my kitchen trying to figure out what to make for dinner, I happened across a package of already cut-up butternut squash.  Honestly, I have no recollection of buying it, but there it was in the crisper -- calling out to me.

"Make me into a nice winter squash soup", it said.

Well, butternut squash soup can't talk, but if it could, that's what it would have been saying.

I had an old Ina Garten recipe for Winter Squash Soup that I hadn't made in years, so I was ready to roll.  This soup is so easy that it's practically criminal.  It's quick too, and my new Vita Mix blender made quick work of pureeing at the end.


As nice as the soup was, it needed a little something to go with it.

In another a-ha moment, I pulled a small piece of filet out of the freezer and roasted it up.  I have to admit that I didn't have a fresh baguette hanging around, so I had to pop out to pick one up.  Honestly, I didn't mind.  There's always something I need at the market and I was getting a little case of cabin fever.  I suited up (coat, scarf, gloves) and headed out.

The cold weather was made far more bearable because I knew there was a nice hot bowl of soup waiting for me when I got home.


Recipe:  Winter Squash Soup
(Barefoot in Paris)

Ingredients:

2 tablespoons unsalted butter
1 tablespoon good olive oil
2 cups chopped yellow onions (2 onions)
1 (15 - ounce) can pumpkin puree (not pumpkin pie filling)
1 1/2 pounds butternut squash, peeled and cut in chunks
3 cups homemade chicken stock or canned broth
2 teaspoons kosher salt
1/2 teaspoon freshly ground black pepper
1 cup half - and - half
Creme fraiche, grated Gruyere, or croutons (see Note), for serving (optional)

Directions:

Heat the butter and oil in a heavy - bottomed stockpot, add the onions, and cook over medium - low heat for 10 minutes, or until translucent. Add the pumpkin puree, butternut squash, chicken stock, salt, and pepper. Cover and simmer over medium - low heat for about 20 minutes, until the butternut squash is very tender. Process the mixture through the medium blade of a food mill. Return to the pot, add the half - and - half, and heat slowly. If the soup needs more flavor, add another teaspoon of salt. Serve hot with garnishes, if desired.

Cook's Note: To serve with croutons, remove the crusts from 2 slices of white bread, cut them in 1/2-inch cubes, and saute them in 1 tablespoon of butter until browned. Season with salt and pepper.


Recipe:Truffled Fillet of Beef Sandwiches
(Barefoot Contessa Back to Basics)

Ingredients:

1 1/2 to 2 pounds fillet of beef, trimmed and tied
1 tablespoon unsalted butter, at room temperature
Kosher salt and coarsely ground black pepper
2 French baguettes, 18 to 20 inches long
3 ounces black truffle butter, at room temperature
1 (2-ounce) chunk good Parmesan cheese
Fresh baby arugula

Directions:

Preheat the oven to 500 degrees F. (Be sure your oven is very clean!)

Place the beef on a sheet pan and pat the outside dry with a paper towel. Spread the butter all over the beef with your hands. Sprinkle the beef evenly with 1 1/2 teaspoons salt and 1 1/2 teaspoons pepper. Roast for exactly 22 minutes for rare and 25 minutes for medium-rare.

Remove the beef from the oven, cover it tightly with aluminum foil, and allow it to rest at room temperature for 15 minutes. Remove the strings and slice the fillet about 1/4-inch thick.

Open the baguettes lengthwise but not all the way through. Spread the bottom halves generously with the truffle butter. Top with a layer of sliced beef and sprinkle it with salt and pepper.

Using a vegetable peeler, shave the Parmesan into thin shards and scatter the shards over the sliced beef on each sandwich. Finish with a sprinkling of arugula leaves. Fold the tops of the sandwiches over, cut each baguette diagonally in 3 or 4 sandwiches, and serve right away.


Monday, January 14, 2013

Laundry Day


Do you sometimes wonder how there can be so much laundry?  I know I do.  It's just the three of us here and it's completely unbelievable to me how much laundry we generate.  Actually it's not "we".  It's Kate.  She's a laundry making machine.

Kate loves sweatpants and sweatshirts and they take up a lot of room in the washing machine.  Everyday when she gets home from school, after changing her clothes to play tennis, she dons a fresh pair of sweatpants and a fresh sweatshirt.  This is in addition to all the other clothes she's already worn. You can imagine the laundry.

I try and stay on top of the laundry but it's impossible.  I no sooner get it all done, and the laundry basket is overflowing again.

But there's good news.

This morning I decided that if I was going to be stuck in the house doing laundry, I might as well accomplish something else as well.  I had been wanting to try this new stew recipe from Fine Cooking, but it had to cook for 3 hours in addition to the prep time.  Clearly laundry day was the perfect day to embark on such a project.


The results were delicious, although this is not a project to be undertaken lightly.  There's a fair amount of prep work, including browning the meat which takes a long time.  There's chopping, sauteing, and finally the cooking.  As I said.  This is not a "I'm in the mood for stew so I think I'll just throw this together" kind of meal.  But it is really good, and perfect for a cold winter dinner.


And it's perfect for laundry day.


Recipe:  Italian-Style Beef and Porcini Stew
Fine Cooking Magazine, December, 2012

Ingredients:

3 lb. boneless beef shoulder roast, chuck roast, or top blade, trimmed of excess fat and cut into 1-1/2- to 2-inch pieces
2 oz. thick-cut pancetta, cut into 1/2-inch pieces
1 Tbs. grapeseed oil or vegetable oil; more as needed
Kosher salt and freshly ground pepper
1 medium yellow onion, coarsely chopped (about 1 cup)
2 medium celery stalks, coarsely chopped (about 1/2 cup)
1 medium carrot, coarsely chopped (about 1/3 cup)
4 medium cloves garlic, minced
1 Tbs. tomato paste
2 oz. dried porcini mushrooms, soaked in 2-1/2 cups warm water until soft, then chopped, soaking liquid reserved and strained
1 Tbs. minced fresh rosemary
1 dried bay leaf
1 cup dry red wine
3 cups peeled pearl onions
1 28-oz. can whole tomatoes, drained and chopped (discard juice)
1/4 cup chopped fresh basil

Directions:

Position a rack in the bottom third of the oven and heat the oven to 325°F.

Spread the beef on paper towels to dry for 10 to 20 minutes before browning. (You can use this time to chop the onion, celery, and carrot). If the meat is very wet, pat it dry.

In a 6-quart Dutch oven or other heavy-duty pot, cook the pancetta in the oil over medium heat, stirring occasionally, until browned but not crisp, 6 to 8 minutes. Using a slotted spoon, transfer to a paper-towel-lined plate and set aside. Do not wipe out the pan.

Heat the pancetta fat over medium to medium-high heat until shimmering hot. Season about one-third of the beef with salt and pepper and arrange it in a single layer in the pot (there should be at least 1/2 inch of space between the pieces). Brown well on at least 4 sides, adjusting the heat as necessary; each batch should take about 10 minutes to brown. Transfer the beef to a large bowl or rimmed baking sheet as it browns and repeat with the rest of the beef, seasoning with salt and pepper before browning. Once all of the beef is browned, remove the pot from the heat to let it cool for a few minutes.

Pour all but 2 Tbs. of the fat from the pot. (If there is not enough, add oil to equal 2 Tbs.) Return the pot to medium heat, then add the yellow onion, celery, and carrot. Season with a pinch of salt and pepper, and cook, stirring often and scraping the bottom of the pot with a wooden spatula, until the vegetables begin to soften, 5 to 6 minutes. Stir in the garlic, tomato paste, soaked porcini, rosemary, and bay leaf and cook, stirring occasionally, until fragrant, 1 to 2 minutes. Return the pancetta to the pot.

Add the wine, stirring with the wooden spatula to dissolve any browned bits on the bottom of the pot. Raise the heat to medium high and boil to reduce by about half, 5 to 8 minutes. Add the reserved mushroom soaking liquid. Bring to a boil.

Return the beef to the pot along with any accumulated juice. Lower the heat to maintain a simmer.

Crumple a 12x16-inch piece of parchment, then flatten it out. (Crumpling makes for easy handling.) Place the parchment directly on the surface of the stew, allowing the ends to come up the sides of the pot. Cover and put in the oven.


After 1 hour of stewing, add the pearl onions to the pot. Cover with the parchment and lid, return to the oven. After another 30 minutes, add the tomatoes. Cover with the parchment and lid, return the pot to the oven, and cook until the beef is fork-tender.

Stir in the basil. Degrease the stew by laying a clean paper towel over the surface of the stew and gently pushing it into all the bumps and dips, then quickly peeling it off. Repeat as necessary with more paper towels. Season to taste with salt and pepper and serve.


Sunday, January 13, 2013

Splatchcocked


Splatchcocked?  Yes, splatchcocked.  It's a fancy word for a butterflied chicken and it's a great way to roast one.

I am not a great roaster.  I have trouble telling if things are cooked through.  I know, I know.  We have meat thermometers for that.  Unfortunately for me, a thermometer doesn't always mean it's cooked.  I know this from personal experience.

The beauty of the splatchcocked or butterflied chicken is that it all cooks evenly, in one layer.  It really does make the whole thing a lot easier and is oodles easier to carve.   It's all good.

And, if you're lazy like I am, you can have your butcher do the honors and remove the backbone.  If you're good at that sort of thing, just use a poultry scissor and do it yourself.  After that, just flatten the chicken out, season well, and roast away.  Easy peasy.

The best thing about cooking this is way is that you get to tell people you splatchcocked a chicken.


Recipe:  Flat Roasted Chicken with Tiny Potatoes 
(Smitten Kitchen Cookbook, 2012)

Ingredients:

1 3- to- 3½- pound (11/3- to- 1½- kg) chicken
Table salt
Freshly ground black pepper
1½ pounds (680 grams) tiny yellow potatoes, peeled
2 tablespoons (30 ml) melted butter or olive oil, for potatoes
1 lemon, to finish
1 tablespoon minced fresh thyme leaves, to finish

Directions:

Preheat your oven to 450 degrees. Using a pair of sharp kitchen shears, remove the backbone of the chicken and discard it (or freeze and save it for making stock). Season the cavity generously with salt and freshly ground black pepper. Lay the chicken, breast side up, in a roasting pan (I adore my 12- inch cast- iron skillet for this; it works best with 3- pound birds), and gently pat the breast skin dry with a paper towel. Generously season the top of the bird with more salt and freshly ground black pepper. Nestle the potatoes around the chicken, and drizzle them lightly with butter or olive oil. Sprinkle the potatoes with salt and pepper.

Roast the chicken for 30 to 45 minutes, or until a thermometer inserted into the thigh registers 165 degrees. Toss the potatoes after about 20 minutes, so that they cook evenly. When the chicken has finished cooking, transfer potatoes to a large serving platter. Remove the legs, thighs, wings, and breasts from the spatchcocked chicken, and arrange them with potatoes. Squeeze juice of entire lemon over dish, then sprinkle with thyme. Serve with simply cooked vegetables. Eat at once.


Thursday, January 10, 2013

The First Time's the Charm


I've been wanting to make biscotti for a long time.  Ted seems to recall that I made them once or twice a couple of years ago, but I have no recollection of ever doing it.  Who knows.  These days, I have trouble remembering what I had for lunch, let alone what I did "a couple of years ago".

Yesterday I had lunch with my friend Mona.  She's recently mastered the croissant.  Yes, she's that friend.  The one who's really good at things.  Anyway, we got to talking about biscotti.  Of course, Mona mastered biscotti long ago so she was able to provide me with a good recipe and a little guidance.

"The dough is very sticky.  Use lots of flour."  Point taken.


"I like to turn them over halfway through the second baking," she told me.  Needless to say, there was no way I wasn't going to follow her advice.


So, after spinning class today, (yes, I go to spinning class), I got to work on the biscotti.  I meticulously followed the instructions, which I don't always do but really is a good idea when baking, and rolled out the logs on a floured counter.  Halfway through the second baking I flipped the biscotti over.

And you know what, they came out perfectly.  I mean, really perfectly.  They're gorgeous and they taste good; a little chewy in the center and crisp around the edges.  I'm so proud.


Now, having mastered chocolate chip biscotti, the world is my oyster.  I'm going to try my hand at some other biscotti recipes.  But not before talking to Mona first.

Recipe:  Chocolate Chip Biscotti
(Sweet Maria's Italian Cookie Tray, 1997)

Note:   This recipe makes enough biscotti for an army but they keep forever.  Follow Mona's advice and use lots of flour to roll out the logs and turn the biscotti over halfway through the second baking.

Ingredients:

1/2 pound unsalted butter, softened
1/2 cup granulated sugar
1 1/4 cups brown sugar
2 teaspoons vanilla extract
6 eggs
5 1/2 cups all purpose flour
2 tablespoons baking powder
1/2 teaspoon salt
2 cups miniature semi-sweet chocolate chips
1 cup coarsely chopped walnuts (optional)

Directions:

Preheat the oven to 350F.

In an electric mixer, cream the butter and sugars.  Add the vanilla and eggs.  Mix well.

Gradually add the flour, baking powder, and salt.  Mix on low speed until just blended.  Stir in the chocolate chips and walnuts, if desired.

Turn out the dough onto a lightly floured surface.  Divide the dough into four equal pieces.  Roll each piece into a loaf about 12 inches long.  Place loaves on a parchment lined cookie sheet, spacing them 3 inches apart.  Brush the tops of the loaves with water and sprinkle with a bit of additional sugar, if desired.

Bake for 20-25 minutes, or until golden brown.  Remove the cookie sheet from the oven.

Let the loaves cool.  Place the cooled loaves on a cutting board.  Using a sharp knife, slice each loaf diagonally into 1/2-inch-wide slices.

Place slices in a single layer on the cookie sheet.  Return to the oven for 12-15 minutes, or until lightly browned.  Remove the cookie sheet from the oven.  Cool toasted biscotti on a wire cooking rack.  Store in an airtight container.

Bakes approximately 45 cookies.


Wednesday, January 9, 2013

Misguided Ambition that Tastes Good


After years of setting out to accomplish all kinds of things, it's finally dawned on me why I never actually get anything done.  It's because I'm ambitious.  Yes.  I'm ambitious and that's not necessarily a bad thing, but it's not always good either.

The other day I was talking with my cousin Gloria, who was on her way to spend a couple of weeks in Florida.  We were talking about how, when we're away from home, we always come up with long lists of all the things we're going to do when we get home.  Do we ever actually get any of that stuff done?  No.  probably not, but it always seems like such a good idea when there's no expectation of getting it done promptly.

It's not that I'm lazy.  I get everything I need to do done.  It's just that I'm easily distracted and I get overly ambitious about all the other stuff.  Especially in the kitchen.

Ted recently bought me a Vita Mix blender.  Actually, to call this thing a bender would be a vast understatement.  It's more of a food preparation system.  The Vita Mix could make a smoothie out of rock and bone and as long as you threw in a banana and maybe a couple of berries, it would taste good.  Needless to say, the Vita Mix has created all kinds of new opportunities for me to be ambitious, including my recent foray into making homemade peanut butter.


Making peanut butter pales in comparison to my weeklong project of making gravlax.  Let's face it, if you want gravlax, it's easy enough to purchase.  Why in the world then, did I decide it was a good idea to spend a week curing my own?


Misguided ambition, pure and simple.

I will tell you this, however.  My home cured gravlax was something special.  It was tender and full of flavor.  Maybe what made it taste so delicious was the fact that I made it myself.  Who knows.  Does it matter?  The fact is that it was a special addition to the weekend's breakfasts.

And, after all, we all need to be ambitious once in a while.

Recipe:  Gravlax
(Adapted from Ina Garten)


Ingredients:

3 pounds fresh salmon, center cut
1 large bunch of dill, plus 1/4 cup chopped dill for serving
1/2 cup kosher salt
1/2 cup sugar
2 tablespoons white peppercorns, crushed
1 tablespoon whole fennel seeds

Directions:


Cut the salmon in half crosswise and place half the fish skin side down in a deep dish. Wash and shake dry the dill and place it on the fish. Combine the salt, sugar, crushed peppercorns, and fennel seeds in a small bowl and sprinkle it evenly over the piece of fish. Place the other half of salmon over the dill, skin side up. Cover the dish with aluminum foil. Place a smaller pan on top of the foil and weight it with some heavy cans. Refrigerate the salmon for at least 2 and up to 3 days, turning it every 12 hours and basting it with the liquid that collects.

Lay each piece of salmon flat on a cutting board, remove the bunch of dill, and sprinkle the top with chopped dill. With a long thin slicing knife, slice the salmon in long thin slices as you would for smoked salmon.

Tuesday, January 8, 2013

Hip Hip Hooray


I am a worrier.  It's my way.  I worry that Charlie isn't wearing socks in the cold Minnesota winter.  I worry that Kate didn't have enough to eat before she left to play three hours of tennis.  I worry about the big things and I worry about the little things  I'm an equal opportunity worrier.

So, I am sure you can imagine the anxiety with which I approached this school year.  You see, this is the year that Charlie will graduate from college, and this is the year that Kate will graduate from high school.  The only thing more anxiety producing than having two toddlers is having two seniors.

Along with these milestone events, comes the requisite anxiety about the next step.  Charlie will either need to  decide on graduate school or a job for after graduation, and Kate will need to find the college that's perfect for her.  Needless to say, I have worked myself into quite a state over all of this uncertainty.

But I have good news.

Charlie, who ultimately decided to put graduate school off for a couple years, has gotten himself a job starting in the fall after graduation.  And not just any job.  He's gotten himself a good job!  A job commensurate with his fancy schmancy education.  In New York, which is what he wanted.  Yay!

And Kate, well, she's gone and gotten herself into her first choice college, early decision no less.  Yes, Kate if off to the wilds of New England!  And to top it all off, aside from it being a great choice academically, all those years of tennis will pay off with a spot on the varsity tennis team in the NESCAC!

Life is good.   I can relax.  For a moment.


Monday, January 7, 2013

Sticky Fingers


The other night I tried a new stew that turned out to be, shall we say, less than inspiring.  Before I knew it was going to need a couple more tries, I was in search of something to serve with it.  I had meant to buy a nice bread when I was at the grocery store, but I didn't put it on the list and as such, I forgot to buy it.

I'm basically a stay-at-home person, especially in the winter.  I don't like being cold, and since it was freezing outside, there was absolutely no way in the world I was going to suit up again just to go out and buy a bread.  No way.  I needed to find something in my house that would do the job.

Since all I had was Kate's favorite "health" bread, I had to come up with something else.  Fortunately, I am almost pathological in my quest to keep a well stocked pantry, and I had enough ingredients to bake any bread I could come up with.  What I didn't have was time, so I had to come up with a recipe that required no rising.

That's what's great about Irish soda bread.  There's no yeast, just baking soda so there's no rising time.  It's perfect with stew (and since the stew was only so-so, it turned out to be the star of the show).  Irish soda bread is easy to make, albeit a little on a sticky side, and can be on the table in just over an hour, mixing and cooling, included.

Despite the fact that Kate doesn't like raisins "in things", I threw them in anyway because I thought they would be a nice complement to the stew.  And they would have been, had the stew been a better complement to itself.

But beware!  This dough is very sticky.  Make sure that when you dump the dough onto your counter that it's well floured.  I'm not talking a light dusting of flour.  Make sure there's lots of flour on the counter and on your hands as well.


This bread is not only perfect with hearty winter stews, it's also nice toasted in the morning.  That's if there's any leftover.

Recipe:  Irish Soda Bread
(Ina Garten)


Ingredients:

4 cups all-purpose flour, plus extra for currants
4 tablespoons sugar
1 teaspoon baking soda
1 1/2 teaspoons kosher salt
4 tablespoons (1/2 stick) cold unsalted butter, cut into 1/2-inch dice
1 3/4 cups cold buttermilk, shaken
1 extra-large egg, lightly beaten
1 teaspoon grated orange zest
1 cup dried currants or raisins
Directions
Preheat the oven to 375 degrees F. Line a sheet pan with parchment paper.

Directions:

Combine the flour, sugar, baking soda, and salt in the bowl of an electric mixer fitted with the paddle attachment. Add the butter and mix on low speed until the butter is mixed into the flour.

With a fork, lightly beat the buttermilk, egg, and orange zest together in a measuring cup. With the mixer on low speed, slowly add the buttermilk mixture to the flour mixture. Combine the currants with 1 tablespoon of flour and mix into the dough. It will be very wet.

Dump the dough onto a well-floured board and knead it a few times into a round loaf. Place the loaf on the prepared sheet pan and lightly cut an X into the top of the bread with a serrated knife. Bake for 45 to 55 minutes, or until a cake tester comes out clean. When you tap the loaf, it will have a hollow sound.

Cool on a baking rack. Serve warm or at room temperature.

Sunday, January 6, 2013

Looks Can Be Deceiving

Rice pudding isn't sexy... but it's so good.

The other day I was in the mood for rice pudding.  I know.  Rice pudding?  Who gets in the mood for rice pudding?  It's not a sexy pudding, like chocolate mousse.  It's not a trendy pudding like brioche bread pudding.

Nope.  It's just... Rice pudding.  Nice, comfortable, easy to eat, rice pudding.

My love affair with rice pudding is nothing new.  I used to order it every time we went to Junior's Deli on Westwood Boulevard in West L.A.  They made their pudding with golden raisins, and it was the absolute best thing ever.  My mother, who always made a big show of skipping dessert, would often try to sneak her spoon into my pudding, but I was quick, too quick, for her.  Junior's rice pudding was, for me, something to be savored.

I felt the same way about black and white cookies from the Beverlywood Bakery on Pico.  To this day, I am sure they are the gold standard of black and whites in Los Angeles.  Ditto the chocolate chip danish from Bea's Bakery.  Shortly after I moved to Pittsburgh, my friend Julie sent me a dozen Bea's chocolate chip danishes for my birthday.  That was, and still is, one of the very best presents I have ever received.

But back to the rice pudding.  This recipe is simple and just requires about 40 minutes where you'll want to be close to the stove.  It's important to give the pudding a nice little stir every couple of minutes, lest the milk  boils over and you end up with the mother of all messes on your nice, pristine stove.  (Yes, I know from which I speak...)  

I like this recipe for its simplicity.  It has just a couple of ingredients and it doesn't even matter what kind of milk you use.  (I would, however, skip the skim and go for something with a little milk fat.)  If you have a vanilla bean laying around, scrap the seeds into the mixture.  If not, just add the vanilla extract along with the almond extract once you've taken the cooked pudding off the stove.  Raisins are up to you.

I'm going to warn you that this pudding doesn't look like much.  Bust as with many things in life, looks can be deceiving.

Recipe:  Arborio Rice Pudding

Note:  Kate doesn't like raisins "in things" so I skipped them.  If you're using raisins, throw about 3/4 cup into the pot along with the milk, sugar, and rice and cook everything together.  The raisins will plump as the pudding thickens.

Ingredients:

1/2 cup Arborio rice
4 cups milk (both whole and reduced-fat have worked for me)
1/4 cup sugar
1/2 vanilla bean, split (or 1 teaspoon pure extract, added with almond at the end)
1 bay leaf
3/4 teaspoon almond extract

Directions:

In a large saucepan, place all the ingredients, except the almond extract. Bring it to a gentle boil and then turn it down to a gentle simmer, stirring occasionally to keep it from sticking to the bottom, for about 30 to 40 minutes. Taste the rice to check for doneness. The rice should be very soft and plump.

Take the pudding off the heat and stir in the extract(s). Pour into dessert bowls. You can serve it immediately or let it chill in the fridge. 

Thursday, January 3, 2013

Leftovers


I really shouldn't take Ted to the market.  It's a recipe for coming home with too much of whatever looks  good, and with a far bigger price tag than anticipated.  You see, for Ted grocery shopping is fun. Clearly this is because he rarely shops for anything.  

I am the designated shopper in our family.

Before you get all excited and envision Ted piloting the cart around the Giant Eagle, let me tell you that we weren't at the Giant Eagle.  We weren't at Costco either.  Nope.  We were at Penn Mac, a store filled with such deliciousness that even a confirmed non-shopper like Ted could find something to buy.

And buy he did.

Ted loves cheese.  I love cheese too, but I have more self control at the cheese counter than he does.  Again, this is probably because the thrill of buying cheese is not so great for me because I do it all the time.

But I digress.  Two or three cheeses into his cheese shopping spree, Ted asked if we needed "just one more".  Being the pleaser that I am, I said "whatever you want" and left to buy crackers.  (I find the best thing to do when Ted is "shopping" is to busy myself elsewhere in the store.)

When will I learn?  I should not have left Ted alone in the cheese department.  One more wedge of cheese turned into three more.  At a half pound each, that's a lot of cheese.

I would be lying if I did not admit that we enjoyed the cheese.  Several times.  But like all good things, we got sick of it.  How many times can you pull those same little nubs of cheese out of the refrigerator and still get excited?

Just as I was feeling overtaken by leftover cheese, I opened my email to find a recipe from one of my favorite blogs, Smitten Kitchen.  Deb had come up with something to do with all that cheese.  Yay!

Fromage Fort is deceptively simple.  Using your trusty food processor, you just grind up all those little bits of leftover cheese, along with some white wine and a little something green -- parsley, chives -- whatever.  And that's it.  Spread it on little toasts or crackers and you're done.  You could even use it as a spread on a sandwich, which would be decadent, but oh-so-yummy.

It's like the very best of the cheese counter, all in one little bowl.


Recipe:  Fromage Fort
(Smitten Kitchen, 2012)

From Deb at Smitten Kitchen, (because she says it so much better than I could):

"There are no rules as to how you put this together. Maybe you want more wine, or less. Maybe you want a heavy hand with salt and pepper, or you want the natural flavors of the cheese to shine through. If you’re using a lot of hard cheeses, a pat or two of butter will help smooth things out. Personally, I go easy on the garlic (one tiny clove) because it really blooms as the cheese sits, and I don’t want it to take over, but maybe you would like that. The only thing I think it important to keep in mind is that even a small amount of blue cheese tends to dominate. I used 25% of the weight in blue, and the result was essentially a blue cheese spread. Fortunately, we love them. But if that’s not your thing, limit it to just a small spoonful or a few crumbles."

Ingredients:

1 pound mix leftover cheese, harder cheeses grated, softer ones cut into chunks
A couple pats of butter, if using mostly firm cheese varieties
1 small clove garlic, minced, or more to taste
1/2 to 1 cup leftover white wine
1 to 2 tablespoons finely chopped fresh herbs, such as parsley, thyme, rosemary or chives
Salt and freshly ground black pepper to taste

Directions:

Blend cheese, butter (if using) and garlic in food processer until combined. Drizzle in wine with the motor running until you get your desired consistency — some like it completely smooth, others prefer chunks. Add herbs, pulsing the machine until just combined. Season to taste with salt and pepper.

Fromage fort can be used right away, or kept in the fridge until needed. In the fridge, it will thicken and age a little; the flavors will mingle and deepen.


Wednesday, January 2, 2013

Show Off Brownies


Over the holidays we went to my brother-in-law's house for dinner.  He's a pretty good cook for a guy, but I always feel kind of guilty the way the whole family just converges on him.  It's a lot of work, having the whole crew to dinner, so I always offer to help.  He usually turns me down, but this year he relented and said I could bring a side dish.

A side dish?  I know side dishes are a key part of any holiday meal, but they're side dishes.  That means they're to the side of the main course, and, of course, they're to the side of the dessert too.

Not to worry.  I made my side dish and it was delicious.  What could be bad when you combine potatoes, fennel and a whole lot of gruyere cheese?  In fact, my potato fennel gratin was downright decadent, in a side dishy kind of way.  It was so good that I've included the recipe just as an added bonus.

I had been longing (okay, longing is probably an overstatement), to make sea salt brownies.  I had initially planned to play around with Ina's Outrageous Brownies, but a stop at Mon Aimee Chocolat yielded more than just chocolate.

The lovely ladies of Mon Aimee gave me their favorite brownie recipe, one that features the use of 100% dutch process cocoa.  What could be better?  I left the shop with a boat load of chocolate and a plan.

The great thing about brownies is that they're easy and really just rely on using delicious ingredients.  This recipe for sea salt brownies is no exception.  They mix up in a jiffy, and they're so easy to make you could throw a batch into the oven in just a couple of minutes.  In fact, besides using top notch ingredients, the hardest part of this recipe is making sure you cut them into equal sized squares.


So, while you may all be battling through your New year's resolution to lose 5 pounds, tuck this recipe away for Valentine's Day.  It's not that far off and by then you may be in the mood to show off.

Recipe:  Mon Aimee Chocolat Sea Salt Brownies

Ingredients:

12 tablespoons unsalted butter
2 oz unsweetened chocolate, finely chopped (suggested Oban chocolate)
1/4 cup plus 2 tablespoons unsweetened dutch process cocoa (suggested Cacao Rouge cocoa)
2 cups granulated sugar
3 large eggs
1 1/2 teaspoons vanilla
1 cup flour
1/2 teaspoons flaked sea salt

Directions:

Preheat the oven to 350F.

Line a 9 inch metal pan with foil draping over the edges.  Lightly butter the foil.

In a saucepan, melt the butter with the unsweetened chocolate.  Pour the chocolate mixture into a large bowl.  One ingredient at a time, whisk in the cocoa powder, eggs, sugar, vanilla, and flour.  Combine until smooth and shiny.

Pour into the prepared pan and sprinkle the sea salt evenly over the mixture.

Bake in the center of the oven for 35 minutes.  Center will be a bit soft.  Let the brownies cool in the pan for at least an hour.  Then refrigerate for at least another hour, until the center is firm.  Peel off the foil and cut into 16 equal sized squares.


Recipe:  Potato-Fennel Gratin
(The Barefoot Contessa Cookbook, 1999)

Ingredients:

2 small fennel bulbs
1 yellow onion, thinly sliced
2 tablespoons good olive oil
1 tablespoon unsalted butter
2 pounds russet potatoes (4 large potatoes)
2 cups plus 2 tablespoons heavy cream
2 1/2 cups grated Gruyère cheese (1/2 pound)
1 teaspoon kosher salt
1/2 teaspoon freshly ground black pepper

Directions:

Preheat the oven to 350 degrees F.

Butter the inside of a 10-by-15-by-2-inch (10-cup) baking dish.

Remove the stalks from the fennel and cut the bulbs in half lengthwise. Remove the cores and thinly slice the bulbs crosswise, making approximately 4 cups of sliced fennel. Saute the fennel and onions in the olive oil and butter on medium-low heat for 15 minutes, until tender.

Peel the potatoes, then thinly slice them by hand or with a mandoline. Mix the sliced potatoes in a large bowl with 2 cups of cream, 2 cups of Gruyère, salt, and pepper. Add the sauteed fennel and onion and mix well.

Pour the potatoes into the baking dish. Press down to smooth the potatoes. Combine the remaining 2 tablespoons of cream and 1/2 cup of Gruyère and sprinkle on the top. Bake for 1 1/2 hours, until the potatoes are very tender and the top is browned and bubbly. Allow to set for 10 minutes and serve.


Tuesday, January 1, 2013

Back to Basics


When I started this blog, some 600 posts ago, my very first post was about oatmeal.  Oatmeal.  Imagine that.  From that humble bowl of oatmeal, a (mini) empire was born.  Okay, perhaps empire is an overstatement, but You Little Tarte was born and it's my (very) little empire.

You know what?  In this world you have to find your place, and my place is in my kitchen.  Cooking. And eating.  And reading cookbooks.  And then trying out all those delicious recipes.  Some are winners and some are not.  It doesn't matter because I always feel most like myself when I'm in my kitchen.

So here we are.  2013.

I thought it would be appropriate to kick the year off with another delicious breakfast recipe.  You just can't have too many of those.  Pancakes and French toast are great, but a good hot cereal recipe is just what the doctor ordered on a cold winter morning.

This recipe for Breakfast Polenta is from one of my favorite blogs/cookbooks, Food 52.  The ladies at Food 52 are masters of finding the best of the best and this recipe looks to be just that.


So, let's kick the new year off with a hearty bowl of hot cereal.  Empires were built from far humbler beginnings.


Recipe:   Blueberry Almond Breakfast Polenta
(Food 52, One Hungry Mama)

Ingredients:


4 cups milk
3/4 cups quick cook polenta
1/2 cup almond meal
4 tablespoons butter
1/3 cup honey
1 cup blueberries
1/2 teaspoon vanilla extract
Pinch cardamom (up to 1/4 teaspoon)
Creme fraiche or sour cream  (optional)

Directions:

Bring milk to a boil in a medium saucepan over high heat. Reduce heat to low and add polenta, whisking constantly until smooth. Add almond meal and continue whisking until the polenta thickens to a creamy consistency. Add butter and whisk until it melts completely. Turn heat off and whisk in honey, blueberries, vanilla and cardamom.

Serve with a dollop of creme fraiche or sour cream and an extra sprinkle of blueberries.