01 09 10

search you little tarte

Thursday, December 12, 2013

Show Off


For some bizarre reason I'm all about bark this holiday season.  It's not like I'm even a bark lover.  I mean, I like bark, but I don't dream about it at night.  Bark is good, but does it deserve two blog posts in a row?  Is bark so special?

All burning questions.

The truth is, I have no idea.

Yes, bark is delicious.  And I suppose it's special too.  But I think what I like best about bark is that I look like a real pro when I can trot out some lovely looking confection that most people pay small fortunes for.  It's a show off thing for me.

There, I said it.  I'm a show off.  So sue me.

I like that candy barks all rely on really top notch ingredients.  The best chocolate.  The best dried fruits and nuts.  And yes, even the best peppermints.  Bark is kind of... naked.  It's all right out there for you to see.  (Note:  If you eat too much bark you will not want to be naked anywhere.  Not even in the shower.  In the dark.  Alone.  In the house.)

So while I'm clearly a show off, I am also an ingredient snob.  I take it seriously when a recipe calls for really good olive oil,  or the freshest _____ you can find.  In the case of cooking, what you end up with is a clear result of what you started with.  If your ingredients aren't the best, well then whatever you cooked isn't going to taste the best either.

Having now established that I'm a show off who uses the best ingredients, this recipe for peppermint bark will be (unsurprisingly) both delicious and a show stopper.  It's easy (because I'm lazy sometimes), but packs a big punch as a gift or a little something to put in a gorgeous silver candy dish for after dinner nibbles either with guests or in front of Scandal (season finale tonight at 10)!!!

Just make sure to use the best chocolate you can find, and don't skimp on the peppermint either.  I used Peppermint Crunch, which is so delicious you might actually consider eating it by the spoonful. Since this recipe used only half the jar, there'll be plenty left over should you find that appealing.

Recipe:  You Little Tarte's Peppermint Bark

Note:  It's definitely worth splurging on your chocolate here.  Go for the best you can find.  You can actually make as much or as little of this bark (or any bark, for that matter).  Just make sure to use equal amounts of dark and white chocolate.

Ingredients:

12 ounces dark (bittersweet) chocolate
12 ounces white chocolate
Peppermint Crunch or crushed peppermint candies

Directions:

Line a 9x13 jellyroll pan with kitchen paper.

Melt the dark chocolate in a double boiler.  Once it is all melted, pour the chocolate into the prepared pan and spread into an even layer using an offset spatula.  Let the chocolate layer harden for about 2 hours.

Once the dark layer is hard, melt the white chocolate in a double boiler.  Pour the melted chocolate over the dark chocolate layer and smooth out into an even layer covering the dark chocolate.  Immediately sprinkle the Peppermint Crunch over the white chocolate, lightly pressing it into the candy so that it sticks.

Let the whole assembly harden for a couple of hours and that break apart into jagged pieces of different sizes.


Tuesday, December 10, 2013

Deck the Halls, etc.


It's the holiday season, which means that if you're the slightest bit social, you're probably either going to someone's house or having people over to yours.  This also means that you'll either need a hostess gift to take when you go to the aforementioned holiday soiree, or you'll need something suitably festive and chic to put out at yours.

Or maybe you're not doing anything special, but you still want to nibble on something festive and yummy because, after all, it is the holiday season.


This recipe is so easy is should be criminal.  In fact, it's so easy it barely requires a recipe.  In short, anyone can make this, even non-cooks and people who only enter the kitchen to open bottles of champagne.  Or people like Carrie Bradshaw, who used her oven for sweater storage.

Cheers!


Recipe:  French Chocolate Bark
( Ina Garten)

Ingredients:

8 ounces very good semisweet chocolate, finely chopped
8 ounces very good bittersweet chocolate, finely chopped
1 cup whole roasted, salted cashews
1 cup chopped dried apricots
1/2 cup dried cranberries

Directions:

Melt the 2 chocolates in a heatproof bowl set over a pan of simmering water.

Meanwhile, line a sheet pan with parchment paper. Using a ruler and a pencil, draw a 9 by 10-inch rectangle on the paper. Turn the paper facedown on the baking sheet.

Pour the melted chocolate over the paper and spread to form a rectangle, using the outline. Sprinkle the cashews, apricots and cranberries over the chocolate. Set aside for 2 hours until firm. Cut the bark in 1 by 3-inch pieces and serve at room temperature.


Tuesday, December 3, 2013

A Punch of Protein


Kate is all about healthy these days.  I think it's because she's eating all of her meals in the college dining hall.  Let's face it, no matter how hard the colleges try, it's just not like eating at home.  Where I cook everything.  With attention to detail.  And all the best ingredients.

Don't get me wrong.  Kate has always been all about the healthy.  She's the one who eats seaweed for a snack.  No offense to those of you who love seaweed, but... ick.

The point of all this is, that despite the best efforts of dining services, there aren't an overabundance of high protein, low calorie healthy options that taste good. 

This is where I come in.  Together with my close personal friend Google, I came up with these really tasty high protein (5 grams), low calorie (71 calories) pumpkin muffins.  They taste like fall and pack a real of punch of all there things that are good for you and none of the things that aren't. 

Recipe:  Moist Pumpkin Protein Muffins
(Adapted from dashingdish.com)

Note:  For fun, add 1/4 cup of chopped walnuts, almonds, or pecans.   You can even go wild and add the same amount of raisins or dried cranberries instead.  

Ingredients:

1 cup pumpkin puree
1/2 cup unsweetened applesauce
1/2 cup nonfat greek yogurt
3 egg whites
1 3/4 cup oats
1/4 cup protein powder
1/2 cup baking Truvia
1 teaspoon baking soda
2 teaspoon baking powder
1/4 teaspoon kosher salt
1 1/2 teaspoon cinnamon
1/2 teaspoon pumpkin pie or apple pie spice

Directions:

Preheat oven to 350 degrees. Line a 12-cup muffin pan with paper liners, or spray with non-stick cooking spray. Set aside.

In a blender, (or food processor), grind the oats until they are ground.  Add the remaining ingredients to the oats in the blender and blend until the mixture is smooth and well combined.

Divide mixture among the muffin cups, and place into pre-heated oven. Bake for 15-20 minutes, or until tops are lightly golden brown.*Note this batter is very moist, and a toothpick may not come out clean…Don’t worry it is baked through if the tops are golden brown!

Cool muffins in the pan.


Monday, November 11, 2013

A Little Love From Home

The care package:  Ready to go, complete with a postcard note.
Kate loves being away at college.  She loves living in the dorms.  She loves going to her classes (most of the time), and she loves all her new friends.  She even loves eating in Commons.  So far as I can tell, the only thing she misses is our dog Pebbles and my cooking.  Hey, I'll take what I get.

The other day we were talking and she mentioned how much she missed her favorite muffins.   All I needed was that little bit of encouragement.  Before long, I was hard at work in the kitchen whipping up a care package to feed Kate plus anyone she happened to pass on her way back to her dorm room.

I included all her homemade favorites:  Frank's Favorite Chocolate Chip Cookies, Banana Bread, and "Crack" Muffins.  There were enough baked goods to sink a ship, or in this case, to fill a large Priority Mail box.

I even threw in a pound of Kate's favorite rugulah from Corky & Lenny's.  I had picked up a pound when I was last in Cleveland thinking that I would have them waiting for her when she returned at Thanksgiving.   I even included some of her favorite sour gummy worms.  (Yuck!)

Anyway, I shipped off a big box of goodies.  Two days later, the box arrived to great reviews from Kate and all her friends.

Just a little something from home.

Recipe:  Frank's Chewy Chocolate Chip Cookies
(adapted from Cooks Illustrated)

Ingredients:

2 1/8 cups all purpose flour
1/2 tsp. kosher salt
1/2 tsp. baking soda
12 tbl. unsalted butter, melted and cooled
1 cup light or dark brown sugar
1/2 cup granulated sugar
1 large egg plus one egg yolk
2 tsp. vanilla extract
2 cups chips (chocolate, Mini M & M's -- whatever you like)
3/4 cup toasted walnuts (optional)

Directions:

Preheat the oven to 325. Line a couple of cookie sheets with parchment paper. Mix the flour, baking soda, and salt together in a bowl and set aside.

Mix the melted butter and the sugars until blended. (I do this by hand.) Mix in the egg, yolk, and vanilla. Add the dry ingredients and mix until just combined. Stir in the chips and nuts, if using.

Using a small scoop, (about 1 1/2 inches) scoop the dough on to the prepared cookie sheets. I usually put 9 cookies on each sheet.

Bake, reversing the cookie sheets' positions halfway through the baking, until the cookies are golden brown around the edges, about 15-18 minutes. Cook on the cookie sheets for a few minutes and then transfer to wire racks.

Makes about 2 dozen cookies

Recipe:  Banana Mocha Muffins aka "Crack" Muffins
(Baking for Friends, Kathleen King, 2012)

Ingredients:

2 1/2 C unbleached all-purpose flour
1 tsp. baking powder
1/2 tsp. baking soda
1/2 tsp. salt
1 Tbsp. instant coffee (or 1 1/2 tsp. instant espresso powder)
1 Tbsp. boiling water
1 1/3 C mashed fully ripe bananas (about 3 bananas)
1 1/4 C sugar
2 sticks salted butter, at room temperature
1 egg
1 C semisweet chocolate chips

Directions:

Preheat oven to 350 degrees (I did 350 degrees); grease a muffin tin tray.

Cream together the sugar and butter until fluffy.  Add the egg, mix again then set aside.   In another bowl add the coffee to the hot water; stir to dissolve.  Stir the mashed bananas into the coffee.  Add to the butter/sugar mixture and stir until incorporated; set aside.

Whisk the flour, baking powder, baking soda and salt together.  By hand, slowly mix the dry ingredients into the wet.  Fold in the chocolate chips.  Divide the batter evenly into the prepared muffin tin tray.

Bake for 25-30 minutes.  Allow to cool in pan for 10 minutes, remove from pan then cool completely on a wire rack.

Recipe:  Banana Bread
(M.S. Milliken & S. Feniger)

Ingredients:

1 cup granulated sugar
8 tablespoons (1 stick) unsalted butter, room temperature
2 large eggs
3 ripe bananas
1 tablespoon milk
1 teaspoon ground cinnamon
2 cups all-purpose flour
1 teaspoon baking powder
1 teaspoon baking soda
1 teaspoon salt

Directions:

Preheat the oven to 325 degrees F. Butter a 9 x 5 x 3 inch loaf pan.

Cream the sugar and butter in a large mixing bowl until light and fluffy. Add the eggs one at a time, beating well after each addition.

In a small bowl, mash the bananas with a fork. Mix in the milk and cinnamon. In another bowl, mix together the flour, baking powder, baking soda and salt.

Add the banana mixture to the creamed mixture and stir until combined. Add dry ingredients, mixing just until flour disappears.

Pour batter into prepared pan and bake 1 hour to 1 hour 10 minutes, until a toothpick inserted in the center comes out clean. Set aside to cool on a rack for 15 minutes. Remove bread from pan, invert onto rack and cool completely before slicing.


Sunday, November 10, 2013

The High and Low of Cooking


I fancy myself a cooking purist, but sometimes real life gets in the way.

Such is the case with chicken stock.  The stuff in the box is fine, but homemade chicken stock is so much better.  And it's not that hard to make.  What's difficult is finding the time to wait around for a couple of hours while the stock is simmering away on the stove.  And that's why I resort to boxed stock so often.  In a perfect world, I would only use homemade chicken stock in my cooking, but there's that nasty real world again.

My go-to chicken stock recipe is this one from Fine Cooking Magazine.  It produces an incredibly rich chicken broth, but it also has a fairly hefty hands on cooking time.  Delicious, but not a project for a busy day.

But in a moment of total kismet,  I came across this recipe for a rich chicken stock made entirely in the slow cooker.  Yes, the stock has to cook away for 8-10 hours on low.  But that's it.  It has just four simple ingredients (plus water, which isn't really an ingredient at all) and virtually no prep, unless you considering dicing an onion and smashing a garlic clove prep, which I do not.  It's barely a recipe at all.  And the prep is so quick that you can make a couple of quarts to squirrel away in the freezer for use at the holidays... and beyond. This chicken stock is the ultimate in low-effort-high-reward cooking, which I love, love, love.


Recipe:  Perfect, Uncluttered Chicken Stock
Smitten Kitchen / Barely adapted from Cook’s Illustrated

You Little Tarte's Note:  You might feel like you want to add more "stuff" to the slow cooker, like carrots and celery.  Wait and add that stuff later if you're going to serve this as chicken noodle soup, etc.  This is a perfect multi-purpose stock just as it is.  Trust me.

Yield: 3 quarts

3 pounds uncooked chicken wings
3 quarts water
1 large onion, chopped
1 garlic clove, smashed
1 teaspoon table salt, or more to taste*

Place all ingredients in a slow-cooker. Cook on LOW for 8 to 10 hours or HIGH for 4 to 5.  (I urge you to go the low for 8-10 hours route.)

Strain out chicken parts, onion and garlic. The stock is now ready to use, or, you might prefer to do as we do, and put it in the fridge to chill until any fat solidifies on the top. (Though, there is really very little here, and some might prefer to leave it.) Once defatted, you can now use it or freeze it until needed.

It's me again...

This time I froze the stock in 1 quart containers, but you can also store it flat by pouring 1 quart of the cooled stock into a gallon sized freezer bag.  I've done this in the past and it works great.  


Tuesday, November 5, 2013

Maximum Crunch


As I'm writing this entry, I'm enjoying a bowl of soggy Grape Nuts and a banana.  No, I didn't forget to eat my cereal while it was still crunchy.  I like my Grape Nuts (and all cereal)  soggy.  I pour on the milk and then let it sit for five or ten minutes -- marinating.  The cereal still has a just little, but not too much, crunch.  Cereal perfection.

Soggy cereal was almost the end of my relationship with Ted.  You see, Ted is a crunchy cereal guy.  I'm pretty sure that Ted would eat the cereal dry and follow it up with a glass of milk if it didn't look weird.  He likes 100% crunch-ability.

I do not.

But I digress.  Back before we were married, I once poured the milk on Ted's cereal before he was seated with his spoon poised to eat.  Honestly, I was just trying to be nice.  It's not like I had ever poured the milk on his cereal before (or since, for that matter).  I guess I just thought it would be a nice thing to do.  Obviously I was mistaken.

You would have thought I had suggested eating wallpaper paste for breakfast.  Well, in Ted's the-cereal-has-to-be-crunchy mind, I had in fact served him wallpaper paste for breakfast.  Needless to say, I have never again even removed the milk from the refrigerator lest the milk and his cereal comingle prematurely.

So, having established that cereal is a somewhat problematic breakfast food in my house, I'm passing along a recipe for the most delicious pumpkin waffles.  Ted made them for us on Sunday morning.  True to my soggy is better mentality, I let the syrup soak into the waffle before I ate it.  Ted, on the other hand, barely let the syrup touch the waffle before cutting into it, therefore insuring maximum crunch-ability.


Recipe:  Sugar-and-Spice Pumpkin Waffles 
Williams-Sonoma Breakfast Comforts cookbook

Ingredients:

2 cups all-purpose flour
1/3 cup sugar
2 tsp baking powder
1/2 tsp ground cinnamon
1/2 tsp ground ginger
1/2 tsp fine sea salt
5 Tbsp unsalted butter, cut into tablespoons, chilled
1 & 1/2 cups whole milk
1/2 cup canned pumpkin puree
2 large eggs

Directions:

In a food processor fitted with the metal blade, pulse the flour, sugar, baking powder, cinnamon, ginger, and salt together until combined.  Add the 5 tablespoons butter and pulse about 10 times, until the mixture looks like coarse bread crumbs with small pea-size pieces of butter.  Transfer to a large bowl.  (Or, alternatively, in a large bowl,  sift together the flour, sugar, baking powder, cinnamon, ginger and salt.  Using a pastry blender or 2 knives, cut the butter into the flour mixture just until the mixture looks like coarse bread crumbs with some small pea-size pieces of butter.)

In a medium bowl, whisk together the milk, pumpkin puree, and eggs.  Add to the flour mixture and whisk just until combined, but still a little lumpy.

If your waffle iron is not nonstick, lightly oil the grid.  Ladle some of the batter over the grid, close the lid, and cook until the waffle is golden brown, about 4 minutes.  Repeat with the remaining batter.

Thursday, October 31, 2013

Throwback Thursday

A long time ago, in a galaxy far, far away, I posted this blog and recipe for Halloween Bark.  Actually, it was 2010, but time sure flies when you're having fun.  I had forgotten about it until Deborah reminded me of this recipe and implored me to post it again.

So, in honor of Halloween and Throwback Thursday (how convenient), here goes...

Ready for Its Close Up


Food, like women, benefits from having a stylist.  As we all know, Jennifer Aniston doesn't wake up looking red carpet ready.  (Okay, so maybe the body is red carpet ready, but I'm sure she has puffy eyes first thing in the morning.  After all, she is over 40.)  Anyway, food, like Ms. Aniston, sometimes needs a little help to look its best.

Enter the stylist.  The food stylist can make burnt toast look sexy.

It is not often that I make something that is photo ready.  As hard as I try to "style" the food on the plate, it usually falls short.  So it was just amazing to me that the Halloween Peanut Butter and Toffee Candy Bark featured in this month's Bon Appetit came out ready for its close up.

First of all, it was so easy to make.  Melted chocolate and chopped candy.  All the good stuff.  Reese's Peanut Butter Cups, Heath Bars,  Butterfingers, Reese's Pieces, Peanut M & M's.  Need I say more?  (It's a good thing I made this at 8:00 in the morning.  It just didn't seem right to have a Reese's for breakfast, though I considered it.)  Melt, spread, sprinkle, press.  Done.  So easy.

And, the end result was as stunning as this year's Dior over the knee boots.  (Mind you, I do not have over the knee boots legs but my friend Deborah does.   She bought them and they're traffic stopping.)   This bark is that good.  In fact, that picture at the top. It's my bark.  It came out so great that Kate is breaking with the tradition of bringing Frank (see my post dated October 12, 2010) some of her Halloween candy after the holiday and bringing him this instead.  High praise from my daughter.  Hopefully Frank will admire the beauty of the bark and then the beauty of her forehand.

You can make this bark with any candy you like.  Maybe wait until Sunday (if you can wait that long) and see what the kids bring home from trick or treating!

Halloween Peanut Butter and Toffee Candy Bark
(Bon Appetit, October, 2010)

Ingredients:

1 pound bittersweet chocolate
3 2.1-ounce Butterfinger candy bars, cut into irregular 1-inch pieces
3 1.4-ounce Skor or Heath toffee candy bars, cut into irregular 3/4 inch pieces
8 peanut butter cups, each cut into 8 wedges
1/4 cup honey roasted peanuts
3 ounces high quality white chocolate
Reese's Pieces and/or yellow and orange peanut M & M's

Line a baking sheet with foil.  Melt bittersweet chocolate in heavy medium saucepan over low heat until melted and warm (not hot) to touch.  Pour chocolate onto foil: spread to 1/4 inch thickness (about 12x10 inch rectangle).  Sprinkle with Butterfinger candy, toffee, peanut butter cups, and nuts, making sure all pieces touch the melted chocolate.

Put white chocolate in heavy small saucepan.  Stir constantly over very low heat until chocolate is melted and warm (not hot) to touch.  Remove from heat.  Dip spoon into chocolate: wave from side to side over bark, creating zigzag lines.  Scatter Reese's Pieces and M&M's over, making sure candy touches melted chocolate.

Chill bark until firm, 30 minutes.  Slide foil with candy onto work surface: peel off foil.  Cut bark into irregular pieces.


Wednesday, October 30, 2013

Scare House


Some people love Christmas, and some people love Thanksgiving.  Ted loves Halloween.

Every year, Ted goes all out in decorating our house for Halloween.  He's spent the last 10 years collecting some of the most ghoulish decorations you've ever seen.  There's the rat eating the packaged brains.  And there's the life-size skeleton which hangs out of the window on the third floor of our house - swaying in the fall breeze.  Yup, we're the scary house on our block.


We've become kind of famous on our block.  Every year after our decorations go up, I can look out my front window to see a mommy out there with her little preschooler in a super hero costume inspecting all the scary decorations in broad daylight.  I guess mommy figures that if she can show her kid that it's all make believe, then he'll have the courage to come trick or treating at our house when it's dark.  It's actually pretty cute.

I have to admit, that in the light of day, the decorations aren't all that scary.  In fact, to me they look a little, shall we say, plastic.   But add a little dusk, and the house does look spooky, especially with that damn skeleton swaying back and forth.  It's all about the ambiance.


Kate hates Ted's Halloween decorations.  She thinks they're embarrassing.  "Honestly, dad. It's not like we have little kids living here..."  Maybe not, but Ted is is not one to let a little detail like that slow him down.

I love Halloween, but for a completely different reasons.  I love Halloween because of the candy.  I still remember the excitement of getting that haul of candy, and the thrill of finding a full size candy bar in my plastic jack-o-lantern.  It was the highlight of every Halloween.  I always said that when I grew up, I was going to be that house that gave out the big candy bars.  No fun size for me.  It's for this reason that we give out full size candy bars every year.  I wanted to pay it forward.

So, while we may be known in the neighborhood for having the scary house,  I'm happy to be known for something else too.  I'm happy to be the house that, years from now, kids remember because we gave out the full size candy bars.

Have a ghoulish Halloween.


Tuesday, October 29, 2013

Autumn Leaves


The best part about moving east is that now I have four seasons.  Back in California, we all got excited if the temperature dipped below 60.  Out came the turtlenecks and the boots.  After all, we had to stay warm.

It's funny how your perspective changes.  Now that I've lived in a cold climate for ten plus years, it takes far more than a 60 degree day for the boots to come out.  In fact, I often surprise my California friends by reporting that even on cold winter days (and by cold, I mean days around freezing), I don't wear anything more than a heavy sweater if I'm not going to be outside for long.  Cold isn't quite as cold as it used to be.

My absolute favorite time of the year is fall.  I love watching the trees change and feeling the crunch of the fallen leaves under my shoes.  I love those first few crisp days, when the sky is still blue but the air has a decidedly cooler feel.

I like how the food tastes like fall too.  I love the crispness of the apples and the smell of cinnamon.  The pumpkins and apples mimic the fall foliage and everything has a comforting rustic taste to it.  I find myself making loaf after loaf of pumpkin bread, along with apple everything: apple sauce, apple cake, apple pie, and baked apples.

So, when I come across a recipe that combines apples and pumpkin I feel obligated to try it.  And that's obligated in a good way.

This recipe comes from one of my favorite baking books: Kathleen King's Baking for Friends.  Not only do the recipes all work (which is not always a given...), they are all delicious.  In fact, there's not a recipe I've made from Baking for Friends that hasn't been really yummy.  I should also note that Ina Garten is one of the friends for whom Kathleen King bakes.  And if you're baking for Ina, it better be good.


Whip this cake up, pour yourself a nice cup of tea and settle in.  You'll taste autumn in every bite.

Recipe:  Pumpkin Apple Cake
Kathleen King, Baking for Friends

Ingredients:


Softened butter and all-purpose flour for the pan
2 cups unbleached all-purpose flour
1/2 cup wheat germ
1 teaspoon baking powder
3/4 teaspoon baking soda
1/2 teaspoon salt
1/2 teaspoon ground cinnamon
1/4 teaspoon freshly grated nutmeg
1/4 teaspoon ground cloves
1/4 teaspoon ground ginger
8 tablespoons (1 stick) salted butter, room temperature
3/4 cup granulated sugar
1/2 cup dark brown sugar, firmly packed
2 large eggs, room temperature
1 teaspoon vanilla extract
1 cup solid-pack pumpkin
2 Granny Smith apples, peeled, cored and cut into 1/2-inch dice (2 cups)
1/2 cup coarsely chopped walnuts
Confectioners' sugar for dusting

Directions:

Position the oven rack in the center of the oven and preheat the oven to 350 degrees F. Lightly butter and flour a 9 inch fluted or plain tube pan and tap out the excess flour.

In a medium bowl, whisk together the flour, wheat germ, baking powder, baking soda, salt, cinnamon, nutmeg, cloves, and ginger. In a large bowl, beat the butter with an electric mixer set on high speed until creamy, about 1 minute. Gradually beat in the granulated and brown sugars and beat until light and fluffy, about 2 minutes. One at a time, beat in the eggs, followed by the vanilla, scraping down the sides of the bowl as needed. Add the pumpkin and beat until combined. Add the apples and walnuts. With the mixer set on low speed, min in the flour mixture in thirds, scraping down the bowl as needed. Spread the batter in the prepared pan.

Bake until the cake is golden brown and a long bamboo skewer inserted in the center of the cake comes out clean, about 1 hour. Let cool in the pan on a wire cooling rack for 15 minutes. Invert the cake onto the wire rack and unmold. Turn right side up and cool completely.

To serve, sift confectioners' sugar over the top and cut into wedges


Monday, October 28, 2013

Date Night

I took this picture of dates when we were at the Woodrow Wilson Market in Paris.
I'm making an effort to at least look as though I'm into this cooking for two thing.  Back when it was just two of us, before kids, before private school, carpools, sports, and enrichment classes, I never cooked.  We went out or we just made it work.  Mostly I think we went out.  I never really cooked for just the two of us.  We were young.  We were energetic.  We had a ton of disposable income.

It wasn't until I was retired from my paying career that I actually learned to cook.  There was no cooking honeymoon period.  I went from zero to a family of four and no nanny in the time it took me to say "I quit" to my bosses at Wells Fargo Bank.

Now, after years of cooking for a family and assorted dinner guests, I find myself in unfamiliar territory: cooking for two without ending up with a freezer full of leftover that most likely we'll never eat.  As Ted has become fond of saying, "It's just you and me, babe".

I'm back to the drawing board.  I don't want to end up with vats of coq au vin, but I also don't want to succumb to the two little chicken breasts mentality.

The really nice thing about pork tenderloin is that they are small.  One small  tenderloin is just the right size for a meal, with just a couple of slices left over for lunch.  The date and cilantro relish in this recipe really dresses up a very simple roasted tenderloin and makes it feel more gourmet than it is.

After all, it's just the two of us, babe.


Recipe:  Pork Tenderloin with Date and Cilantro Relish
Bon Appétit Magazine, November, 2013

Ingredients:

3 tablespoons olive oil, divided
1 pork tenderloin (about 1½ lb.)
Kosher salt and freshly ground black pepper
⅔ cup Medjool dates (about 4 oz.), cut into small pieces
2 tablespoons fresh orange juice
3 tablespoons chopped fresh cilantro plus leaves for serving

Directions:

Preheat oven to 425°.

Heat 1 Tbsp. oil in a large ovenproof skillet over medium-high heat. Season pork with salt and pepper and cook, turning, until browned on all sides, 6–8 minutes. Transfer skillet to oven and cook pork until an instant-read thermometer inserted in thickest part registers 140°, 10–15 minutes. Transfer pork to a cutting board and let rest at least 5 minutes before slicing; set aside pan drippings.

Toss dates, orange juice, reserved pan drippings, 3 Tbsp. chopped cilantro, and remaining 2 Tbsp. oil in a small bowl; season with salt and pepper. Spoon relish over pork and top with cilantro leaves.


Sunday, October 27, 2013

Thai One On

My Thai Beef with Basil... Picture Perfect
I'm not usually much for Asian food.  My friend Lisa is always making stir fry dishes but I never do.  In fact, I only recently added sriracha to my pantry.  Both Ted and Charlie think my lack of interest in Asian cooking is my greatest failing.  I figure that if that's my greatest failing, I'm in pretty good shape.

Here's the thing about Asian cooking.  The recipes call for about a zillion ingredients, most of which I don't possess.   I mean, I have soy sauce, and fish sauce, and chili sauce.  And now I have sriracha which, by the way, is delicious.  But it seems like every recipe I come across calls for every sauce imaginable.  It's just too much measuring, mixing, and stirring for me.

But I'm a pragmatic kind of gal and I have to cook dinner every night.  Sometimes I just have to reach into the deep recesses of my pantry and go Asian.

Last night was one such night.  I had been looking through (actually I was searching desperately through) my new Bon Appétit magazine for something... anything... to make for dinner.  And there it was: Thai Beef with Basil.  Quick and easy, at least according to the 25  minute time estimation, and I was sold.  The fact that I also possessed all the ingredients without having to google for substitutions, made me jump with joy.  (Okay, I didn't actually jump, but I was happy).

 Bon Appétit knows their stuff.  The recipe took about 25 minutes start to finish, and came out looking an awful lot like the picture in the magazine.  Score one for me!

Not only was the Thai Beef with Basil pretty, it was delicious.  Quick, easy, delicious.  What more could I ask for, other than a shorter ingredient list?

Recipe:  Thai Beef with Basil
Bon Appétit Magazine, November, 2013


Ingredients:

2 tablespoons vegetable oil, divided
6 garlic cloves, thinly sliced
2 red chiles, thinly sliced, seeded for less heat if desired, divided
1 pound ground beef
Kosher salt and freshly ground black pepper
½ cup low-sodium chicken broth
3 cups fresh basil leaves, divided
2 medium carrots, julienned or coarsely grated
2 scallions, thinly sliced
4 tablespoons fresh lime juice, divided
2 tablespoons reduced-sodium soy sauce
1 tablespoon fish sauce (such as nam pla or nuoc nam)
1 teaspoon sugar
Steamed rice and lime wedges (for serving)

Directions:

Heat 1 Tbsp. oil in a large skillet over high heat. Add garlic and 1 chile and cook, stirring, until fragrant, about 30 seconds. Add beef, season with salt and pepper, and cook, breaking up with a spoon and pressing down firmly to help brown, until cooked through and nicely crisped in spots, 8–10 minutes. Add broth and 2 cups basil and cook, stirring, until basil is wilted, about 2 minutes.
Toss carrots, scallions, 1 Tbsp. lime juice, and remaining chile, 1 cup basil leaves, and 1 Tbsp. oil in a small bowl.

Mix soy sauce, fish sauce, sugar, and remaining 3 Tbsp. lime juice in another small bowl until sugar dissolves.

Top rice with beef and slaw and drizzle with soy dressing. Serve lime wedges alongside for squeezing over.


Thursday, October 24, 2013

A Tale of Two Banana Breads


I know you've probably had enough of the banana breads.  I understand, but I love banana bread.  I am forever in search of the perfect banana bread recipe.  It's a sickness.  I know.

A couple of weeks ago I made Smitten Kitchen's Jacked Up Banana Bread.  I brought it to Charlie when we went to see him in New York.  Of course he loved it, because aside from Kate, Charlie is my best customer.  And besides, it had booze in it and what 22 year old guy doesn't like a little alcohol with his banana bread?

But rotten bananas wait for no one, and I once again found myself with a bunch of specked fruit.  Yes, I could have waited and made banana pancakes over the weekend, but those bananas were so ugly that I needed to take action stat.

I had been thinking about trying another recipe from Smitten Kitchen that was a healthier version of a classic banana bread.  (Disclaimer: I believe anything that calls for whole wheat flour and some kind of grain classifies it as "healthy" whether it is or not.)  This particular loaf included millet, which I like because of its crunch.  And, instead of cooking or olive oil, the fat called for was coconut oil, which I absolutely love.

After returning from the gym this morning, I set to work making the banana bread.  I always figure that if I've gone to the gym I deserve a little something special, just to replace all those calories I worked so hard to burn.  God forbid I ever end the day net ahead.  Oh well.

The good news is that this "healthier" banana bread was just as delicious as the boozy one, albeit probably not as appealing to my son.  Not to worry.  It won't go to waste.  I cut myself a nice little piece for breakfast while it was still warm.


Recipe:  Crackly Banana Bread
Smitten Kitchen

Ingredients:

3 large ripe-to-over-ripe bananas
1 large egg
1/3 cup (80 ml) virgin coconut oil, warmed until it liquefies, or olive oil
1/3 cup (65 grams) light brown sugar
1/4 to 1/3 cup (60 to 80 ml) maple syrup (less for less sweetness, of course)
1 teaspoon (5 ml) vanilla extract
1 teaspoon (5 grams) baking soda
1/4 teaspoon table salt
1 teaspoon ground cinnamon
1/4 teaspoon freshly grated nutmeg
Pinch of ground cloves
Salt
1 1/2 cups (180 grams) whole-wheat flour
1/4 cup (50 grams) uncooked millet

Directions:

Preheat your oven to 350°F and butter a 9×5-inch loaf pan. In the bottom of a large bowl, mash bananas with a potato masher or the back of a wooden spoon until virtually smooth but a few tiny lumps remain. Whisk in egg, then oil, brown sugar, syrup and vanilla extract. Sprinkle baking soda, salt, cinnamon, nutmeg and cloves over mixture and stir until combined. Stir in flour until just combined, then millet.

Pour mixture into prepared pan and bake until a tester comes out clean, about 40 to 50 minutes. Cool loaf in pan on rack.


Wednesday, October 9, 2013

The Mother Mode


Every once in a great while, I wake up in the morning and there's no niggling feeling of anxiety left over from the day before.  Everything is in its place and everyone is in a good place.  Such is the case in our family at the moment.

Charlie, living in New York and working at his first real job, is not only doing well but has returned to being the wonderful young man I thought I was raising.  (Let's just say that the college years were not necessarily a good thing for our overall relationship.)  Kate is happily finding her way at college.  She's making friends, managing the work, and even winning tennis matches.  Ted and I are both chugging along, which after my summer of radiation, is welcome news.

Yup, life is good.  I almost hate to jinx it by saying anything.

Even the Pirates have had their best season in more than 20 years.  I'm not a big baseball fan, but Ted and the kids are diehard Pirates fans.  In fact, they are somewhat resentful of all the band wagon fans that have recently been claiming their devotion to the Bucs.  Kate has been live streaming games on her computer up at school, Ted has season tickets, and Charlie even made it home over the weekend to see the Pirates beat the Cardinals in game 3 of the series.

All is well, despite the fact that the Pirates lost game 4 and it's do or die for them today.

But I digress.  Charlie was here over the weekend and that allowed me to kick into full mothering mode.  And what, I ask you, is more mothering that a good apple cake?  According to my friend Mona, every mother has an apple cake -- at least every mother we know.

I've made almost as many Jewish apple cakes as I have pound cakes.  They're all basically the same. -- batter, apples, batter, apples.  And they're all good.  But even taking that into account, I am still making new and different apple cakes just to challenge myself.

This time I decided to give Smitten Kitchen's Mom's Apple Cake a whirl.  Quick, easy, and of course delicious.  Really delicious.  What made this one so much better than apple cakes of the past?

The apples.  Plain and simple.  It was the apples.

Recently I have been receiving these really ugly, pockmarked little apples in my CSA basket.  These apples may be ugly, but they are the most delicious apples I've had in a long time. They taste like... apples.  Not red fruit, but apples the way they're supposed to taste.

So, Charlie was home and I made him an apple cake.  Try this one or try your favorite recipe, but look for the best ugly little apples you can find.  I promise you something special.


Recipe:  Mom’s Apple Cake
Smitten Kitchen

Ingredients:

6 apples
1 tablespoon cinnamon
5 tablespoons sugar

2 3/4 cups flour, sifted
1 tablespoon baking powder
1 teaspoon salt
1 cup vegetable oil
2 cups sugar
1/4 cup orange juice
2 1/2 teaspoons vanilla
4 eggs

Directions:

Preheat oven to 350 degrees. Grease a tube pan. Peel, core and chop apples into chunks. Toss with cinnamon and sugar and set aside.

Stir together flour, baking powder and salt in a large mixing bowl. In a separate bowl, whisk together oil, orange juice, sugar and vanilla. Mix wet ingredients into the dry ones, then add eggs, one at a time. Scrape down the bowl to ensure all ingredients are incorporated.

Pour half of batter into prepared pan. Spread half of apples over it. Pour the remaining batter over the apples and arrange the remaining apples on top. Bake for about 1 1/2 hours, or until a tester comes out clean. Cool completely before running knife between cake and pan, and unmolding onto a platter.

Friday, September 27, 2013

Another Fix


When you write a food blog, you're constantly searching for inspiration.  Actually, it's not inspiration as much as it is a new take on things you've made 100 times already.  At least that's the case for me.

My family is either blessed or cursed with the fact that they rarely eat the same thing twice.  Or at least twice in a year.  Some families have the same roast chicken recipe for dinner every Friday night.  It's the old "if it's not broke, don't fix it" approach.  In our house, it might be a roast chicken, but you can bet that it's a different roast chicken every time.

I'm like an addict.  I'm constantly looking for my next score, although my drug of choice is a new take on roast chicken, or mashed potatoes, or in this case, banana bread.


Two things happened this morning.  One is that I packed a weekend bag because we are going to New York to see Charlie.  I'm very excited about this because we haven't seen him since he moved there back in early July.  A lot has happened since then -- most importantly, he's become a member of the working world.  Any parent out there will know what I mean when I say that it's one thing to talk on the phone, and quite another to actually have a face to face conversation, so I'm very happy to get to do that.  It's also his 22nd birthday and we are thrilled to get to spend it with him.

The other thing that happened was that I noticed that I had four really ripe bananas.  This, as you might imagine, is not an unusual or particularly unique occurrence in my house.  But, in a true case of serendipity, our visit to see Charlie (who loves everything I bake), and my overripe bananas combined to create... an opportunity to try another banana bread recipe!

Since I make banana bread all the time, I am always in search of new recipes for said banana bread.  I decided to consult with my good friend Google to see if there were any recipes out there that I may have missed the other 10 trillion times I looked for banana bread recipes.

Hard as is it for me to believe, I realized that I have never made Smitten Kitchen's Jacked Up Banana Bread.  This didn't seem  possible because I love, love, love Smitten Kitchen.

Of course it was divine, and of course you should all make this.  It's a fairly straightforward recipe except that it calls for bourbon in the batter.  What could be better?  What could appeal to a young 20's guy more?  Bread with booze -- all your major food groups.

Happy birthday Charlie.

Recipe:  Elise’s Friend Heidi’s Friend Mrs. Hockmeyer’s Banana Bread, As Jacked Up by Deb
Adapted from Simply Recipes and Smitten Kitchen

No need for a mixer for this recipe — need I say more?

Ingredients:

3 to 4 ripe bananas, smashed
1/3 cup melted salted butter
3/4 to 1 cup light brown sugar (depending on the level of sweetness you prefer, I always use the smaller amount)
1 egg, beaten
1 teaspoon vanilla
1 tablespoon bourbon (optional)
1 teaspoon baking soda
Pinch of salt
1 teaspoon cinnamon
1/2 teaspoon nutmeg
Pinch of ground cloves
1 1/2 cup of flour

Directions:

Preheat the oven to 350°F. With a wooden spoon, mix butter into the mashed bananas in a large mixing bowl. Mix in the sugar, egg, vanilla and bourbon, then the spices. Sprinkle the baking soda and salt over the mixture and mix in. Add the flour last, mix. Pour mixture into a buttered 4×8 inch loaf pan. Bake for 50 minutes to one hour, or until a tester comes out clean. Cool on a rack. Remove from pan and slice to serve.


Thursday, September 26, 2013

L'American

Note the all black motif...
French women know how to put together an outfit.   I'm certain that they know lots of other things too -- like how to run major corporations and how to properly slice a melon -- but the fact remains that they always look smashing doing whatever it is they're doing.  Even if it's just walking down the street..

How do they do it?  

My friend Deborah is as close to a Parisian woman as I'll ever come.  She lived in Paris for a couple of years during college, and she's remained très chic ever since.  Not being a complete idiot, I decided to check in with her about what to pack for my trip.  I figured that even though there would be no mistaking me for anything but American, I could look like a  American with a certain amount of je ne sais quio.

Apparently, according to Deborah, the key is black.  Lots of black.  Okay.  I can handle black.  I live in a city where getting dressed up means wearing black pants.  Year round.  And I have a lot of black clothes because they're slimming.  So I'm good on the black.

Scarves are the main staple in the accessorizing area.  This was good news to me as well.  For years I have been acquiring the most beautiful scarves, most of which I never wear.  In fact, Charlie's favorite place to shop back when Ted was financing the presents, was Hermes.  As a result, I have a drawer full of spectacular Hermes scarves.  You can't get more French that that.
A French woman's best friends...  Foulards


So,  I had the black and the scarves covered.  The rest was easy.  White shirts and black shirts.  Oh, and a navy shirt.  Apparently it's very chic to wear black and navy.  I always think of black and navy as being a little bruise-like, but I went with it.  Black shoes, dress, jacket, and bag and I all was set to be French-ish.

I am not going to say that anyone mistook me for anything but an American, but at least I wasn't wearing running shoes or a fanny pack.  Or mom jeans.  (I actually did see that actual combination.) 
Not a Parisian
And you know what? I got it all into a carry on bag.  No checked luggage for me, which also is apparently very chic.

And the black and navy? It worked too.

Now for today's recipe.  Salads are a big deal in France.  They're on every menu in every cafe at lunchtime.  But they're not the big, hulking salads Cheesecake Factory serves.  They're deceptively simple and so delicious.

One day for lunch I had this French take on the Caesar salad.  I didn't take a pictures -- which is shocking because I took pictures of everything -- so you're going to have to visualize until I can make this at home and take a picture then.  Just be creative but remember, less is more.

Recipe:  Caesar Salad with Chicken

Ingredients:

2 heads of baby romaine lettuce, cut in half lengthwise but left in tact
4 slices of boneless skinless roasted chicken breast
4 anchovies
About 1/8 cup of shaved parmesan
2 hardboiled eggs, sliced 
1 medium tomato, quartered
Croutons
Kosher salt and pepper to taste
Caesar dressing (see below)

Directions:

Lay the 4 pieces of romaine across an oval or rectangular plate, leaving space in between each piece.  Attractively and at a slight angle, lay the roasted chicken slices over the lettuce.  Lay the anchovies over the chicken, and fan the hardboiled eggs and the tomato along the edges of the plate.  Sprinkle the parmesan and the croutons (not too many) around the salad, and then drizzle the dressing lightly.  Salt and pepper to taste.

Recipe:  Caesar Dressing
Fine Cooking

Ingredients:

1/4 cup canola oil
1/4 cup extra-virgin olive oil
6 oil-packed anchovies
4 large cloves garlic, smashed and peeled
1 large egg yolk
2 Tbs. fresh lemon juice
2 tsp. Dijon mustard
1 tsp. finely grated lemon zest
1/2 tsp. Worcestershire sauce
1/4 tsp. kosher salt
1/4 tsp. freshly ground black pepper
1 oz. Parmigiano-Reggiano, finely grated (1/2 cup)

Directions:

Note: This recipe contains a raw egg. If that’s a concern, use a pasteurized egg.

In a liquid measuring cup, combine the canola and olive oils. Put the remaining dressing ingredients except the Parmigiano in a blender and blend until thoroughly combined. With the motor running on medium high, carefully pour in the oils in a slow, steady stream. The dressing will emulsify as soon as all of the oil is incorporated. Stop the motor, add the Parmigiano, and quickly blend to combine. (You can store the dressing, tightly covered, in the refrigerator for up to 3 days.)

Tuesday, September 24, 2013

La Bonne vie à Paris


As you may recall, Ted and I had our 25th wedding anniversary over the summer.  For years, or at least for the last couple of years, we have been talking about how to appropriately celebrate such an important event.

Nice present.  Check.

Celebratory dinner out. Check.

France.  Vérifier deux fois.

Yup.  We went to France for our 25th anniversary and it was très magnifique.

I have to start by saying that Ted is an excellent travel agent.  He has been planning our trips, without the aid of a travel agent, for years.  He's planned trips to such far flung destinations as the Amazon and Angkor Wat.  He's planned musical tours of the deep south.  Ted has planned college visiting trips, and he has planned camp visiting weekends.  He is our own personal tour guide.

The Rosenthals are a touring family.  While other families may elect to spend a week on a beach somewhere, our family is up and out with the sun, taking in the sights and tastes of wherever we are.  Even if it's a beach.  As you might imagine, this has lead to a lot of complaining from the kids about vacations not being well, vacation-y.

But here's the good news.  The kids didn't come with us.  Charlie is living and working in New York, and Kate is at college in New England.  As a result, we were free to tour to our heart's content.  But the funny thing is, we didn't.  Ted and I have been to France many times, so this time we did some light sightseeing and sort of... hung out.

And it was divine.  We ate (too much) and drank (way too much).  We saw beautiful art (never enough) and stopped into far too many shops.  Needless to say, it was très fantastique.

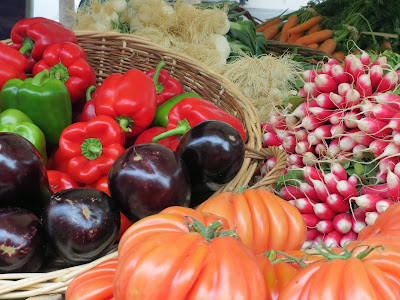
One of my favorite things we did was go to a street market in Paris.  The French are all about their ingredients, and nowhere is that more evident than in their gorgeous street markets.  The produce is absolutely delectable.  The fruit is more vibrant, and you can almost taste the vegetables they're so stunning.  The cheese, well... it's France.  Need I say more?

So, I'm going to start my little overview of France with some pictures from the market and a couple of recipes inspired by those magnifique ingredients.


Bon appétit.


Recipe:  Pasta with Bacon, Rosemary, and Very Ripe Tomatoes 
Melissa Clark, Cook This Now, 2011

 Ingredients:

3 ounces bacon, sliced into 1/2-inch pieces
1 large, bushy sprig fresh rosemary
1 fat garlic clove, minced
Pinch crushed red pepper flakes
Kosher salt and freshly ground black pepper
2 very large tomatoes (or 3 medium, a mix of yellow and red is nice), cored and chopped
8 ounces pasta shape of choice
Soft herbs if you want this to look pretty

Directions:

Bring a pasta pot of salted water to a boil. Meanwhile, in a large skillet over medium heat, cook the bacon until brown, about 5 minutes.  Transfer the bacon to a paper towel-lined plate, leaving the grease in the pan. Add the rosemary, garlic, red pepper flakes, salt and pepper to the skillet and cook until garlic is lightly browned, 1 to 2 minutes. Add the tomatoes and let the sauce simmer until the pasta is cooked. Season aggressively with more salt and black pepper.

Cook the pasta until al dente. Drain.

Serve the sauce on the pasta and toss with the bacon and herbs if you like.

Recipe:

Green Bean Salad with Walnuts and Walnut Oil
Melissa Clark, Cook This Now, 2011

Ingredients:

1/3 cup walnuts
3/4 pound haricot verts, trimmed
2 teaspoons finely chopped shallot
1 1/2 teaspoon sherry vinegar
1/4 teaspoon kosher salt, plus additional to taste
1/4 teaspoon freshly ground black pepper, plus additional taste
1 1/2 tablespoon walnut oil
3/4 teaspoon chopped tarragon

Directions:

Preheat the oven to 350.  Spread the walnuts on a baking sheet.  Toast until gold, 7 to 10 minutes,  Let the nuts cools, then chop them coarsely.

Bring a large pot of salted water to a boil.  Drop in the green beans and cook until bright green and just shy of being crisp tender, 1 to 2 minutes.  Plunge into an ice bath and then drain well.

In a small bowl, whisk together the shallot, vinegar, salt and pepper.  Whisk in the walnut oil and the tarragon.

In a bowl toss together the walnuts, reserving a few for sprinkling on top, the green beans, and dressing.  Taste and adjust the seasonings.  Serve at room temperature with the reserved walnuts sprinkled on top.


Tuesday, September 10, 2013

Hot Pepper


I am still dealing with this spring's poor judgment.  That's right.  I am still getting two CSA baskets every week and as such, I am still overwhelmed by fresh produce.  I should also note, that if kale is in season at one farm, it's a sure bet that kale will be in season at all the other farms that also grow it.  Needless to say, there's a lot of duplication going on around here.

Such is the case with this week's over abundance of banana peppers.  Truthfully, I don't think I've ever even eaten a banana pepper, and now between my two CSA's, I have 12 to use before they go bad.

What to do?  What to do?

Stuffed peppers.  That's what to do.


I've stuffed other kinds of peppers, but never banana peppers.  And I've seen stuffed banana peppers on menus in restaurants, but I've never tried them.   I'm an adventurous gal and there's no time like the present.

An exhaustive review, (well, not so exhaustive -- more a perusal), of Google reveals that there are as many variations on the theme of stuffed banana peppers as there are on marinara sauce.  Each offered it's own little twist, but basically all encompassing the same general ingredients: sausage, egg, bread crumbs, and onion.  Think of a stuffed pepper as kind of a meatball stuffed into a pepper.

Having now been armed with stuffed pepper basics, I decided that this was area where I could just wing it.   Since there's really no cooking chemistry involved in making stuffed peppers, I went through my pantry and came up with my own take on this classic.  I don't know how classic my peppers were, but they were certainly tasty.

So here goes.  Let me know what you think.

Recipe:  Stuffed Banana Peppers

Ingredients:

8 banana peppers
1 pound turkey italian sausage
2 tablespoons olive oil
1/2 cup onion, minced
2 cloves garlic, minced
1 teaspoon dried oregano
1 teaspoon dried basil
1 teaspoon kosher salt
1/2 teaspoon freshly ground black pepper
1/4 cup dried italian bread crumbs
2 cups marinara sauce
1/2 cup shredded ricotta salata

Directions:

Preheat oven to 350F.

Cut off the tops of the peppers, and remove the ribs and seeds.  (I use a grapefruit knife to do this.)  Chop edible portions of the tops, set aside.

Heat olive oil in a large skillet.  Cook the reserved pepper, onion, and garlic until tender, 3 to 4 minutes.  Remove from heat.

In a large bowl, combine the sausage (remove casings if the sausage came in links), egg, bread crumbs, salt, pepper, oregano, and basil.  Add the reserved cooked vegetables.  Mix well, making sure to combine all the ingredients evenly.

Using your hands (or a sausage stuffer if you have one), gently stuff the sausage mixture into the hollowed out peppers, taking care to completely fill the cavity.  Spread about 1/3 cup of the marinara sauce in the bottom of the baking dish and place the stuffed peppers in the dish.  Cover the peppers with the remaining marinara, and sprinkle the top with the ricotta salata.

Bake for 30 minutes or until the sausage is cooked, the peppers are soft, and the whole assembly is bubbling.


Sunday, September 1, 2013

Cookie Monsters


With both of my kids out of the house, there's probably not going to be a lot of cookie baking going on around here.  Don't get me wrong.  I would love for there to be a lot of cookie baking going on, but my waistline would not be quite so appreciative.  So I will have to reserve my cookie production to those times when one or both of the kids come home to visit.

All of this is not to say that I didn't get a last batch in before Kate left.  The key was that I didn't really want them left after she was gone, so they had to be really good.  In fact, they had to be so good that the cookie jar would be empty concurrent with Kate's departure to college.

The good news was that on our way up to Maine, we were stopping off for lunch and a visit at Ted's Aunt Ann's house in Cambridge, MA.  Me being me, I couldn't arrive empty handed so these cookies made their way northeast with us.

These cookies are a perfect example of finding recipes in the least likely places.  I found this recipe on Facebook.  Who knew that amongst all the nonsense that everyone posts on Facebook, there would be a recipe worth pursuing.

What made this recipe interesting to me was the inclusion of instant pudding mix in the batter.  Back in the day, my mother's signature cake was a "Like Miss Grace's Lemon Cake", which included lemon jello, I think.  Who knows?  I just remember there was a little box of something that was incorporated into the batter.  I also remember how delicious that cake was, and I attribute that deliciousness much more to the jello than to my mother's skill as a baker.

But back to the pudding in the cookie batter cookies.  I whipped up the cookies, pudding and all.  I fiddled with the recipe a bit by using milk chocolate chips instead of semisweet chips (either would be fine), and a little more vanilla because you really can never have too much vanilla.  And, while a little softer than my standard chocolate chip cookie recipe, they were quite good and definitely worth a try.

And while you're at it, if you still have cookie eaters at home, give my favorite chocolate chip cookie recipe a try (see above).

Recipe:  Chocolate Chip Pudding Cookies

Ingredients:

1 cup softened unsalted butter
3/4 cup brown sugar, packed
1/4 cup granulated sugar
1 small package instant vanilla pudding mix
2 large eggs
1 1/2 teaspoons vanilla
2 1/4 cups all purpose flour
1 teaspoon baking soda
2 cups milk chocolate chips

Directions:

Preheat oven to 375.

In an electric mixer fitted with the paddle attachment, combine the butter and sugars.  Mix on medium speed until they are light and fluffy.  Add the eggs, one at a time, followed by the vanilla, and then the pudding mix.

In a separate bowl, combine, the flour and baking soda and then add to the wet ingredients in the mixer,.  Do not over mix.  Fold in the chocolate chips.

Drop by rounded tablespoonful onto a prepared baking sheet, nine to a sheet.  Bake for 9-10 minutes in the preheated oven, until golden brown.  Remove from oven and cool on a wire rack.


Wednesday, August 28, 2013

And She's Off!


Kate has left for college and I am now cooking for two.  It's been a long time since I've cooked for  just the two of us and I think it's going to take a little getting used to.

Actually it's going to take a lot of getting used to.

This morning I went to the grocery store.  Kate had her things that she always wanted me to buy: Skippy Touch of Honey Peanut Butter, Special K Red Berries, Whole Foods Light Butter Popcorn.  None of these things are things that Ted or I regularly eat, but there they were in my basket.

Have you ever seen anyone look happier to say goodbye?
I put them all back.  And I have to admit it, I did feel a little sad.  That Skippy with the touch of honey is actually pretty good.  But do I really need Skippy Touch of Honey?  I think not.

But I digress.  I have to start cooking for two.  This is not as easy as it sounds because I am a crowd cook.  If I know I need to make four chicken breasts, I make five or six, just in case.  You just never know when someone might be really hungry and want another one.

The truth is that, except for when Charlie was a teenager and was growing at a rate that was impossible to keep up with, no one ever really wanted another chicken breast.  They might have wanted more dessert, but never another chicken breast.

So tonight I cooked for two.  I found this recipe in The New York Times for Chicken Paillards with Corn Salad and I cut it in half.  Yup.  I made half.  And it was just enough for us.  And it was delicious.


Recipe:  Chicken Paillards With Corn Salad
Florence Fabricant,  The New York Times, August 28, 2013)

Note:  This recipe can easily be cut in half to make less or even doubled to make more.  I used a red tomato because I didn't have yellow ones, and it was delicious.  I actually liked the way the red tomato added a little more color to the salad.

Ingredients:

1 tablespoon Dijon mustard
1/4 cup plus 1 tablespoon lemon juice
2 skinless and boneless chicken breasts, about 1 1/4 pounds, pounded thin
3 tablespoons extra-virgin olive oil
1/2 cup chopped onion
2 ears corn, kernels stripped
1 jalapeño chile, seeded and minced
1 medium-size yellow summer squash, diced
Salt and ground black pepper
1 medium yellow tomato, diced
1/3 cup flour
2 tablespoons minced cilantro leaves

Directions:

Mix mustard and 1/4 cup lemon juice in a shallow dish. Cut each chicken breast in half, place in the mustard mixture, turn to coat both sides and set aside.

Heat 1 tablespoon oil in a large skillet, add onion and sauté on low a few minutes, until softened. Add corn, chile and squash and continue to cook until vegetables are tender, about 15 minutes. Season with salt and pepper. Remove from heat, fold in tomato, add 1 tablespoon lemon juice and set aside.

Remove chicken from marinade and dust with flour. Heat remaining oil in a large cast-iron skillet or grill pan on medium-high heat and sear chicken, turning once, until lightly browned and just cooked through, about 5 minutes a side. Arrange on a serving platter. Add cooking oil to salad, fold in cilantro and spoon over and around chicken.

YIELD 4 serving


Tuesday, August 13, 2013

The Full Effect


For years, Deborah has been telling me about her Nana.  To say that Nana was a pistol would, I think, be a vast understatement.  A real firecracker, that Nana.  Or at least that how she's always sounded to me.

In any case, years ago Deborah gave me Nana's eggplant parmesan recipe.  It was delicious.  In fact, Nana's is the only eggplant parmesan I have made since.  It's that good.  There's just no reason to look any further.

So imagine how pleased I was, when complaining about our overabundance of CSA zucchini, that Deborah mentioned that Nana also made the best zucchini bread ever.

Recognizing that Deborah may have been a little on the, shall we say, partial side, I decided to give Nana's recipe a try myself.  It's not as though I didn't have enough zucchini to try 200 of the best zucchini bread ever recipes.  I was game for the try.

Was Nana's the best zucchini bread I have ever eaten?  I have no idea because, after all, what is best?  But I will tell you this: It was pretty damn good.  Deborah's praise was not misplaced.

But then, on reflection (and a lot of very slim slices because I was just testing for professional purposes), I figured out why Deborah said Nana's recipe was the best ever.  What made Nana's so delicious, was what it tasted like the morning after.   Deborah directed me (in large type on the email), that to achieve the "full Nana effect", the bread should be toasted and slathered with cream cheese.  The moisture from the zucchini combined with the crunch from the wheat germ and the nuts made the bread the perfect bed for the cream cheese.  And everyone knows that the perfect bed makes everything that much better.

And that, my friends, is why Nana's is, in fact, the best zucchini bread ever.

Recipe:  Nana's Zucchini Bread

Ingredients:

3 eggs
1 cup salad oil
1 cup granulated sugar
1 cup brown sugar, packed
3 teaspoons maple syrup
3 1/2 cups coarsely shredded, unpeeled zucchini
2 1/2 cups all-purpose flour
1/2 cup toasted wheat germ
2 teaspoons baking soda
2 teaspoons salt
1/2 teaspoon baking soda
1 cup finely chopped walnuts

Directions:

Preheat oven to 350F.  Grease and flour 9x5 inch loaf pans.

Beat eggs until frothy.  Add oil, sugars, and maple syrup.  Continue beating until the mixture is thick and foamy.  Stir in the zucchini.

In a separate bowl, sift together the flour, wheat germ, baking soda, salt, baking powder, and walnuts until thoroughly blended.  Fold gently into the wet ingredients.  Do not overmix.

Spoon batter into the loaf pans and bake for 1 hour, or until the bread begins to pull away from the sides of the pans and a wooden skewer inserted in the center comes out clean.  Let the breads cool in the pans for 10 minutes, and then turn out onto wire racks and cool completely.