01 09 10

search you little tarte

Tuesday, April 30, 2013

On the Mend


I had a little surgery today.  I fretted about it, but I am happy to report that all went very well and I am on the mend.

In honor of having gotten through my little procedure, I decided to roll up my sleeves and bake Kate some muffins this afternoon.  It was the least I could do.  She's been a constant cheerleader and even sent me a lovely Cookie Bouquet (with a funny note), wishing me a speedy recovery.  Little did she know that I would be well on the road to recovery by the time she got home from school.
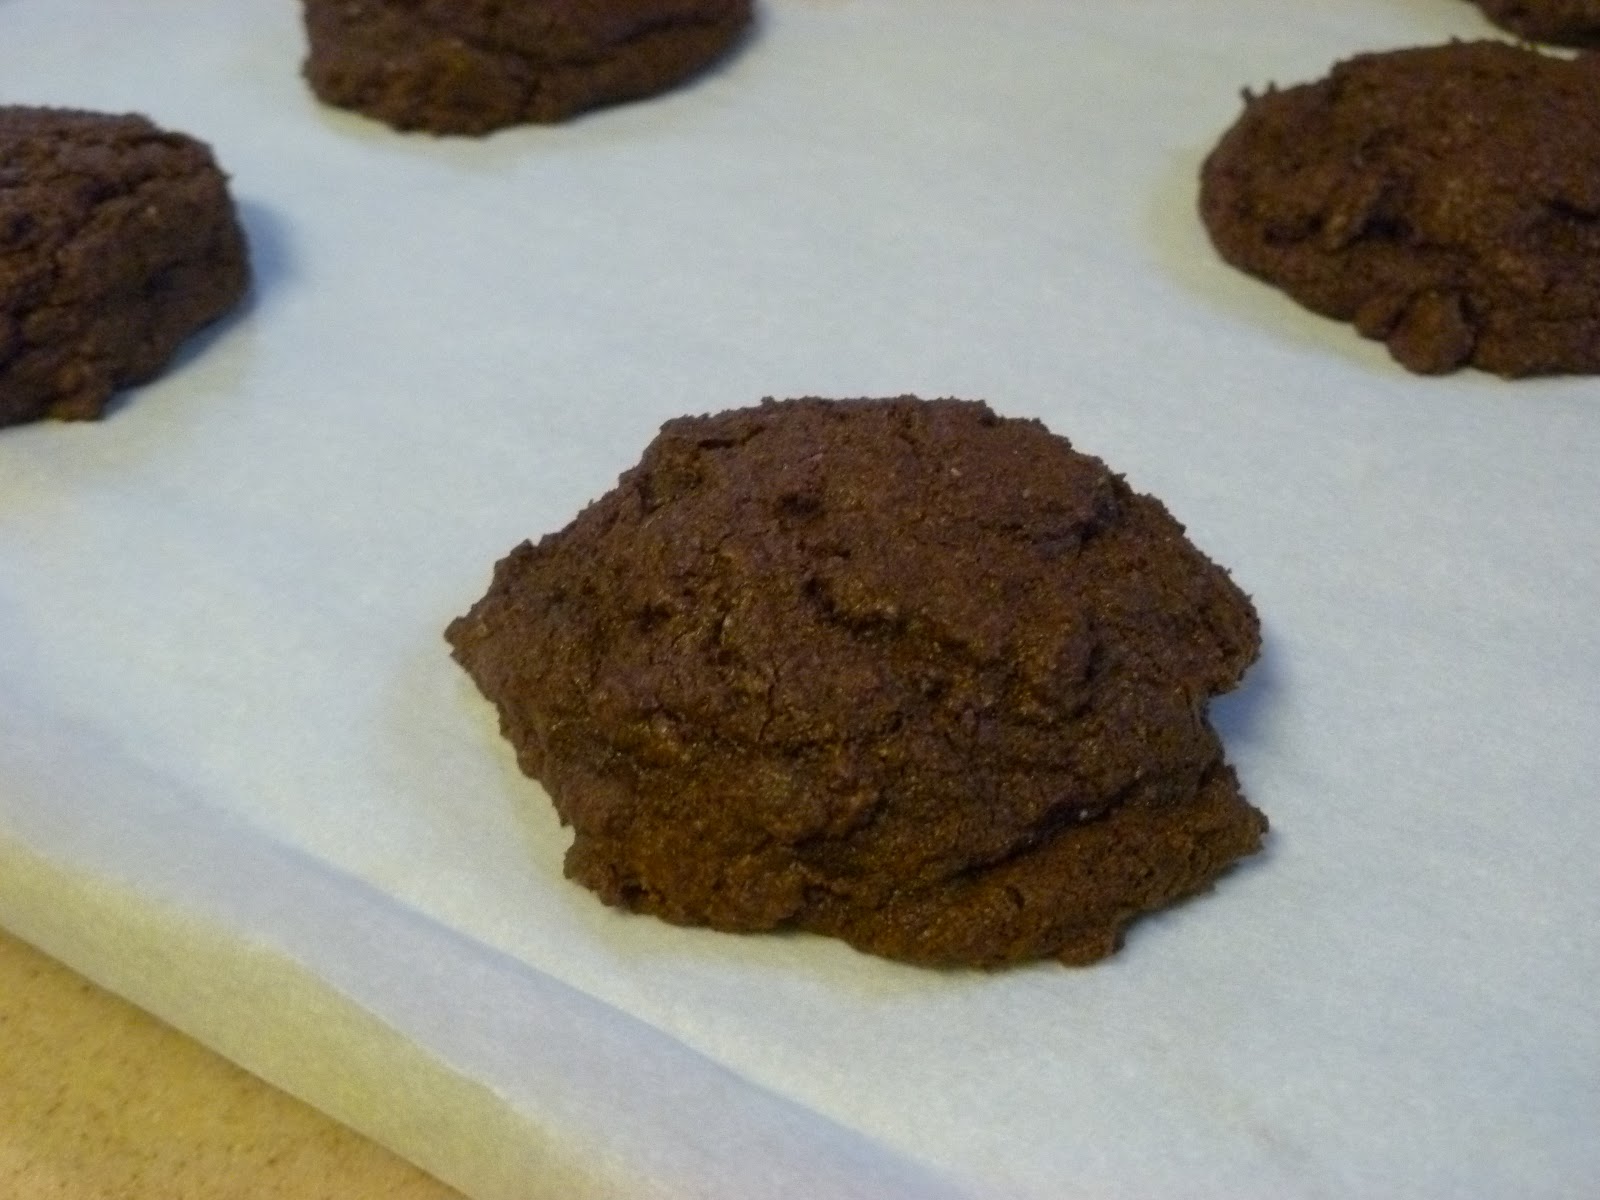
My Get Well Soon Cookie Bouquet
My general approach to selecting a muffin recipe is to scan my pantry, fruit, and veggie drawers and take stock of what's looking a little old and tired.  This time, I came up with a box of blueberries and a couple of bananas.

Kate is my official taste tester.
The bananas were easy.  I whipped up a batch of Kate's Favorite "Crack" Muffins.  The blueberries gave me a little more opportunity to find something new and different.

I've recently become a big fan of Food 52.  In fact, Charlie bought me one of the cookbooks for Hanukkah and I love it.  Anyway, I had everything else the recipe called for so I made them.

I have to start by telling you that I love anything with coconut.  My mother-in-law never liked coconut, and that was just something I could never get my arms around?  How could anyone not like coconut?  Ted likes coconut, so at least that coconut didn't fall from the coconut tree.


But I digress.  The muffins were light and tasted like springtime.  There were just the right amount of blueberries, and a toss with with a little flour made sure the fruit was even distributed throughout each muffin.

Ted thought I was crazy to be baking in the afternoon after having surgery in the morning.  That was until he tasted the results.  I'd say we all deserved a little something sweet this afternoon.


Recipe:  Mom's Blueberry-Coconut Muffins
(Food 52)

Ingredients:

2 cups all-purpose flour
1 tablespoon baking powder
1/2 cup sugar
3/4 teaspoons kosher salt
1/2 cup coconut, toasted
1 egg, beaten
1/4 cup butter, melted and slightly cooled
1 cup milk
1-1/2 cup fresh blueberries
1 tablespoon all-purpose flour

Directions:

Preheat oven 400 degrees F. Grease a 12-cup muffin tin and, if desired, line with paper muffin cups. Set aside. Sift together the 2 cups flour, baking powder, sugar and salt. Stir in toasted coconut. Combine egg, melted butter and milk. Add to dry ingredients and mix lightly till combined. Toss blueberries with 1 T flour. This prevents the blueberries from sinking to the bottom of the muffins. Fold into batter. Spoon batter into muffin cups. Bake at 400 degrees F for 17-20 minutes or till they test done. Remove from oven and allow to cool in the pan for 10 minutes, then remove from the pan and finish cooling on a rack.

Wednesday, April 24, 2013

On A Quest


Having barely recovered from my ramp-less excursion to the grocery store yesterday, I opened my New York Times Dining Section this morning only to find a recipe for... yes... ramps.  How could this be?  How could every cook in the universe be getting ramps, yet I was ramp-less?

Alright, I admit that I'm not Melissa Clark or Ina Garten, but I'm an above average cook and I wanted ramps.  Bad.  Real bad.

My desire to acquire ramps took on mythic proportions.  Where could I get them?  How could I get them?  I was a woman possessed.  Meth addicts are less desperate than I was this morning to get my hands on a couple of ounces of ramps.

I decided that maybe Whole Foods would be my ticket to ramp acquisition.  As I was driving to the gym I called Mike, the produce manager my local Whole Foods.  (As an aside, knowing your produce manager is almost as important as having a good butcher.)  Mike said the three words I was longing to hear.  "We have ramps."

Come to mama.

It was only my overwhelming desire to have a flat stomach ,and thinner thighs that propelled me to the gyn instead of directly to Whole Foods.  I did my hour on the treadmill and off I went to see Mike.

I decided not to tempt fate with another ill-fated pizza and opted instead for Melissa Clark's Focaccia with Ramps.  I bought a new jar of yeast, so as not to repeat yesterday's unrisen dough episode.  I was ready to roll.

And boy did I roll.  And knead.  And knead some more.  The result was a delicious focaccia bread studded with the now mythic ramps.  The bread was tender and had just a hint of heat from the red pepper flakes.  In a word, it was sublime.

Now, having achieved ramp success, I need more ramps.  Lots more.

At least now I know where to go to get my fix.


Recipe:  Focaccia Dough
(Melissa Clark, New York Times, April 24, 2013)

Ingredients:

3 3/4 teaspoons active dry yeast
3/4 cup extra-virgin olive oil, more as needed
11 grams kosher salt (1 tablespoon)
10 grams sugar (2 teaspoons)
515 grams all-purpose flour (about 4 cups), more as needed
130 grams whole wheat flour (about 1 cup)

Directions:

Place 1 1/2 cups lukewarm water (105 to 115 degrees) in a large bowl or the bowl of a stand mixer. Sprinkle yeast over it. Let stand until foamy, about 5 minutes.

Stir oil, salt and sugar into yeast mixture. Stir in all-purpose and whole-wheat flour until a soft dough forms (you may need to add more all-purpose flour).

Turn dough out onto a floured surface. Knead until it is smooth and elastic, about 10 minutes, or knead in a stand mixer with a dough hook attached for about 5 minutes. If using a stand mixer, finish dough by hand, on a floured surface, for 1 minute. Add more all-purpose flour if dough feels very sticky (you want damp but not unworkable dough).

Oil a large bowl. Place dough in bowl and turn to coat it lightly with oil. Cover bowl with a dish towel. Leave in a warm place until dough has doubled in size, about 1 hour.

Divide dough into 3 equal-size balls. Tightly wrap in plastic any you are not planning to use right away and freeze. Transfer remaining balls to a baking sheet and cover loosely with a towel. Let rest for 20 to 30 minutes.

YIELD 3 balls of dough (for 9-inch focaccias)

Recipe:  Ramp Focaccia


Ramp Focaccia

Ingredients:

1 ball of focaccia dough (see recipe)
3 ounces ramps
4 tablespoons olive oil
1/4 teaspoon salt
1/8 teaspoon chile flakes

Directions:


Heat oven to 450 degrees. Trim roots of ramps; separate white bulbs from green leaves. Rinse each under warm water and pat dry. Coarsely chop leaves.

Heat 1 tablespoon olive oil in a large skillet until very hot. Quickly sauté whole ramp bulbs until caramelized, about 2 minutes. Pour bulbs and their oil over chopped leaves and toss with salt and chile flakes. Pour 3 tablespoons oil into bottom of a 9-inch cake pan. Pat dough evenly into pan, leaving a small gap between dough and edges of pan. Press ramp mixture into dough. Bake until golden brown, 30 to 35 minutes.

YIELD 1 (9-inch) focaccia


Tuesday, April 23, 2013

Not Everything Works


I just want to make one thing clear.  For all the cooking victories I have, and for all the really delicious meals I make, there are at least an equal number of clunkers.  Sometimes the chicken doesn't cook.  Sometimes the sauce is lumpy.  Sometimes it just doesn't come together.  What can I say?  I'm human.

Such was the case today.

This morning I was very excited to receive an email from Smitten Kitchen, one of my very favorite cooking blogs.  Today's recipe was for ramp pizza.  I was thrilled.

I am fortunate to live in ramp country.  They grow in the northeast, (the one time Pittsburgh is an advantageous place to live), and they're only in season for a very short time.  I have made them in the past with mussels but I loved the idea of a pizza topped with the sweet, garlicly ramps.

Hit with inspiration, or at least a good recipe, I set off for the grocery store, where I was sure they would have ramps.  They had them last year around now, so I assumed (big mistake), that the ramps would be there waiting for me.  "Hi Nadine.  We're over here, just waiting for you."  This was not the case.  In fact, not only was there no ramp welcoming committee, there wasn't a ramp to be found.  When I asked the produce manager about the availability of ramps, he looked at me in complete confusion.  Clearly he had never tasted, or for that matter, heard of ramps.

Before I left for the grocery store, I whipped up some pizza dough.  I have a foolproof recipe, which I would give you here, except this time it wasn't so foolproof.  It didn't rise.  At all.  Not even a little.  I checked the date on the yeast and it appeared to be fresh enough, but it was a no-go with the rising.  I have no idea why.  Maybe the water was too hot.  Or too cold.  Or maybe I did something else wrong.  Who knows?  All I know is that when I returned from the grocery store, rampless, I was faced with a large bowl of flabby dough.  True, I could have Googled "unrisen dough" and come up with a recipe, but I was defeated.  Sometimes you just have to cut your losses.

So, here I was, late afternoon, with a big bowl of unrisen dough and some green spring onions, my sorry stand in for the ramps.  There was no pizza to be had, and the spring onions found their way into the salad.  Which I served with my old standby Crusty Beef Casserole.

At least that worked.


Monday, April 22, 2013

Kate's Fav


Kate calls these muffins "crack muffins".  And I have to agree.  They're so good they're addictive.  What could be better than banana muffins flavored with espresso and then studded with chocolate chips.  Nothing.  Absolutely nothing.

I came to make these muffins the same way I end up making anything banana.  I had a couple of over ripe bananas sitting on the counter and I was looking for something to do with them.  As you know, I've made a zillion banana breads and muffins, and honestly they've all been good.  Let's face it.  Banana muffins are about the easiest thing in the world to make.

I was perusing Baking for Friends by Kathleen King (owner of Tate's Bake Shop in Southampton, NY), and came across this recipe for banana mocha muffins.  Everything I've made from this cookbook has been beyond, so I knew these would be delicious as well.

I wasn't wrong.  Kate went nuts.  She ate the whole dozen in just a couple of days.  That's how good they were.  Usually she loses interest in my baked goods within a day or two, but this time she ate every last muffin.  Ted and I barely got a crumb.

Recipe:  Banana Mocha Muffins
(Baking for Friends, Kathleen King, 2012)

Ingredients:


2 1/2 C unbleached all-purpose flour
1 tsp. baking powder
1/2 tsp. baking soda
1/2 tsp. salt
1 Tbsp. instant coffee (or 1 1/2 tsp. instant espresso powder)
1 Tbsp. boiling water
1 1/3 C mashed fully ripe bananas (about 3 bananas)
1 1/4 C sugar
2 sticks salted butter, at room temperature
1 egg
1 C semisweet chocolate chips

Directions:


Preheat oven to 350 degrees (I did 350 degrees); grease a muffin tin tray.

Cream together the sugar and butter until fluffy.  Add the egg, mix again then set aside.   In another bowl add the coffee to the hot water; stir to dissolve.  Stir the mashed bananas into the coffee.  Add to the butter/sugar mixture and stir until incorporated; set aside.

Whisk the flour, baking powder, baking soda and salt together.  By hand, slowly mix the dry ingredients into the wet.  Fold in the chocolate chips.  Divide the batter evenly into the prepared muffin tin tray.

Bake for 25-30 minutes.  Allow to cool in pan for 10 minutes, remove from pan then cool completely on a wire rack.


Sunday, April 21, 2013

Jolt


I haven't been sleeping well lately.  I'm so exhausted that I fall asleep watching television and then wake up around midnight.  Then I wake up again every hour, on the hour, until about 5:00 a.m., at which point I fall into a deep sleep, only to be jolted awake by my alarm at 6:00 a.m.  This is no way to live.

Needless to say, coffee and I have become good friends.  It's sad to say, but I need my morning jolt of java these days.

Not only is coffee my beverage of choice, it is also my taste enhancer of choice as well.  I don't know if you know this, but coffee makes chocolate taste more chocolately.  Yes!  It does!  And what could be better than more chocolately chocolate?

I don't usually make double chocolate cookies because I hate dealing with cocoa powder.  It's so messy and it gets everywhere.  It clings to the counter and everything else it comes in contact with.  But, on the other hand, if what you're really in the mood for is a double chocolate espresso cookie, well then you just have to deal with the cocoa powder.  There are worse things in life, right?


A double chocolate coffee cookie probably isn't the best bedtime snack for someone who spends the night looking up at the ceiling.  On the other hand, if it weren't bad form to start the day off with a cookie, this might just do the job of my morning cuppa joe.


Recipe:  Double Chocolate Espresso Cookies

Ingredients:

2 1/4 sticks unsalted butter, room temperature
1 cup sugar
1 cup light brown sugar
2 eggs, room temperature
2 1/2 cups flour
3/4 cups unsweetened cocoa powder
1 teaspoon baking soda
1 teaspoon Kosher salt
2 tablespoons instant espresso powder (like Medaglia D'Oro, or similar)
12 ounces semisweet chocolate chips

Directions:

Preheat oven to 350 Cream butter and sugars until light and fluffy. Then, add eggs one at time, mixing after each addition to make sure they are well combined. In a separate bowl mix together dry ingredients: flour, cocoa powder, baking soda, salt, and espresso powder. I use a whisk to make sure the dry ingredients are well mixed. With the mixer on low, slowly add the dry ingredients to the wet ingredients, scraping down the sides of the bowl as needed. Mix everything until the ingredients are fully combined, but do not overbeat. Using a wooden spoon, stir in chocolate chips. Line a baking sheet with Silpat or parchment paper. Using a 1 1/2" ice-cream scoop, or rounded teaspoon, drop dough on the sheet 2" apart. Bake for 10-12 minutes. Cool on a wire rack and serve.

Thursday, April 18, 2013

A Spring In My Step


I don't often make risotto because I'm just not into all that stirring.  Sure, there are those of you out there who find the stirring to be calming. And there are those of you who think of making risotto as an upper body workout.  I don't.  If I want to develop my arm muscles, I'll blow dry my hair.

But I do like risotto, and a couple of years ago I discovered Ina Garten's "Magic Risotto", as I like to call it.  All of a sudden risotto became something I might actually make at home because it was baked.  In the oven.  With minimal stirring.

Today I was in Williams Sonoma doing a little browsing.  While I was waiting to meet my friend,  I struck up a conversation with my favorite WS saleslady.  We got to chatting about what to make for dinner and she mentioned this recipe.  It sounded good.  It sounded pretty easy.  It required no stirring.  And I had everything I needed to make it in the house.  Having everything in the house instantly makes a recipe sound good to me.

The recipe required a little prep time but once that was done, into the oven it went.  20 minutes later  out came perfect risotto.  It was creamy.  It looked like I had been stirring for hours.  Five minutes on the stove, just to add the veggies, butter, and cheese, and onto the table it went.

It was the perfect spring meal, what with the asparagus and the peas.  And it required no stirring.

Recipe:  Baked Risotto with Peas, Asparagus & Pancetta
(thekitchn.com)

Ingredients:

4 ounces finely chopped pancetta
3 tablespoons butter, divided
2 large shallots (4 cloves), finely chopped
1 1/2 cups Arborio rice
1/2 cup dry white wine
4 1/2 cups chicken stock
1 cup fresh or frozen green peas
1/2 bunch pencil-thin asparagus stalks, cut into 3/4-inch pieces (about 1 cup)
1/2 cup grated Parmesan cheese, plus extra for serving
1/2 teaspoon lemon zest
Kosher salt and freshly ground black pepper

Directions:

Preheat oven 400°F.

Heat a large Dutch oven over medium-high heat until very hot but not smoking. Add pancetta and cook, stirring occasionally, until crisp, about 6-8 minutes. Remove with a slotted spoon and set aside.

Reduce heat to medium. Add 1 tablespoon butter and shallots to the pancetta drippings and cook until softened, about 3-5 minutes. Add the rice and sauté until every grain is coated with butter, about 1 minute.

Increase heat to high. Pour in the wine and simmer until the liquid evaporates. Add stock and bring to a boil, stirring occasionally. Season generously with salt and pepper.

Cover the pot and transfer to the oven. Cook until the liquid is almost cooked out and the risotto is creamy, about 20 minutes.

Remove from the oven and place over moderate heat. Stir in peas and asparagus and cook until the vegetables are bright green and warmed through, about 5 minutes. Stir in remaining 2 tablespoons butter, Parmesan, and lemon zest. Taste and season with salt and pepper, if needed. Garnish with additional Parmesan and reserved pancetta.
Recipe Notes
Vegetarian Version: This recipe can easily be made vegetarian. Sub in olive oil for the pancetta and use vegetable broth instead of chicken stock.
To make the risotto in advance, bake the risotto for 15 - 20 minutes. Cool and transfer to the refrigerator. When ready to serve, add 1 1/2 cups hot stock and vegetables and cook over medium heat until warm. Stir in the butter, Parmesan, and lemon zest. Season to taste.
null

Wednesday, April 17, 2013

Golden Lemons


The other day I was at the grocery store and I came across a jar of preserved lemons.  I'd never seen them there before, and I immediately got very excited.  (Not a lot happens in my life, so preserved lemons were indeed a thrill.)  Needless to say, I snapped those babies up and came home to look for something to do with them.


I've preserved my own lemons in the past but these looked very different.  First of all, the whole lemon was preserved.  When I did it, every recipe I found called for cutting the lemons in slices, so I cut the lemons in slices.  Looking at these "professionally" preserved lemons, mine really paled in comparison.  I saw that one real advantage of preserving the lemons whole is that you can remove the skin in one piece and reserve the pith, which is very soft and mushy.  And they just looked so much better than mine.  Sad for me, but true.

So here I was with an $8 jar of preserved lemons.  I had to find a recipe worthy of this jar of golden lemons.  My close personal friend Google had dozens from which to choose and one sounded better than the next.  It was like a horn of plenty... filled with lemons.

After much research, I settled on this recipe for roast chicken from The New York Times.  Those of you who read my blog regularly know that I am not a great roaster.  In fact, I'm not very good at it at all, so I try to avoid roasting "whole" things whenever possible.  Instead of roasting a whole chicken, I had Mark the Butcher butterfly a whole chicken and then cut it into four pieces.

Roasting the chicken in quarters has several advantages, not the least of which is that it cooks faster and more evenly.  It's also much easier to serve and it looks really pretty.  Each serving gets some of the crispy skin, which adds a lot of flavor to the chicken.

The preserved lemons added a lemony and somewhat floral taste to the dish, which was beyond delicious.  I served it over a bed of couscous studded with pine nuts.  It was like having dinner in Morocco.  Well, not quite.  But exotically delicious nonetheless.


Recipe:  Roasted Chicken With Preserved Lemons
(New York Times, December 16, 2012)

* Note:  I made this with a whole chicken which I had my butcher butterfly and quarter.  Roast chicken pieces until the juices run clear.

Ingredients:

1 3 1/2-pound chicken
2 preserved lemons
1 1/2 teaspoons ground cumin
Salt and black pepper to taste
2 tablespoons unsalted butter
1 tablespoons honey

Directions:

Preheat oven to 450 degrees. Cut the preserved lemons into quarters and remove the rinds from the flesh, reserving both. Create a pocket between the skin and meat of each chicken breast. Slide pieces of the lemon rind, pith side down, into each pocket, two pieces per breast. Then rub the chickens with the remaining lemon flesh. Sprinkle the ground cumin over the birds and season with the salt and pepper.

Set chickens on a roasting rack in a large roasting pan and cook for 20 minutes. Remove the chickens and spread butter over the breasts, then drizzle with the honey. Lower oven temperature to 400 degrees. Roast for 30 to 50 minutes, or until the skin is a burnished brown.

Remove from oven, and allow to rest for 15 or 20 minutes.

Reduce juice from pan over medium heat. Pour over carved chicken.


Tuesday, April 16, 2013

Fake Out


My husband  has grown accustomed to eating like a king.  It's nice that he feels that way because not everything I serve is king-worthy.

The simple fact is that sometimes I'm just not into the whole cooking thing.  Unfortunately, Ted and Kate are into the whole eating thing, so I have to come up with something regardless of my enthusiasm level.  What can I say?  I've spoiled them and Chinese takeout is just not all that exciting.  I guess I could have worse problems.

Nonetheless, I find that when I'm not excited about making dinner, the best remedy is a little trip through a cookbook.  Browsing a favorite cookbook never fails to inspire me and help me get motivated.  In fact, I often find that some of my best dinners are born of desperation.

Such was the case a week or two ago when I had absolutely no ideas.  I pulled out Melissa Clark's In the Kitchen with A Good Appetite and came across this recipe for Roasted Shrimp and Broccoli.  The funny thing is that I had never noticed this recipe before and it's just the kind of quick and easy recipe that I usually love to try.

Go figure.

Anyhow, I literally whipped this recipe up in minutes, threw it in the oven, and came off looking a lot like (a much shorter) Julia Child to my husband and daughter.

They don't need to know that this yummy dinner was the result of about 10 minutes of effort, and that included setting the table.


Recipe:  Roasted Broccoli With Shrimp
Melissa Clark, In the Kitchen With a Good Appetite, and published January 9, 2009, New York Times)

Ingredients:

2 pounds broccoli, cut into bite-size florets
4 tablespoons ( 1/4 cup) extra virgin olive oil
1 teaspoon whole coriander seeds
1 teaspoon whole cumin seeds
1 1/2 teaspoons kosher salt
1 teaspoon freshly ground black pepper
1/8 teaspoon hot chili powder
1 pound large shrimp, shelled and deveined
1 1/4 teaspoons lemon zest (from 1 large lemon)
Lemon wedges, for serving

Directions:

Preheat oven to 425 degrees. In a large bowl, toss broccoli with 2 tablespoons oil, coriander, cumin, 1 teaspoon salt, 1/2 teaspoon pepper and chili powder. In a separate bowl, combine shrimp, remaining 2 tablespoons oil, lemon zest, remaining 1/2 teaspoon salt and remaining 1/2 teaspoon pepper.

Spread broccoli in a single layer on a baking sheet. Roast for 10 minutes. Add shrimp to baking sheet and toss with broccoli. Roast, tossing once halfway through, until shrimp are just opaque and broccoli is tender and golden around edges, about 10 minutes more. Serve with lemon wedges, or squeeze lemon juice all over shrimp and broccoli just before serving.

Yield: 4 servings.


Sunday, April 14, 2013

Happy Birthday Kate (Belated Edition)


I love birthdays.  To me, they're the best of  the holidays, all wrapped into one special day that's all yours.  I'm not sure the rest of my family feels the same way, certainly not Ted and Charlie, (how very male of them), but I just love birthdays.


Back when my kids were little, I always enjoyed hosting their birthdays at home.  We had all kinds of parties: mad science parties, princess parties, Star Wars parties.  You name it, we did it.  As the kids got older, parties moved out of our backyard and into bowling alleys, ice skating rinks, and laser tag venues.  Living in Los Angeles back then, I'm sure you can imagine what went on with birthday parties.  Let's just say that a simple little do with balloons, cake, and ice cream would never do.

Nonetheless, I always enjoyed the backyard parties the best.  There was something simple (read appropriate) about them.  Everyone had fun and they didn't require a party planner other than yours truly.

Yup, those were the days.

Kate turned 18 back in March, and I thought some sort of celebration was in order.  She was dubious. This was not because she doesn't enjoy a good birthday shindig, but rather because I think she hadn't figured out how best to mark the occasion.  Not to worry.  Mom to the rescue.

So, we had a dinner party.  Yes, we had a dinner party.  At our house.  And it was perfect.  

Kate invited a bunch of her closest girlfriends over for dinner.  I cooked up a storm.  They laughed and talked about how excited they are for college.  They ate birthday cake.  Her friends made her Pinterest crafts for presents.  There was something so perfectly appropriate about the celebration.  

Kate loved it.  Her friends loved it.  And I loved doing it.

Among other things, I made this baked rigatoni with zucchini dish.  We had a couple of vegetarians so I wanted to make sure there was something for everyone.


Recipe:  Baked Rigatoni and Zucchini Recipe
(Lidia Bastianich)

Ingredients:

1/4 cup extra virgin olive oil
1 medium onion, sliced
1 pound medium zucchini, sliced
1/2 teaspoon kosher salt
2 cups of marinara sauce (recipe below)
1 pound rigatoni
1 tablespoon unsalted butter
1 cup loosely packed fresh basil leaves, roughly chopped
8 ounces shredded Muenster cheese or Taleggio
1 cup grated Grana Padano cheese

For the marinara sauce:

(*Note:  You can be lazy and use prepared marinara sauce. I like the Rao's brand.)

1/4 cup extra virgin olive oil
8 garlic cloves, peeled
2  35 oz cans of Italian plum tomatoes (preferably San Marzano)
Crushed red pepper to taste
10 fresh basil leaves
1 teaspoon salt

Directions:

For the marinara sauce:

Heat oil in a 2 to 3-quart non-reactive saucepan over medium heat. Whack the garlic with the flat side of a knife, add it to the oil and cook until lightly browned.
Crush the tomatoes by hand, slide the crushed tomatoes and their liquid into the oil, bring to a boil and season lightly with salt and crushed red pepper. Lower the heat so the sauce is at a simmer and cook until the sauce is chunky and thick, about 20 minutes. Stir in the basil about five minutes before the sauce is finished. Season with more salt and red pepper if necessary.
Remove garlic cloves, let cool and store in pint and quart containers. They will keep well in the freezer for one to two months.

For the baked rigatoni: 
Preheat the oven to 400 degrees. Bring a large pot of salted water to boil for pasta. In a large skillet, heat the olive oil over medium heat. Add the onion and cook until it begins to soften, about 5 minutes. Add the zucchini, and cook until the zucchini begins to soften, another 5 minutes.

Add the marinara sauce to the skillet. Bring the sauce to a boil and simmer just until the sauce thickens, about 8 to 10 minutes. Take care the zucchini doesn’t fall apart.

Meanwhile, cook the rigatoni until al dente, a few minutes shy of the package directions. Drain the pasta and toss in the skillet with the tomato sauce and basil.

Butter a 9-by-13-inch baking dish. In a medium bowl toss together the two grated cheeses. Spread half the pasta and sauce in the baking dish and top with half the cheese. Layer the remaining pasta and sauce, then the remaining cheese. Bake uncovered until browned and bubbly, about 20 minutes.


I

Thursday, April 11, 2013

Curry In a Hurry


I have to start out by saying that I am not a huge fan of curry dishes.  I mean, they're good, but I don't seek them out.  The whole idea of coconut milk turns me off.  And the sauce is always to soupy.  What can I say?  I'm just not a curry person.

But, while I may not be a Thai food fan, I am pragmatic.  I have to come up with something to make for dinner every night.  So, sometimes I have to cook outside the box and make something which, on it's face, isn't something I'm all that excited about.

Well then, you can imagine my surprise when I actually really enjoyed this recipe from Melissa Clark for Chicken Curry with Sweet Potatoes and Coconut Milk.  The prep was fast and easy, which is always a plus when it's 5:30 p.m. and I'm just getting started on dinner.  In addition, it was, well, in a word, delicious. The sauce has a subtle heat and was really flavorful.  The chicken was tender as could be.

Ted and Kate loved it too, although they both always love curry dishes.  What can I say?  Maybe I'm on the road to becoming a curry lover as well.

Recipe:  Chicken Curry with Sweet Potatoes and Coconut Milk
)The New York Times, Melissa Clark, 4/10/2013)


Ingredients:

1 (3 1/2-pound) whole chicken, cut into 8 pieces
2 1/2 teaspoons kosher salt, more as needed
Black pepper, as needed
2 tablespoons peanut, safflower or vegetable oil
1/4 cup finely chopped scallion
1 1/2 inches fresh ginger, peeled and grated (1 1/2 tablespoons)
3 garlic cloves, finely chopped
1 to 2 jalapeño or Serrano chiles, to taste, seeded and finely chopped
2 tablespoons red curry paste
1 (15.5-ounce) can coconut milk
2 medium sweet potatoes (1 pound), peeled and cut into 1 1/2-inch chunks
3/4 cup coconut flakes
1 tablespoon black or brown mustard seeds
Fresh cilantro leaves
Lime wedges

Directions:

Heat oven to 325 degrees. Pat chicken dry with paper towels and season with salt and pepper.

Heat a large Dutch oven over medium-high heat. Add oil. Brown chicken pieces, in batches if necessary, until golden all over, 6 to 8 minutes per batch. Transfer chicken to a plate.

Stir scallion, ginger, garlic and chiles into pot and reduce heat to medium. Cook, stirring, until soft, 1 to 2 minutes. Stir in curry paste and cook 1 minute. Stir in coconut milk and sweet potatoes. Arrange chicken pieces on top of potatoes, placing breast meat on top. Pour in enough water to come halfway up the sides of chicken (about 1/2 cup). Bring to a boil. Cover pot and transfer to oven. Bake until chicken is cooked through, about 40 minutes.

Meanwhile, in a large dry skillet over medium heat, toast coconut flakes until golden, 2 to 3 minutes. Add mustard seeds and toast until they begin to pop, 1 minute more. Transfer to a bowl and season with a pinch of salt.

Transfer chicken and sweet potatoes to a platter. Return Dutch oven to the stove and simmer over medium-high heat until cooking liquid has thickened to a saucelike consistency, 5 to 10 minutes. Pour over chicken and potatoes. Sprinkle with the coconut and mustard seed mixture and cilantro. Serve with lime wedges for squeezing.

YIELD 4 servings

Friday, April 5, 2013

Double Duty


My sister once told me that quick breads and muffins are really just cake.  No!  How can that be? I would never eat cake for breakfast.  Muffins and quick breads are different, aren't they?

But the whole quick bread as cake thing stuck in my mind.  If it looks like a cake and tastes like a cake, then it must be cake, right?  So why not make a quick bread for dessert?

As you all know by now, I am a lover of pound cakes: classic pound cake, lemon pound cake, orange pound cake -- any pound cake, for that matter.  I love the simplicity.  I love the way they cut into such a nice little slice with no stray crumbs or broken edges.  Pound cake are as neat as a pin, and I like things neat as a pin.


But I digress.  Back to the quick bread as a dessert.

I was paging through my Williams-Sonoma catalogue the other day and came across this recipe for Cherry-Almond Quick Bread.  Despite being categorized as a quick bread, it looked a lot like a pound cake to me.  Okay, maybe not a traditional pound cake -- it only has 1 stick of butter- but a pound cake nonetheless.

And like most pound cakes, and quick breads for that matter, it took just minutes to mix up and get into the oven.

The result was a firm yet moist loaf studded with just the right amount of dried tart cherries and just a hint of almond.  And it was perfect for dessert and then with breakfast the next morning.


Recipe:  Cherry-Almond Quick Bread
(Williams-Somona, 2013, Courtesy of The Invisible Chef)


Ingredients:

2 cups all-purpose flour
1 cup sugar
2 tsp. baking powder
1/2 tsp. salt
1/2 cup chopped dried tart cherries
3/4 cup milk
2 eggs
8 Tbs. (1 stick) unsalted butter, melted and cooled
1 tsp. almond extract

Directions:

Preheat an oven to 350°F. Lightly grease an 8-by-4-inch loaf pan.

In a large bowl, whisk together the flour, sugar, baking powder and salt. Add the cherries and toss to distribute evenly.

In another bowl, whisk together the milk, eggs, butter and almond extract. Add the milk mixture to the flour mixture and stir until combined. Do not overmix.

Pour the batter into the prepared pan. Bake until the top of the loaf is golden brown and a toothpick inserted into the center comes out clean, 55 to 60 minutes. Transfer the pan to a wire rack and let cool for 10 minutes. Turn the loaf out onto the rack and let cool completely before serving. Makes 1 loaf.


Tuesday, April 2, 2013

Singing the Blues

You haven't heard from me because we've been away on vacation.  Yup.  We were away.  Out of town.  I was away from the washing machine and the kitchen.  It was great.

A little music video from New Orleans
This was an unusual trip for us.  I am generally of the mind that it's not really a vacation if a passport isn't involved.  I don't go on that many vacations so I always want to make them count.  To me, using a passport to go to some far off land seems well, more vacationy.

But enough about what constitutes a vacation and on to the details.  We went to New Orleans, and then drove the Delta Blues Highway through Mississippi, ending up in Memphis.  That's right.  We did a musical tour of the South with stops in Natchez (you have to love those antebellum homes), Vicksburg (we all need a little history lesson on The War of Northern Aggression as it's called down there), and Clarksdale, the home of the blues.  Memphis was our final stop.
Kate, after her Tarot card reading, with her physic Nicole. Apparently hate's aura is turquoise.

Ted and Charlie listening to some soul at the B.B. King Blues Club in Memphis


I especially enjoyed Memphis.  It lacked the drunken college spring break vibe that NOLA had, which was a good thing.  There's just something so unappealing about people roaming the streets, drunk, with a large fishbowl drink hanging from their necks.  If I'm going to drink, I'd prefer to do it from a nice cocktail glass with perhaps a little bowl of nuts along side.
Kate enjoying a saxophonist along the banks of the Mississippi.

Memphis, like NOLA, is all about music and food.  It's about the blues and soul music, with a healthy dose of Elvis thrown in.  In fact, I even got my family to humor me and do the Graceland tour.  It's not to be missed.  Visiting Graceland is like visiting an alternate universe.  To say that Elvis' wardrobe and decorating taste were consistent, would be a vast understatement.  He had a staircase that was entirely mirrored and a room carpeted on the floor, walls, and ceiling in green shag.  We even got to stop off at Elvis' grave, where the faithful were placing flowers and stuffed animals.

Memphis isn't all about Elvis.  In fact, it's about far more.  The blues and some serious soul music came out of Memphis and it's still everywhere.  There's music in the air in Memphis.

I particularly enjoyed visiting the Stax Museum of American Soul Music.  Where else would I ever get to view Isaac Hayes' gold plated, fur carpeted Eldorado?  It was one of the most fascinating museums I've ever been to.

We also made our way to the Civil Rights Museum and the Lorraine Motel.  Pulling up to the Lorraine Motel was so strange.  How many thousands of photographs have we all see of that balcony where Martin Luther King was shot?  Eerie.

Despite the fact that my kids both through that being downstairs for breakfast by 9:30 a.m. was unreasonable, ("We're on a vacation.  Why do we have to get started so early?"), a good time was had by all.

Next Time: How I Ate My Way Through the South
Also, be sure to take a look at my latest posting on My Year of Unspending