01 09 10

search you little tarte

Wednesday, August 31, 2011

A Starting Point

A full cookie jar is a happy cookie jar.

It's back to school for Kate so I feel like it's a  good time for me to embark on a new project.  I know, I know.  I'm always talking about new projects but this time I actually have one I think I can follow through on.

I have a lot of cookbooks and many of them are baking books.  When I first started out in the kitchen, I was a cookie baker so many of these books date back to my earliest triumphs (and disasters) as a baker.  My new project is to revisit some of my old favorite cookie recipes as well as some new ones.  Sounds simple.  That's the beauty of this project.  It is simple.

Make sure to get all your ingredients together before you start.  
If only I always followed my own advice.

I try not to buy too many bags of cookies at the grocery store because  I can usually make something much better at home.  Save for the occasional Double Stuffed Oreo, which are Kate's favorites, I try to bake most of the cookies we eat around here.  But sometimes I get lazy or disorganized, or both, and I fall into buying cookies.  This may not sound like a bad thing, but for me it's like opening Pandora's Box.  Before I know it, we have all manner of mass produced cookies -- from Oreos to Milanos to Chips Ahoy -- and they are not all equally good.

So, my new project is to bake something different every week.  True, there's nothing quite like a chocolate chip cookie so I'll try some interesting versions instead of the standard recipe.  My cookie project doesn't sound ambitious I know, but I'm starting small.  Hey, you have to start somewhere.

Recipe:  Toffee Pecan Drop Cookies
(The Complete Magnolia Bakery Cookbook, 2009)

Note:  I love this cookbook.

Ingredients:

2 cups all-purpose flour

1 teaspoon baking soda
1/2 teaspoon salt
1 cup butter, softened
3/4 cup firmly packed light brown sugar
1/4 cup sugar
1 large egg, at room temperature
1 1/2 teaspoons vanilla extract
1 1/2 cups coarsely chopped toasted pecans
1 cup toffee pieces

Directions:

Preheat oven to 350°.

In a bowl, combine the first 3 ingredients; set aside.  In a large bowl, cream the butter with the sugars for 2 minutes or until smooth.  Add in the egg and vanilla; beat well.  Add in the dry ingredients and mix thoroughly.  Stir in the pecans and toffee.

Drop by rounded teaspoonsful onto an ungreased cookie sheet (leave room for expansion).  Bake 10-12 minutes or until lightly golden.  Let cookies cool in pan for 5 minutes; then transfer cookies to a wire rack to cool completely.


Tuesday, August 30, 2011

Kugel Me

Mushroom Kugel... A lightbulb moment.

Usually when I think of noodle kugel I think of something sweet.  I am especially fond of those kugels that are clock full of cream cheese, raisins, and topped with corn flake crumbs mixed with brown sugar.  You know, the kugels that are desserts masquerading as side dishes.

The other night I was trying to come up with a side dish that was noodle-y but not just plain noodles.  I thought about a sweet kugel but alas, I didn't have any cream cheese in the house.  And what's a sweet kugel without cream cheese?   I did have a box of dried portobello mushroom and that got me to thinking that maybe I could make a savory kugel.  Imagine that.

This was cooking by the seat of my pants because I am a believer in following recipes.  In fact, I am absolutely convinced that anyone can cook anything if they can read a recipe.  But at some point all those recipes that I so diligently follow started out as ideas.  Here was my chance to actually create a recipe from scratch.  I was ready to roll.

I have to tell you that this mushroom kugel was delicious.  Not only was it a lovely side dish to my somewhat uninspired (although perfectly cooked) roast chicken, it would be perfect at the Jewish holidays because it used no dairy.  In fact, it would be good anytime!  It has a pleasing crunch from the bread crumb topping and the mushrooms add a heartiness to the noodles that really pushed the flavor up a notch.

So come on... Are you ready to kugel?

Recipe:  Mushroom Kugel


Ingredients:


1 pound wide egg noodles
1 onion, chopped
1 ounce dried portobello mushroom, rehydrated in hot water and drained
1 clove garlic, minced
6 tablespoons olive oil
6 eggs
2 teaspoons kosher salt
1 teaspoon black pepper
1 cup seasoned bread crumbs

Directions:


Preheat oven to 350.


Cook noodles according to package instructions.

In a large saute pan over medium high heat warm 4 tablespoons of the olive oil and cook mushrooms and onions until lightly browned.  Add garlic and cook for one minute more.   Remove from heat.

In a large bowl, lightly beat the eggs with a fork.  Add the noodles, salt, pepper, and mushroom mixture. Combine well.  Transfer the noodle mixture into a greased 9x13 baking dish.  In another bowl, combine the bread crumbs with the remaining 2 tablespoons of olive oil and then sprinkle over the noodle mixture.

Bake for 45 minutes to 1 hour, until the kugel is set and top is browned.  Let cool slightly and serve.


Monday, August 29, 2011

Overloaded with Tomatoes

Ted's backyard garden is in full swing.  Every day he presents me with more tomatoes from his bountiful crop.  It's funny because Ted is a little disappointed that he isn't harvesting more tomatoes and I'm grateful for the slight slump in production.

So, the tomatoes were starting to pile up on the counter when I went to make dinner tonight.  We're also heavy on the basil around here and there's a limit to how much pesto I want to fill my freezer with.  It was time to make a serious tomato and pesto dish.

I actually love really simple food.  It tends to be really refreshing and, not surprisingly, requires little actual work.  In the winter I'm all about the complicated dishes that require 100 ingredients and hours of prep and cooking.  In the summer my idea of complicated cooking is making a marinade.   There is nothing faster and easier to make than roasted tomatoes with pesto.

Here's the thing.  A dish like this requires the absolute best ingredients you can find.  There's no masking a tasteless tomato or dull basil.  If you're not growing it yourself, pick the ingredients up at a farmers market.  You'll taste the difference.

This dish smacks of summertime.  And as the lazy days of summer are drawing to an end, I'm all for savoring those flavors just a little longer.

Recipe:  Roasted Tomatoes with Pesto
(Ina Garten)

Ingredients:


2 to 2 1/2 pounds large red tomatoes
3 tablespoons good olive oil
2 teaspoons dried oregano
Kosher salt
1/2 teaspoon freshly ground black pepper
1/2 cup pesto, homemade is best (recipe follows)
1/2 cup freshly grated Parmesan cheese

Directions:


Preheat the oven to 425 degrees.

Core the tomatoes and then slice them across (not through the stem) in 1/2 inch-thick slices. Arrange the slices in a single layer on a sheet pan. Drizzle the tomatoes with the olive oil and sprinkle with the oregano, 1 1/2 teaspoons salt, and the pepper.

Bake the tomatoes for 10 minutes. Remove them from the oven, spread each slice with pesto, and sprinkle with the Parmesan cheese. Return the tomatoes to the oven and continue baking for 7 to 10 minutes, until the Parmesan is melted and begins to brown. Using a flat metal spatula, put the tomatoes on a serving platter, sprinkle with extra salt, and serve hot, warm, or at room temperature.

Pesto:
1/4 cup walnuts
1/4 cup pine nuts
3 tablespoons diced garlic (9 cloves)
5 cups fresh basil leaves, packed
1 teaspoon kosher salt
1 teaspoon freshly ground black pepper
11/2 cups good olive oil
1 cup freshly grated Parmesan cheese

Place the walnuts, pine nuts, and garlic in the bowl of a food processor fitted with the steel blade. Process for 30 seconds. Add the basil, salt, and pepper. With the processor running, slowly pour the olive oil into the bowl through the feed tube and process until the pesto is pureed. Add the Parmesan and puree for a minute. Use immediately or store the pesto in the refrigerator or freezer with a thin film of olive oil on top. Makes 4 cups.


Sunday, August 28, 2011

Ole'

These are Pioneer Woman's enchiladas because I forgot to take my own picture.  Mine looked just as good.

I'm from California so of course I love Mexican food.  It's in my DNA.  Despite my almost constant cravings for all things spicy and cheesy, I've never really mastered south of the border cuisine.  And living in Pittsburgh, it's not as though there's Mexican food on every corner like there is in L.A.  Needless to say, my hankering for Mexican food is rarely satisfied.

A couple of years ago I made enchiladas.  They came out gluey and as a result I've not attempted making them again.  All I recall of that episode is Ted valiantly choking down the gooey mess all the while telling me that they weren't that bad.  Not that bad isn't exactly what I was going for.

Lately I've been craving enchiladas so I decided to start simple.  The last time I made them I was really ambitious and used a complicated recipe from Diana Kennedy.  This time I decided to go with the visual approach and use a recipe from everyone's favorite cowgirl, the Pioneer Woman.

I have to start by saying that I don't usually cotton to PW's recipes, and more specifically to all the photographs.  I find her recipes to be somewhat distracting.  But for my enchiladas I thought maybe the pictures would help me to construct an edible casserole.

I have to tell you, there's something to all those photographs.  There's also something to be said for the somewhat less complicated version of this Mexican specialty.  This is not the most authentic recipe I've ever seen, but it's pretty foolproof and it tastes surprisingly good.

Because I found the step by step photos to be so helpful, here's a link to Pioneer Woman Cooks Enchiladas.  For those of you who don't need the pictures, here's the recipe.

Recipe:  Pioneer Woman's Enchiladas
From Pioneer Woman Cooks, 2009)


Ingredients:


FOR THE SAUCE:
1 Tablespoon Canola Oil
1 Tablespoon All-purpose Flour
1 can (28 Ounce) Enchilada Or Red Sauce
2 cups Chicken Broth
1/2 teaspoon Salt
1/2 teaspoon Ground Black Pepper
2 Tablespoons Chopped Cilantro
_____
FOR THE MEAT:
1-1/2 pound Ground Beef
1 whole Medium Onion, Finely Diced
2 cans (4 Ounce) Diced Green Chilies
1/2 teaspoon Salt
_____
FOR THE TORTILLAS:
10 whole (to 14) Corn Tortillas
1/2 cup Canola Oil


_____
TO ASSEMBLE:
3 cups Grated Sharp Cheddar Cheese
1/2 cup Chopped Black Olives
1 cup Chopped Green Onions
1/2 cup Chopped Cilantro

Directions:


Step #1 – The Sauce
In a large saucepan over medium heat, add oil and flour and whisk together to make a paste, cooking for one minute. Pour in the red sauce, chicken broth, cilantro, salt and pepper. Bring to a boil. Reduce heat and simmer 30-45 minutes.
Step #2 – The Meat
Brown the meat with onions in a skillet. Drain off fat. Stir in 2 cans diced green chilies and seasoned salt. Set aside.
Step #3 – Tortillas
Heat canola oil in a small skillet over medium heat. One by one, using tongs, fry tortillas in oil until soft, not crisp – about 30 seconds per side. Remove to a paper—towel lined plate. Repeat until all tortillas have been fried.
Step #4 – Assembly
Preheat oven to 350 degrees. Pour ½ cup red sauce in bottom of baking pan. Spread to even out. Dip each tortilla into red sauce, then remove to work surface. Spoon meat, a little grated cheese, a little black olives, and green onions in the center of tortilla. Roll up and place, seam down, in baking pan. Repeat until pan is filled. Pour extra red sauce over enchiladas. Top with remaining cheddar cheese.
Bake for 20 minutes or until bubbly. Sprinkle cilantro over enchiladas before serving.


Friday, August 26, 2011

You know You Love It

Come on.  Admit it.  Cookie dough has a certain appeal.  I can certainly remember back to when I was a young baker enjoying the cookie dough far more than the finished product.  Of course, that was back in the years before we all got nervous about uncooked eggs.   It still has a certain appeal.

And I'm not going to lie to you.  I have been known to nibble on the  leftovers on the spatula even as an adult.  I don't love the dough the way I used to but it does bring back memories.  Now Kate is my cookie dough lover.  She goes for all the hybrids -- cookie dough ice cream, cookie dough malted milk balls, to name just a few.

So, when Kate came home from visiting a friend and reported that they had made cookie dough cupcakes, I had to investigate.

Just as you might imagine, there are a lot of cookie dough cupcake recipes out there.  It's funny because I had never even though about combining the two but obviously others had.  There were all kinds of recipes.  Some used boxed mixes and Pillsbury cookie dough.  Others cooked the dough inside the cupcake.  It wasn't until I hit upon this recipe from Annie Eats that I knew I had found the ultimate cookie dough cupcake recipe.

This recipe is for cookie dough cupcakes on steroids.  The cake is cookie dough flavored, there is a delicious eggless cookie dough filling, and just in case you haven't had enough of a cookie dough fix, the frosting is cookie dough flavored.  You might think this is all a little too much cookie dough but you would be wrong.  This is a delicious cupcake.

Beware.  These are not quick to make.  It's a multi-step process.  You have to make the filling.  You have to bake the cupcakes.  You have to cut little cone shaped holes in the cupcakes and then you have to fill them with the dough.  Then you have to make the frosting and decorate the cupcakes.  As I said, it's a multi-step process.

But it's worth it because you know you love it.


Recipe:  Chocolate Chip Cookie Dough Cupcakes
((Annie Eats)

Yield:24 cupcakes

Ingredients:


For the cupcakes:
3 sticks unsalted butter, at room temperature
1½ cups light brown sugar, packed
4 large eggs
2 2/3 cups all-purpose flour
1 tsp. baking powder
1 tsp. baking soda
¼ tsp. salt
1 cup milk
2 tsp. vanilla extract
1 cup chocolate chips (semisweet or bittersweet)

For the filling:
4 tbsp. unsalted butter, at room temperature
6 tbsp. light brown sugar, packed
1 cup plus 2 tbsp. all-purpose flour
7 oz. sweetened condensed milk
½ tsp. vanilla extract
¼ cup mini semisweet chocolate chips

For the frosting:
3 sticks unsalted butter, at room temperature
¾ cup light brown sugar, packed
3½ cups confectioners’ sugar
1 cup all-purpose flour
¾ tsp. salt
3 tbsp. milk
2½ tsp. vanilla extract

For decoration:
Tiny chocolate chip cookies
Mini chocolate chips

Directions:


To make the cupcakes, preheat the oven to 350° F.  Line two cupcake pans with paper liners (24 total).  In the bowl of a stand mixer fitted with the paddle attachment, combine the butter and brown sugar.  Beat together on medium-high speed until light and fluffy, about 3 minutes.  Mix in the eggs one at a time, beating well after each addition and scraping down the sides of the bowl as needed.

Combine the flour, baking powder, baking soda, and salt in a medium bowl.  Stir together to blend.  Add the dry ingredients to the mixer bowl on low speed, alternating with the milk, beginning and ending with the dry ingredients, mixing each addition just until incorporated.  Blend in the vanilla.  Fold in the chocolate chips with a spatula.

Divide the batter evenly between the prepared cupcake liners.   Bake for 18-20 minutes, until a toothpick inserted in the center comes out clean.  Allow to cool in the pan 5-10 minutes, then transfer to a wire rack to cool completely.

To make the cookie dough filling, combine the butter and sugar in a mixing bowl and cream on medium-high speed until light and fluffy, about 2 minutes.  Beat in the flour, sweetened condensed milk and vanilla until incorporated and smooth.  Stir in the chocolate chips.  Cover with plastic wrap and refrigerate until the mixture has firmed up a bit, about an hour.

To fill the cupcakes, cut a cone-shaped portion out of the center of each cupcake.  Fill each hole with a chunk of the chilled cookie dough mixture.

To make the frosting, beat together the butter and brown sugar in the bowl of a stand mixer fitted with the paddle attachment until creamy.  Mix in the confectioners’ sugar until smooth.  Beat in the flour and salt.  Mix in the milk and vanilla extract until smooth and well blended.

Frost the filled cupcakes as desired, sprinkling with mini chocolate chips and topping with mini chocolate chip cookies for decoration.

Source: inspired by Hello, Baker!, cake adapted from Cupcake Bakeshop, frosting adapted from The Cupcake Review and How to Eat a Cupcake


Wednesday, August 24, 2011

Forbidden No More

You learn something new everyday.  Today, for example, I learned about forbidden rice.  I never even knew that there was such a thing as forbidden rice but now that I know about it I'll bet it will pop up everywhere.  You know how that happens sometimes.

But back to the forbidden rice.  Apparently forbidden rice, which is originally from China, was reserved for the Emperor's table.  It was considered to be an aphordisiac and was renowned for its nutritional properties.    What makes forbidden rice so cool is that it's black.  Black rice.  Who knew?  As I said.  You learn something new everyday.

What's especially nice about forbidden rice is that it's absolutely gorgeous.  It tastes really good too.  It's vaguely nutty, like wild rice, but a little more subtle.  It also lends itself nicely to room temperature rice salads, like this one with ginger, fresh peaches, and sugar snap peas.

This is a dish that makes a statement.  It's as beautiful to look at as it is delicious to eat.

Recipe:  Black Forbidden Rice with Peaches and Sugar Snap Peas
(Giada De Laurentiis)


Ingredients:


Rice:
3 1/2 cups water
2 cups black forbidden rice (recommended: Lotus Foods)
1 (1 1/2-inch) piece fresh ginger, peeled and finely chopped
2 teaspoons kosher salt
1 tablespoon vegetable oil
2 1/2 cups (8 ounces) snap peas, trimmed and cut into 1-inch pieces
2 peaches, pitted and sliced

Dressing:
1/4 cup seasoned rice vinegar
1/4 cup grapeseed oil
3 tablespoons honey
1 tablespoon soy sauce

Directions:


For the rice: In a medium saucepan, bring the water, rice, ginger, and salt to a boil over medium heat. Reduce the heat to a simmer, cover the pan, and cook until the rice is tender, about 30 minutes. Remove the pan from the heat and set aside for 5 minutes. Fluff with a fork and place in a large serving bowl.

In a large nonstick skillet, heat the oil over medium-high heat. Add the snap peas and cook, stirring frequently, until slightly soft, about 2 minutes. Add the peach slices and cook for 2 minutes. Transfer the peas and peaches to the serving bowl.

For the dressing: In a medium bowl, whisk together the vinegar, oil, honey, and soy sauce until smooth.

Pour the dressing over the rice mixture and toss well. Serve warm or at room temperature.


Tuesday, August 23, 2011

I'll Have Some Salad With That Vinaigrette

I don't usually get excited about salad.   I'm a romaine and a couple of tomatoes salad kind of girl.  But as you know, I've been trying to widen my salad horizons lately.  It's hard work but someone has to do it.

The other day, in my effort to expand beyond romaine lettuce, I bought a selection of other, more varied lettuces.  To be fair, this gourmet grouping, creatively named "Tanimura & Antle Artisan Lettuces"  came in a multi pack from Costco.  It was very attractively packaged, and we all know packaging is key.   It had three different lettuces: Petite Tango, Petite Gem, and Petite Oak, two heads of each.

Last night I made a salad using Petite Tango.  The lettuce was lovely but it's what I did with the lettuce that was noteworthy.  I made the best vinaigrette I've ever had.  I'm not talking just good, I'm talking really great.  I added just a few very fresh thinly sliced mushrooms, some sweet yellow teardrop tomatoes from my garden, and a shaving of parmesan on top.  It was, to be modest, divine.  

Just when I thought I had expanded my horizons as far as they would go by making salads with fruit in them, I upped the ante with a vinaigrette to end all vinaigrettes.  This is a vinaigrette to die for.

Recipe:  Lemon Vinaigrette


*  Note:  This would also made a delicious marinade


Ingredients:


2 Tbsp. extra-virgin olive oil
1 Tbsp. fresh lemon juice
1 small clove garlic, minced
1/2 tsp. finely shredded lemon zest (optional)
1/2 tsp. salt
1/4 tsp. freshly ground black pepper
1/4 tsp.dry mustard


Directions:


Whisk all ingredients together in a small bowl.  Immediately toss with salad greens.  


Monday, August 22, 2011

A Dessert to Feel Good About

I am a dessert eater.  I love a little something sweet after dinner and by sweet I mean a cookie or a little ice cream.  Being a middle aged woman, a cookie or a little ice cream isn't the most sensible dessert so I often try and fake myself out with a dessert that's a little more, shall we say, sensible.

Macerated strawberries are the perfect dessert.  First of all, you can make them in about 30 seconds.  Second of all, there's no cooking involved, just stirring.  And most importantly, they are pretty much guilt free which means you can have a nice little bowl and not cringe when you get on the scale the next time.

Not only are macerated strawberries easy to make, you can dress them up or down, depending on your mood.  I love them with just sprinkling of lemon zest but they're also absolutely delicious with a chiffonade of fresh basil.  Anyway you do it, they're the perfect end to dinner.

If you want to go wild and make the strawberries into a less virtuous show stopped for guests, try serving them over pound cake or ice cream.  Or, how about making your breakfast a little more gourmet and serving them over a little greek yogurt.  The possibilities are endless and this is still a dish you can feel good about enjoying.

Recipe:  Macerated Strawberries


*  Note:  These strawberries are good with a chiffonade of 8 basil leaves.  If using basil, omit the lemon zest.  They are also delicious mixed with other fruits, especially blueberries.

Use a high quality aged (thick) balsamic vinegar.  I like Fini, available at Williams Sonoma.


Ingredients:


4 cups fresh strawberries, rinsed, hulled, and sliced
1 tablespoon granulated sugar
2 teaspoons aged balsamic vinegar
1/8 teaspoon freshly ground black pepper
1 teaspoon fresh lemon zest

Directions:
In a large bowl, gently toss the strawberries with the sugar, balsamic, and pepper. Let sit at room temperature until the strawberries have released their juices but are not yet mushy, about 30 minutes but not more than 90 minutes.

Just before serving, grate lemon zest over strawberries.


Sunday, August 21, 2011

Memphis Rendezvous

Most people think of Elvis and Graceland when they think of Memphis, Tennessee.   For junior tennis players, Memphis means something different.  It means clay court championships.  And for Budi, one of Kate's coaches, Memphis means not only clay courts, it means Rendezvous Barbecue.

Budi is a man after my own heart.  He loves to eat.  He also takes advantage of where ever he is to sample the local specialties.  In Memphis, a city filled with great barbecue, Budi swears that Rendezvous is the gold standard.

Budi and I happened to be talking just before he left for Memphis, and I mentioned  that he should try Neeley's.  After all, Gina and Pat Neeley are Food Network staples.   If you can get part the saccharine sweetness of their interaction ("honey", "sugar baby"), they clearly know their barbecue.  I've never been to Memphis but there are two must visits on my list if I ever make it there:  Graceland and Neeley's Barbecue.

Despite my Neeley's sales pitch, Budi informed me that the best barbecue in Memphis was at Rendezvous Barbecue.  In fact, he said it was so good that he planned to eat there every night during his visit.  And to prove to me how good it was, he offered to bring back some of their world famous barbecue sauce.


Budi did try Neeley's and announced that it wasn't nearly as good as Rendezvous.  True to his promise, he arrived home with not only the sauce, but a spice rub as well.

Normally I would have made ribs the next day because I was so excited to try my Rendezvous rub and sauce.  But I knew that of all the people in my family, the one who would enjoy this taste test the most was Charlie.  So I waited for him to return and now that he is back Ted fired up the smoker and settled in for a long, relaxed afternoon.

After six hours in the smoker the baby backs were ready and I have to tell you, they were sublime.  The rub added a lot of nice flavoring but the real topper was the spicy Rendezvous sauce.  A little went a long way.  It was very spicy but so good.
Ted's Ribs

I have no immediate plans to go to Memphis.  When I do finally get there, my two must visits have changed.   I'll be stopping by Graceland and Rendezvous Barbecue.


Thursday, August 18, 2011

Pop to It

I have to admit that I've been late to the ice pop party.  I bought a Zoku Ice Pop Maker last summer but after a couple of ill fated attempts I took the unit out of my freezer, stuck it in the back of a cabinet, and promptly forgot about it.

That is, until this summer.  It seems like everywhere I go I see the Zoku, even in the supermarket.  The marketing people for the Zoku have really done their work.   The Zoku freezer is very slick and colorful and its appearance alone makes you want to jump on the band wagon and make some cute little ice pops.

And for someone like me, who loves accessories, the Zoku was made in heaven.  There are Zoku holders, little measuring cups, special molds, and cookbooks dedicated solely to the pursuit of making these frozen treats.

So as not to be left out of the latest craze, back into the freezer went my Zoku and out came the cookbooks and accessories.  This time I actually read the instructions and followed them and low and behold, the pops popped right out of the Zoku.  I set them in my Zoku pop holder and we had dessert.

There is a catch.  The unit must be frozen for 24 hours prior to use so this is not a spontaneous little dessert.  You can make nine pops each time you freeze the unit so there'll be plenty of pops to hold you over until the unit refreezes.

Get creative and pop to it.


Wednesday, August 17, 2011

Where's the Dog?

This is Pebbles.  

My five year old English bulldog Pebbles has finally learned to climb the stairs to the second floor of our house.  That may not sound like a big deal but it is.

For years,  Pebi's world has ended at the bottom of the staircase.  She would stand at the base of the stairs and whine but never ventured up the stairs to see what was going on in no man's land.  It's not like we didn't invite her up because we did.  We'd coax and cajole her but she never budged.  It was just too scary a thought, I guess.

But all that changed a couple of weeks ago.  I was working in my office on the second floor.  Actually I  wasn't working at all.  I was probably cruising the internet.   I felt like there was something moving in the room.  I looked around and out from behind the coffee table appeared none other than Pebbles.  Who knows how long she had been hiding there.

She was most excited at her new location.  She scurried all around, with her little tushy wiggling.  She was pretty excited.

Getting her down the stairs was a little dicey.  She was afraid and the first couple of times I had to carry her with her little legs shooting straight out in front of her, like Super Dog.  But soon she was handling the stairs like a pro.

Pebbles is now a regular on the second floor.  She's even ventured up to the third floor, lest she miss out on any of the action.  All those years of inviting her upstairs and she finally took the bull by the horns and did it all by herself.

Of course, now we have a new problem.  We can never find Pebi.  Since the world is now her oyster, she tours the house was abandon and the familiar refrain around here is "where's the dog?"

Clearly there is not a recipe that really works with the Pebbles story so instead I'm going to share a recipe for a truly delicious peanut butter chocolate chip cookie.   These cookies are deliciously cakey.  Eat one and then send the rest with your kids to share with their friends.  That way you get to enjoy a truly delicious cookie without the "I can't believe I ate the whole thing" guilt.  I'm pragmatic if nothing else.

Recipe:  Peanut Butter Chocolate Chip Pecan Cookies
(Adapted from The Complete Magnolia Bakery, 2009)

Ingredients:


2 1/2 cups all-purpose flour
1 teaspoon baking soda
1/2 teaspoon salt
1 cup (2 sticks) unsalted butter, room temperature
1 cup firmly packed light brown sugar
1/3 cup sugar
1 large egg
2 tablespoons milk
1 1/2 teaspoons vanilla extract
1 1/2 cups toasted chopped pecans
1 cup peanut butter chips
1 cup semi-sweet chocolate chips

Directions:


Preheat the oven to 350.  Line 2 baking sheets with parchment paper.

In a small bowl, combine the flour, baking soda, and salt.   Set aside.

In a large bowl, cream the butter and sugars until smooth, about 2 minutes.  Add the egg, cream, and vanilla, and beat well.  Add the dry ingredients and mix thoroughly.  Stir in the pecans, peanut butter chips, and chocolate chips.  Drop by rounded teaspoonfuls onto cookie sheets, leaving several inches between for expansion. Bake for 10-12 minutes, or until lightly golden.

Cool the cookies on the sheets for 5 minutes, and then remove to a wire rack to cool completely.


Tuesday, August 16, 2011

The (Salad) Bar Just Got Higher

I have to admit it that I'm not usually all that creative when it comes to salad.  Usually I reserve my creative salad eating to lunch out with the girls.  At home I'm more of a romaine and a couple of tomatoes kind of salad maker.  Serviceable but not creative.

Then last week I went wild and made Ina's celery and parmesan salad (YLT 8/4/11), and I was hooked.  There was this whole wide world of salads out there just waiting for me to make them.  Who knew?  All of a sudden I was thinking of salad as a key part of the meal and not just, well, salad.

So, last night I wanted to make an arugula and watermelon salad.  When I'm trying something new I always look to Ina first.  I figure that if she says it's good than it usually is.  Low and behold, Ina had a recipe that called for parmesan instead of the standard feta.  Since I had parmesan in the house but not feta, this was the route I took.  Everyone loved it.  Even Charlie, and he's not a big lover of green things.

Now that I'm making dinner more interesting by chucking the romaine and rolling out the red carpet for more interesting salads I feel like the world is my oyster -- or at least my salad bar.

Recipe:  Arugula and Watermelon Salad
(Ina Garten)


Ingredients:


1/2 pound baby arugula leaves
2 pounds seedless watermelon, 3/4-inch-diced (3 pounds with the rind)
1/3 cup good olive oil
1/4 cup freshly squeezed lemon juice (2 lemons)
1 teaspoon kosher salt
1/2 teaspoon freshly ground black pepper
1/2-pound chunk Parmesan cheese

Directions:


Place the arugula and watermelon in a large bowl. In a small bowl, whisk together the olive oil, lemon juice, salt, and pepper. Pour enough dressing on the arugula to moisten. Toss well and place on 6 salad plates.

With a very sharp knife or a vegetable peeler, shave the Parmesan into large shards and sprinkle them on the arugula and watermelon. Sprinkle with salt and serve.


Monday, August 15, 2011

A Long, Hot Bath

My jam fresh out of the water bath.  Kate took this picture.  

I've made a lot of jam over the last couple of days and needless to say, we will not be eating all of it.   And besides, jam is the perfect thing to give to others.  I know that I would be very excited if someone gave me a jar of homemade jam.   I, like most people, generally buy jam at the grocery store so receiving homemade jam would be really special.

But, you have to be careful not to poison your gift recipients.  That is why sterilization is so important when canning.  Aside from using the best ingredients possible, sterilization comes next in order of importance.  When the jars are all filled with your delicious jams, the next stop for your jars should be a long, hot water bath.

I'm not going to lie.  The water bath is a pain in the neck.  I'm not a big fan of huge pots filled with boiling water but I have to make an exception for this process.  Giving your jam a water bath is really very easy but takes some time and a really good pair of hot mitts.

This is a canner.  This is why we have basements for storage.

I actually have a canner.  It's a huge pot with a rack inside to hold the jars.  To be fair, this pot hasn't seen the light of day in years, not since the last time I made jam.  In the meantime, it's been living a secluded life and gathering dust in the basement.

This video, Water Baths for Dummies, is very helpful in explaining the sterilization process.  In fact, it's a lot clearer than I could be without plagiarizing someone who actually knows what they're talking about.

Since we are still swimming in peaches over here, I made another batch of jam, this time peach raspberry.  It's so yummy and looks beautiful in the jars.  And, having taken a ten minute stop in a water bath, I know it will make a perfect gift for anyone who really likes a nice jar of jam.
My peach raspberry jam just before I started cooking it.

Recipe:  Peach Raspberry Jam
(Adapted from Certo)

Ingredients:


4 cups prepared fruit (buy about 1-1/2 pt. fully ripe red raspberries and about 1-1/2 lb. fully ripe peaches)


1/4 cup  fresh lemon juice
6-1/4 cups sugar, measured into separate bowl
1/2 tsp.  butter (optional, to prevent foaming)
1 pouch CERTO Fruit Pectin


Directions:


Bring a boiling-water canner, half full with water, to simmer. Wash jars and screw bands in hot soapy water; rinse with warm water. Pour boiling water over flat lids in saucepan off the heat. Let stand in hot water until ready to use. Drain jars well before filling.


Crush the raspberries thoroughly, one layer at a time. Sieve half of the pulp to remove some seeds. Measure 2 cups prepared raspberries into 6- or 8-qt. saucepot. Peel, pit and finely chop peaches. Measure 2 cups prepared peaches into saucepan with raspberries; mix well. Stir in lemon juice.


Stir the sugar into prepared fruit in saucepan. Add butter to reduce foaming. Bring mixture to full rolling boil (a boil that doesn't stop bubbling when stirred) on high heat, stirring constantly. Stir in pectin. Return to full rolling boil and boil exactly 1 min., stirring constantly. Remove from heat. Skim off any foam with metal spoon.


Ladle immediately into prepared jars, filling to within 1/8 inch of tops. Wipe jar rims and threads. Cover with two-piece lids. Screw bands tightly. Place jars on elevated rack in canner. Lower rack into canner. (Water must cover jars by 1 to 2 inches. Add boiling water, if necessary.) Cover; bring water to gentle boil. Process 10 min. Remove jars and place upright on a towel to cool completely. After jars cool, check seals by pressing middles of lids with finger. (If lids spring back, lids are not sealed and refrigeration is necessary.)

Sunday, August 14, 2011

Peachy Keen

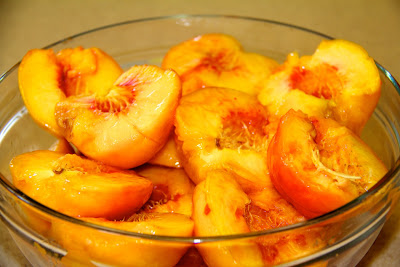
The other day Ted passed a farm stand selling fresh peaches.  Ted being Ted, he didn't arrive home with a little bag of peaches.  He arrived home with ten pounds of fresh peaches.  Let me tell you that ten pounds of peaches is a lot of peaches.

Although I like peaches, I hadn't given them a lot of thought this summer prior to their arrival.  That's probably because the peaches found in my supermarket are hard as rocks and don't have that delicious peachy smell.  Now, faced with a huge bag of delicious smelling peaches,  I was faced with a daunting task.  What would I do with them?  Sure, we would eat some.  And I could grill some on the barbecue, but that would probably only account for a small number of this massive bag full of peaches.

Well, when life gives you peaches, make peach jam.

I used to make jam all the time but then I got lazy.  It's so much easier to just buy a jar of jam especially because most of the fruit available in the supermarket isn't all that tasty anyway.  Making jam from scratch is a lot of work, especially with peaches.  You have to blanch the peaches to remove the fuzzy skin and then you have to remove the pit from the flesh.  But when you have delicious succulent peaches like I had sitting on my kitchen counter, suddenly all the work seemed like a small price to pay given what I would get in return: summertime in a jar.

Little did I know that the hardest aspect of this project would be to locate 8 ounce Mason jars.  You would think they would be easy to find.  Not so.  Mason jars are usually available in the supermarket or in a hardware store.  Well, they may be found in those stores in your city, but not here in Pittsburgh.  Nonetheless, after several false starts I secured several dozen jars and got to work.

Making jam is a race against the clock.  First of all, you have to make the jam when the fruit is at its freshest.  You have to be organized and have all your jars sterilized and ready to go.  And finally, you have watch your mixture meticulously or it will burn.


I blanched my peaches and peeled them.  Then I chopped them.  Then I coarsely pureed them.  Then I cooked them.  And finally I poured the golden mixture into my sterilized jars and gave them a nice hot water bath.

Like I said.  Summertime in a jar.

Recipe:  Peach Jam
(Adapted from Certo)


Ingredients:


3 pounds peaches, peeled, and chopped to equal exactly 4 cups
7 1/2 cups granulated sugar
1/4 cup fresh lemon juice
1 pouch Certo
1/2 teaspoon butter (optional) to prevent foaming

Directions:


Bring boiling-water canner, half full with water, to simmer. Wash jars and screw bands in hot soapy water; rinse with warm water. Pour boiling water over flat lids in saucepan off the heat. Let stand in hot water until ready to use. Drain well before filling.

Peel and pit peaches. Finely chop or grind fruit. Measure exactly 4 cups prepared fruit into 6- or 8-qt. saucepan. Stir in lemon juice.

Stir sugar into prepared fruit in saucepan. Add butter to reducing foaming. Bring to full rolling boil (a boil that doesn't stop bubbling when stirred) on high heat, stirring constantly. Stir in pectin. Return to full rolling boil and boil exactly 1 min., stirring constantly. Remove from heat. Skim off any foam with metal spoon.

Ladle immediately into prepared jars, filling to within 1/8 inch of tops. Wipe jar rims and threads. Cover with two-piece lids. Screw bands tightly. Place jars on elevated rack in canner. Lower rack into canner. (Water must cover jars by 1 to 2 inches. Add boiling water, if necessary.) Cover; bring water to gentle boil. Process 10 min. Remove jars and place upright on towel to cool completely. After jars cool, check seals by pressing middles of lids with finger. (If lids springs back, lids are not sealed and refrigeration is necessary.)


Thursday, August 11, 2011

Some Assembly Required

(Food Network)
Back when all I could do in the kitchen was bake cookies and order in Chinese, I knew I had it in me to do more.  I knew I could assemble.  Don't laugh.  Being able to assemble a crudite platter or a cheese platter is a useful skill.  It may not involve turning on the oven or frying something up in a pan but assembly does have it's place in cooking.

Last week I had guests for dinner and it was about 1,000 degrees outside.  Needless to say, the idea of turning the oven on the bake a cake was unappealing.  Enter the assembled dessert.

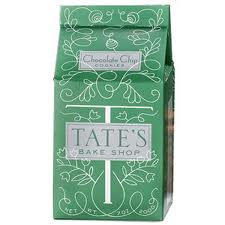
The epitome of the assembled dessert is an old fashioned ice box cake.  The classic icebox cake is made with plain chocolate wafer cookies and whipped cream.   But leave it to Ina to "turn up the volume', to use her words, and turn the classic on it's ear.    Ina's recipe uses Tate's chocolate chip cookies, a delicacy on their own and absolutely insane in the  cake.  (By some stroke of luck, Tate's cookies are available at Whole Foods.)  The whipped cream in this version is mocha flavored and is a really nice contrast with the crispy chocolate chip cookies.  The best thing about this cake, and any icebox cake for that matter, is that it's the perfect summertime dessert because it requires no baking, just assembly.

I literally whipped this cake up the night before because it needs to sit in the refrigerator at least overnight to reach the peak of deliciousness.  When I served it the next evening my guests were duly impressed.  Little did they know that it took just minutes to assemble.  Like I said.  Being able to assemble is a useful cooking tool.

Recipe:  Mocha Chocolate Icebox Cake
(Ina Garten)

Ingredients:

2 cups cold heavy cream
12 ounce Italian mascarpone cheese
1/2 cup sugar
1/4 cup coffee liqueur, such as Kahlua
2 tablespoons unsweetened cocoa powder, such as Pernigotti
1 teaspoon instant espresso powder
1 teaspoon pure vanilla extract
3 (8-ounce) packages chocolate chip cookies, such as Tate's Bake Shop
Shaved semisweet chocolate, for garnish

Directions:

In the bowl of an electric mixer fitted with the whisk attachment, combine the heavy cream, mascarpone, sugar, coffee liqueur, cocoa powder, espresso powder, and vanilla. Mix on low speed to combine and then slowly raise the speed, until it forms firm peaks.

To assemble the cake, arrange chocolate chip cookies flat in an 8-inch springform pan, covering the bottom as much as possible. (I break some cookies to fill in the spaces.) Spread a fifth of the mocha whipped cream evenly over the cookies. Place another layer of cookies on top, lying flat and touching, followed by another fifth of the cream. Continue layering cookies and cream until there are 5 layers of each, ending with a layer of cream. Smooth the top, cover with plastic wrap, and refrigerate overnight.

Run a small sharp knife around the outside of the cake and remove the sides of the pan. Sprinkle the top with the chocolate, cut in wedges, and serve cold.


Too Many Tomatoes

I am having a hard time keeping up with the tomato production around here.  It's amazing to me just how many tomatoes six plants can produce.  Let's just say that it's a lot.

Every day Ted presents me with a new bushel of tomatoes to turn into something delicious.  Given that the raw ingredients are so good, it's not too difficult.  There's always the old standby caprese salad which, let's face it, is reason enough to grow tomatoes in the first place.  But, me being me, I like to do more than just what's expected.

It's summer and light, fresh pastas are really appealing to me right now.  It was with that in mind that last night I made a no cook tomato sauce based solely on the ingredients I had on hand.  It was quick and it was easy.  To make it into a real main course, I added roasted shrimp to the pasta, although you could serve it with grilled chicken if you were so inclined.  It doesn't really even need the shrimp or the chicken if you were feeling more, shall we say, vegetarian.

This recipe took care of today's crop.  Now I have to come up with something tomato-y for tomorrow.  I can't let the tomatoes get ahead of me.

Recipe:  No cook Tomato Sauce


*  Note:  Serve tossed with grilled chicken or roasted shrimp.  Also consider adding 1/4 cup chopped kalamata olives and/or 2 tablespoons of drained capers. 


Ingredients:


2 cloves garlic, chopped
2 pounds fresh tomatoes, medium dice
2 tablespoons olive oil
1 jalapeno, seeded and chopped
1/4 cup Italian parsley, chopped
1/4 cup fresh basil, julienned
Kosher salt and pepper

Directions:


In a large pasta bowl, combine the garlic, tomatoes, olive oil, jalapeno, basil,  and parsley.  Let sit for at least 30 minutes for flavors to meld.  Season well with salt and pepper.  Serve over cooked pasta.


Put the parsley, garlic, and chile on a cutting board. With a chef’s knife, mince the ingredients together. In a medium bowl, combine the parsley mixture with the tomatoes and olive oil. Season to taste with salt, and serve over cooked pasta. 

Tuesday, August 9, 2011

On the Side

(Fine Cooking Magazine)


I don't know about you, but I have a hard time coming up with interesting side dishes.  Dinner for me is sort of a bookend event.  I think a lot about the main course and I think a lot about the dessert.  What I don't think much about is what goes in between.  This is why the side dishes often end up being treated like the ugly step sister in a fairy tale.

Lately I've been making more of an effort to expand my side dish horizons and not serve quite so much plain rice or egg noodles.  And I'm doing well.  I've tried a lot of new recipes and I'm feeling excited about some new recipes.

This recipe for Orzo with Brown Butter and Parmesan is a good example of what a little preparation can add to a somewhat unexciting pasta.  This dish is a new take on standard pilaf and is a nice accompaniment to almost any main dish you could think of.  I served it with a marinated grilled flank steak and it was a real home run around our dinner table.

Recipe:  Orzo with Brown Butter and Parmesan
(Fine Cooking Magazine, August/September, 2011)
 
Ingredients:


1-1/2 cups lower-salt chicken broth
2 Tbs. unsalted butter
1 cup orzo
1/3 cup dry white wine
Kosher salt and freshly ground black pepper
2 Tbs. freshly grated Parmigiano-Reggiano
Thinly sliced fresh chives (optional)

Directions:


In a 1- to 2-quart saucepan, bring the chicken broth and 1/2 cup water to a simmer over medium-high heat.

In a 3-quart heavy-duty saucepan, cook the butter over medium heat, swirling the pan occasionally, until the butter turns goldenbrown and smells nutty, about 2 minutes. Add the orzo and stir with a wooden spoon to coat well. Cook until the orzo just begins to turn a light golden color, about 2 minutes.

Pour in the wine and stir until absorbed, about 1 minute. Add the simmering broth mixture, stir, cover, and reduce the heat to low. Cook until the orzo is just tender, about 12 minutes; the mixture may still be wet but will set up.

Stir the orzo, season to taste with salt and a generous amount of pepper,

Monday, August 8, 2011

Home Sweet Home

(Johanne Killeen)
As I have mentioned in my blog, Charlie stayed at Carleton this summer to work for a professor.   I have also mentioned that, much to my surprise, he and his roommates have been cooking.  I still can't believe it, since when he was living at home, Charlie's kitchen prowess extended only as far as the microwave where he could heat up Stauffer's macaroni and cheese.

But Charlie has managed to feed himself this summer quite impressively so I have to be on my game now that he's returning.  I can't just throw a broiled chicken breast on the table and call it dinner for his first meal at home.  I need to make a good showing.

Now, I'm at a disadvantage because I am simply not in the cooking mood.  I mean that I am seriously not in the cooking mood to the point that a bowl of Frosted Flakes for dinner would be fine with me.  But, like many things in life, maybe if I pretend to be in the mood I'll actually end up in the mood.  So here goes.

Charlie loves sausages.  Perhaps that's because the natural accompaniment for sausages is  beer. Being both a college student and an accomplished beer pong player (yes, I'm so proud...), it only stands to reason that sausages would be a favorite.  Now, while I will not be serving my gourmet sausage dish on a dismantled dorm room door alongside a red Solo cup, I am sure it will be well received by my son.

This is not just any sausage dish.  This recipe for Roasted Sausages with Grapes is sausage at its best.  You can make it with any kind of Italian sausage you like -- chicken, turkey, pork -- but mix it up using half sweet and half spicy sausage.  I also mix the grapes so that half are green and half are red.  If you only have one color don't worry.  It all ends up a little brown anyway.

This recipe is easy too.  It takes just minutes to put together and looks very impressive when you bring it to the table.  It's very rustic and is so satisfying.  You can up the amounts and it would be a great dish for a crowd too.  And, having not cooked for my very tall son in several months, I had almost forgotten that cooking for him is almost the same as cooking for a crowd.


Recipe:  Roasted Sausages and Grapes
(Johanne Killeen)

Ingredients:

1 1/2 pounds Italian hot sausage
1 1/2 pounds Italian sweet sausage
3 tablespoons unsalted butter
5 to 6 cups (2 pounds) red or green seedless grapes, stems removed
2 to 4 tablespoons dry red wine, preferably Chianti
3 tablespoons balsamic vinegar
Fresh Foccaccia or Ciabatta bread, to serve

Directions:


Preheat the oven to 500 degrees.

Parboil the sausages in water to cover for 8 minutes to rid them of excess fat.

Melt the butter in a large heatproof roasting pan, add the grapes, and toss to coat. Over moderately high heat add the wine. Stir with a wooden spoon for a few minutes until the wine has reduced by half.

Using tongs, transfer the parboiled sausages to the roasting pan and push them down in the grapes so the sausages will not brown too quickly. Roast in the oven, turning the sausages once, until the grapes are soft and the sausages have browned, 20 to 25 minutes.

Place the roasting pan on top of the stove over a medium-high heat and add the balsamic vinegar. Scrape up any browned bits on the bottom of the roasting pan, and allow the vinegar and juices to reduce until they are thick and syrupy. With a slotted spoon, transfer the sausages and grapes to a serving platter.

Pour the sauce over the sausages and grapes and serve immediately, accompanied with fresh bread.

This recipe was provided by professional chefs and has been scaled down from a bulk recipe provided by a restaurant. The Food Network Kitchens chefs have not tested this recipe, in the proportions indicated, and therefore, we cannot make any representation as to the results.

Sunday, August 7, 2011

Summer's Bounty

(Fine Cooking Magazine)

Every summer Ted grows tomatoes in our backyard.  Living in the middle of the city, we don't have a lot of room for this agricultural endeavor, but Ted does a pretty impressive job with our limited space.

This summer we are growing six different kinds of heirloom tomatoes and at the moment they are all starting to ripen.  This means that around here we are eating a lot of fresh, beautiful tomatoes.  The only problem is that we have so many tomatoes that I have to become very creative to use them all up.  Let's face it.  As delicious as a caprese salad is, there's a limit to how many I want to eat in a one month period.

Fortunately, there are lots of other delicious dishes that beautifully showcase these tomatoes.   Over the next couple of weeks I'll be sharing some of our favorite tomato recipes.  I hope that if you have a favorite recipe you'll share it with me.  I need all the help I can get!

Recipe:  Tomato Gratin with Asiago and Fresh Herbs
(Fine Cooking Magazine, August/September, 2011)

Ingredients:


Extra-virgin olive oil 
3 medium beefsteak tomatoes, (about 6 oz. each), sliced 1/4-inch thick 
Kosher salt and freshly ground black pepper 
1/4 cup coarse fresh breadcrumbs 
1/4 cup finely grated Asiago cheese 
1 Tbs. chopped fresh flat-leaf parsley 
1 tsp. coarsely chopped fresh thyme 


Directions:

Position a rack 6 inches from the broiler element and heat the broiler on high. Lightly oil a 10x12-inch (or similar size) broiler-safe baking dish. Arrange the tomato slices in the baking dish in a single, slightly overlapping layer. Sprinkle with 1/4 tsp salt.


In a small bowl, mix together the breadcrumbs, Asiago, parsley, thyme, 2 tsp. olive oil, a pinch of salt, and 1/8 tsp. pepper. Sprinkle the breadcrumb mixture evenly over the tomatoes.


Broil until the breadcrumbs are a deep golden-brown, 2 to 3 minutes. Drizzle with more olive oil and serve immediately.

Thursday, August 4, 2011

Crunch is the Word

Celery is an underrated vegetable.  Mostly it just provides the crunch in tuna salad and the trough for the peanut butter.  Celery is never the star of the show.  That is until now.

I was looking for an interesting salad to make with dinner tonight and happened across this recipe for Celery and Parmesan Salad.  Hello Gorgeous.  Where have you been all my life?

This may be the best salad I have ever eaten.  It's crunchy, fresh, light, and all around perfect.  I cannot say enough nice things about it.  It's also incredibly easy to make and gets better with age so you can make it early in the day to serve at dinner.

What I really love about this salad is that it's unexpected.  Who ever makes a celery salad?  It's not something you ever see on a menu, that's for sure.   I don't say this often but you really should try this.  I'm sure you'll be singing it's praises like I am.

Recipe:  Celery and Parmesan Salad
(Ina Garten)


Ingredients:


1/2 cup good olive oil
2 teaspoons grated lemon zest
1/4 cup plus 1 tablespoon freshly squeezed lemon juice (3 lemons)
2 tablespoons minced shallots
1 teaspoon celery seed
1/2 teaspoon celery salt
1/2 teaspoon anchovy paste
Kosher salt and freshly ground black pepper
5 cups thinly sliced celery hearts, tender leaves included, sliced on an angle (about 12 stalks)
4-ounce chunk aged Parmesan cheese
2/3 cup toasted walnuts, coarsely chopped
Whole flat-leaf parsley leaves

Directions:

At least 1 hour before you plan to serve the salad, whisk together
the olive oil, lemon zest, 1/4 cup of lemon juice, the shallots, celery
seed, celery salt, anchovy paste, 2 teaspoons salt, and 1 teaspoon
pepper. Place the celery in a mixing bowl and toss it with the
remaining 1 tablespoon of lemon juice and 1/2 teaspoon of salt.
(Even though these ingredients are in the dressing, believe me—
this step makes a difference.) Add enough dressing to moisten well.
Cover and refrigerate for at least an hour to allow the celery to crisp
and the flavors to develop.

When ready to serve, arrange the celery on a platter, shave the
Parmesan onto the celery with a vegetable peeler, then sprinkle
with walnuts, parsley leaves, salt, and pepper and serve immediately.

Wednesday, August 3, 2011

Behind the Eight Ball

I can't catch up.  It's just a fact.  I have spent the entire summer schlepping here and there and as a result I have gotten absolutely nothing done at home.  I am officially behind the eight ball and it's a bummer.

For more than 10 years I have one or both of my kids have been away at camp during the summer.  I got used to the summer being catch-up time.  Summer was when I got all my cleaning out and organizing done because I had no kids to schlep or entertain.  I always really missed my kids but I have to admit, it was great having a little break in the daily action.  Come on.  You've probably felt the same way too.

This summer Charlie has been working for a professor at Carleton and Kate has been home.  I have assumed the role of full time chauffeur, driving her back and forth to tennis every day, 20 miles each way.  In addition, we have been to tennis tournaments in Philadelphia, California, and St. Louis.  That's a lot of ground to cover.  Some of these trips have lasted as long as a week.  Like I said, a lot of schlepping.

So, we have now arrived home after six days in St. Louis and have no plans to leave until Labor Day weekend. I am running around like a chicken without a head because my house is a disorganized mess.  Charlie is coming home on Monday and his bedroom has become a catch-all for everything I can't find a place for.   Dust has formed a nice little film over everything in the house.  It's time to get to work.

But all this cleaning up doesn't leave a lot of time for gourmet cooking.  It's a good thing this recipe for Roasted Fish with Potatoes is so easy.  Give it a try... in your free time.


Recipe: Roasted fish with potatoes
(Adapted from Mark Bittman)

Ingredients:


6 tablespoons olive oil
2 pounds new potatoes, cut into 1/8- to 1/4-inch slices
Salt and freshly ground black pepper
1 tablespoon chopped fresh sage
1 teaspoon minced fresh garlic, or more to taste
1 tablespoon chopped fresh Italian parsley
About 1 1/2 pounds white fish fillets

Directions:


Heat the oven to 425°F. Put 4 tablespoons of the oil in a roasting pan or baking dish large enough to hold the fish comfortably. Add the potatoes, sprinkle liberally with salt and pepper, and toss. Put the dish in the oven and set a timer for 10 minutes.

Every 10 minutes, turn the potatoes gently with a spatula. When they are nicely browned all over-30 to 40 minutes-stir in the sage and garlic. Put the fish on top and drizzle with the remaining 2 tablespoons oil. Roast for 8 to 12 minutes, depending upon the thickness of the fillets. The fish is done when it's opaque throughout and offers no resistance to a thin- bladed knife; avoid overcooking. Serve drizzled with the pan juices and sprinkled with chopped parsley.

A Cool Take on a Hot Day

Gazpacho, like a classic chocolate chip cookie, doesn't have just one recipe.  There are a million variations and each has its own merits.

I usually go for a chunky gazpacho, like Ina Garten's, but recently my friend Deborah turned me on to Mario Batali's version.  I have to tell you, it's really good and very different from Ina's.

To make Mario's version, it helps to have a blender, preferably one with a couple of different settings, like a Vita Mix.  Not to worry if you don't have such fancy machinery.  You can use a less complicated blender or even a food processor to make this.  Just make sure to blend the ingredients really well so that the gazpacho is smooth.


There are a couple of things that makes this gazpacho so good.  The first is that there is stale bread blended in with the veggies.  The bread gives the soup a nice thickness.  I also like the addition of jalapenos.  They add just a little heat.  And blending the ice into the soup it a stroke of cooking genius.  The ice makes the gazpacho very cold, which is, as we all know, the perfect temperature for gazpacho.  I guess this explains why Mario is an Iron Chef and I am not.  It all comes down to the ice.

I don't have a Vita Mix, although I have been thinking that I may want to get one, so I used my Cuisinart and it worked just fine.  Either way, this is a very cool take on gazpacho.

Recipe:  Gazpacho
(Mario Batali)

Ingredients:


5 very ripe beefsteak tomatoes, quartered-plus 1 cut into 1/4 inch dice, set aside
2 large english cucumbers, peeled, quartered- plus 1 cut into 1/4 inch dice, set aside
2 red bell peppers, stemmed, seeded, quartered- plus 1 cut into 1/4 inch dice, set aside
2 small jalapenos, seeded and stemmed
1 small red onion, peeled, quartered-plus 1 cut into 1/4 inch dice, set aside
2 slices day old white bread
3 bread slices cut into 1/2 inch croutons
3 cloves garlic, peeled
1/2 cup water
4 tbsp red wine vinegar
1/2 cup extra virgin olive oil, plus more to drizzle
1 cups ice
salt and pepper to taste

Instructions:

1. Toast croutons in extra virgin olive oil in a pan till deep golden brown.

2. Peel the cucumber  and remove seeds.  Stem and seed the peppers.

3. Tear stale bread into pieces.

4. Place half of the prepared vegetables, bread, water, vinegar, oil and ice into blender or food processor and blend until smooth.

5. Pour the pureed soup into a pitcher and repeat with other half of ingredients.  Be sure and season each batch nicely with salt and freshly ground pepper.

6. Pour remaining soup into the pitcher, cover and refrigerate until very cold. Place garnishes in small bowls and refrigerate as well. When ready to enjoy, stir well with a spoon.

7. Serve in shallow bowls with the garnishes on the side  Drizzle each serving with a little more spanish extra virgin olive oil, if desired.