01 09 10

search you little tarte

Wednesday, August 29, 2012

Marinate Me

A perfectly grilled flank steak 
Let's face it, flank steak is tasty but it's not the most gourmet of steaks.  Flank steak is good, but it needs a little something something to make it sing.  This is why there's such a thing as marinade.

My mother was a big fan of dumping an entire bottle of Italian salad dressing on a flank steak and calling it a marinade.  I guess her thought was that she needed to tenderize the thing and Italian dressing tasted good, so why not.  Hey, it worked.  The taste wasn't subtle, but it did the job.

Back before I knew how to cook anything, I too thought a marinade came out of a salad dressing bottle.  In fact, it never occurred to me that I could actually make my own marinade.  Who makes marinade?  Why make marinade when you can buy it?


Well, let me tell you who and why.  I make marinade and you should too.  There are really very few things that aren't made better than by making them yourself.  I hate to sound preachy, but it is kind of a good thing to know what's in the food you eat.  It's also cheaper to make than buying it.

Need I say more?  Better for you and cheaper.  It's a win/win.

This is a pretty basic marinade that I've been using for years.  I have no idea where I originally got the recipe.  I've been playing around with it for as long as I've been making it, so I'm going to take credit for it being my own.

Recipe:  My Own Marinade

Ingredients:

1/4 cup canola oil
1/2 cup Dr. Pepper
1 tablespoon molasses
1 tablespoon soy sauce
1 tablespoon red pepper flakes
2 tablespoons minced garlic
1 tablespoon freshly cracked black pepper
1 lime, juiced
1 (2-pound) flank steak, trimmed and scored

Directions:
In a small bowl mix together the oil, cola, molasses, soy sauce, red pepper flakes, garlic, black pepper and lime juice. Put the steak into a large shallow bowl and pour in the marinade. Move the steak around to assure the marinade is covering the meat. Allow to marinate 2 hours or up to 4 hours in the refrigerator.

Cook on the grill as you normally would.

Tuesday, August 28, 2012

My Mother and Julia

Ted's heirloom tomatoes

When I was growing up, my mother had a copy of Julia Child's Mastering the Art of French Cooking.  She also had a complete set of Gourmet Magazine cookbooks.  I don't think she ever cracked the spine on any of them, but they were there, on the shelf in the family room.  I don't even think it ever occurred to my mother to actually make any of the recipes.  Rather, they were sporty additions to her cookbook library.
5 pounds of tomatoes and this is what you get.

My mother was good at lots of the "household arts".  Honestly, that women took cleaning to a whole new level.  Every morning she made her way through the house like a cyclone, picking up, dusting off, wiping down, and vacuuming away the debris of our family of five.  Honestly, it looked like no one actually lived in our house.

I must admit that I have inherited the "cleaning gene" from my mother.  My family also complains that it doesn't look like anyone actually lives in our house either..  I'm sorry.  I like things neat.  So sue me.

I have, after years of aggravation, finally given up on my kid's bedrooms and Ted's home office.  I just close the door and pretend that the disarray isn't there.  But the rest of the house is generally up to my neat standards and so I'm happy.

I shrink could make really fast work of me.

But I digress.  Back to Mastering the Art of French Cooking.  I'm not quite as afraid of a recipe as my mother was, so I've cracked the cookbook open numerous times and tried lots of recipes.  I also jumped on the "Julie and Julia" bandwagon too many times to count and promised myself that I would cook my way through a cookbook.  It's never happened but I can dream.

So as you know, Ted has been growing tomatoes this summer.  We have pounds of beautiful heirloom tomatoes coming off the vines every week and I'm desperate to do something with them besides making tomato salads.

Enter Julia Child.  Julia would be turning 100 years old this year (August 15th to be exact).   In honor of her birthday, The New York Times  dedicated a column to Julia, complete with a couple of recipes, including this one for tomato sauce.
Ready to be cooked
I often think about what might have happened if my mother had actually cooked something from Mastering the Art of French Cooking.  Maybe instead of the cleaning gene, my mom would have passed along some of her favorite Julia Child recipes.


Recipe:  Coulis de Tomates À La Provençale (Tomato Sauce with Mediterranean Flavors)
(Adapted from “Mastering the Art of French Cooking” by Julia Child) (Knopf, 1961)

Note:  Just so you know, this recipe takes a ton of tomatoes, 5 to 6 pounds to be precise, and yields just a quart of tomato sauce.  The resulting sauce is tomato-y and delicious beyond compare.

Ingredients:

1/4 cup olive oil
2/3 cup finely minced yellow onions
Kosher salt and black pepper
4 teaspoons all-purpose flour
5 to 6 pounds ripe tomatoes, quartered
1/8 teaspoon sugar, plus more to taste
4 cloves garlic, minced or put through a press
A large herb bouquet: 8 sprigs parsley, 1 bay leaf and 4 sprigs thyme, all tied in cheesecloth
1/4 teaspoon fennel seeds
1/2 teaspoon dried basil, oregano, marjoram or savory
Large pinch saffron threads
1 dozen coriander seeds, lightly crushed
1 2-inch piece dried orange peel (or 1/2 teaspoon granules)
2 to 3 tablespoons tomato paste (optional)

Directions:

In a large heavy pot, heat the oil over medium-low heat. Add the onions, sprinkle with salt and cook slowly for about 10 minutes, until tender but not browned. Sprinkle on the flour and cook slowly for 3 minutes, stirring occasionally; do not brown.

Meanwhile, fit a food processor with the coarse grating blade. Working in batches to avoid overfilling the machine, push the tomatoes through the feed tube to make a coarse purée.

Stir the tomatoes, sugar, garlic, herb bouquet, fennel, basil, saffron, coriander, orange peel and 1 teaspoon salt into the pot. Cover and cook slowly for 10 minutes, so the tomatoes will render more of their juice. Then uncover and simmer for about an hour, until thick. The sauce is done when it tastes thoroughly cooked and is thick enough to form a mass in the spoon. Remove herb bouquet and taste. Season with salt, pepper, sugar and tomato paste, and simmer two minutes more. The sauce may be used immediately, refrigerated or frozen for up to 6 months.

YIELD About 1 quart.


Monday, August 27, 2012

New Vocabulary


I am instituting some new vocabulary around my house.  I do not ever want to hear the phrase stressed out again.  That's it.  I don't want to hear it.

My daughter is the queen bee of stressed out.  She goes to an all girl's high school, where they are apparently all stressed out all the time.  And of course, you know as well as I do, that one stressed out teenage girl leads to a lot of stressed out teenage girls and that's not a good thing.

So, I have informed my daughter that now that's it's a new school year, she needs to find a new way of expressing her anxiety.  She can feel internally wrought up or she can feel anxious, but she cannot call it stressed out.  I am hoping that by eliminating that phrase from her vocabulary that it will no longer be her go to response when I ask her how she is.

I'm doing this for a reason.  This, her senior year, is going to be inherently anxiety producing.  It will be that way for her, as well as for those of us who live with her.  There's all the school work, which will not diminish just because it's senior year.  There are the college applications, high school tennis team, the official college tennis visits, junior tennis (although not as much) and all the rest of the general teenage stuff that goes on.  It's a big year.

So we are instituting some changes around here.  We'll see how they go.  I'm hoping that they don't leave me feeling full of anxiety.


Here's a recipe for a delicious and easy salad that is anything but anxiety producing to prepare.  Just make sure you get yourself a nice juicy watermelon, some really crisp arugula, and the best feta cheese you can find.

Recipe:  Arugula, Watermelon and Feta Salad
(Ina Garten, 2009)

Ingredients:

For the vinaigrette:
1/4 cup freshly squeezed orange juice
1/4 cup freshly squeezed lemon juice (2 lemons)
1/4 cup minced shallots (1 large)
1 tablespoon honey
1/2 cup good olive oil
1 teaspoon kosher salt
1/2 teaspoon freshly ground black pepper

For the salad:
6 cups baby arugula, washed and spun dry
1/8th seedless watermelon, rind removed, and cut in 1-inch cubes
12 ounces good feta cheese, 1/2-inch diced
1 cup (4 ounces) whole fresh mint leaves, julienned

Directions:

Whisk together the orange juice, lemon juice, shallots, honey, salt, and pepper. Slowly pour in the olive oil, whisking constantly, to form an emulsion. If not using within an hour, store the vinaigrette covered in the refrigerator.

Place the arugula, watermelon, feta, and mint in a large bowl. Drizzle with enough vinaigrette to coat the greens lightly and toss well. Taste for seasonings and serve immediately.

Sunday, August 26, 2012

Back to School and Back to the Blog

Breakfast" Cookies"
I really have no excuse other than to say that it's been a busy summer.  I felt like I was constantly on the move, what with everyone home, Kate's tennis tournaments, and college visits.  I'm exhausted.

Not only have I had a hamster wheel of a summer, I've also been, shall we say, without inspiration in the kitchen.  It's been all I can do to throw some chicken on the grill or cut up some tomatoes.  It happens.  Life is funny that way.

But school has started up again for Kate, which means we are pretty much back to school around here.  It's time to buckle down and get back to business.  The Common App is waiting too, along with the supplements.  Kate may be in denial, but the party has come to an abrupt end.

Charlie goes back to school later this week, and I can tell he's winding down on summer as well.  He wants to get back to his college friends and the routine  (i.e. social life) that school provides.  Summer jobs are just never as much fun as hanging out with friends in the dorm lounge and I get that.  I am also sure that he's had enough of my particular brand of mothering (nagging).  My endless questions about "what comes next" after graduation have gotten old, even though I have yet to get an answer that keeps me from asking again and again.

What can I say?  I'm a mother.  This is what I do.  Deal with it.

The point of all this is that I feel like I'm getting back into a routine and with that comes new blogging inspiration.  For the first time in a month or two, I am looking through cookbooks and making lists.  It's time to experiment with new recipes again.


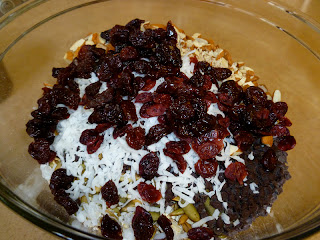
Kate brought this recipe for for breakfast cookies to my attention.  Of course, we had to make substitutions because she wasn't all that excited about the selection of dried fruit in the original recipe. Nonetheless, I think we ended up with something workable.  (Apparently my daughter doesn't like raisins "in things".)  Feel free to customize (with or without the mini chocolate chips) for your family.

This recipe made 17 cookies. I froze all but six. I hope I don't forget I have them.  I mention this because it's a definite possibility given my limited organizational skills and memory.


I'm glad to be back.

Recipe:  Breakfast Cookies
(Martha Stewart)

Note:  Kate doesn't like raisins, dried papaya, and dried mango (in things) so we substituted like amounts of dried cherries, dried cranberries, and mini chocolate chips.  Hey... I have to go with what works and if chocolate chips work, who am I to judge?

This recipe make 8 one cup size cookies or 16 half cup size cookies.  I made the smaller size because no one needs such a huge cookie, even if it's healthy.  Take note: Even the half cup sized cookies are enormous. The next time I make these, I'm going for something a little more manageable.


Ingredients:

2 cups whole wheat flour
2 cups all-purpose flour
1 1/2 teaspoons baking soda
1/2 teaspoon coarse salt
2 cups (4 sticks) unsalted butter, room temperature
3 cups packed dark-brown sugar
4 large eggs
1 tablespoon plus 1 teaspoon pure vanilla extract
4 cups rolled oats
1 cup raw almonds, coarsely chopped
1/2 cup raw pumpkin seeds
1/2 cup raw sunflower seeds
1/2 cup unsweetened shredded coconut
1/2 cup raisins or currants
1/2 cup finely chopped dried mango
1/4 cup finely chopped dried papaya
1 cup dried banana chips

Directions:

Preheat a convection oven to 325 degrees or a conventional oven to 350 degrees. Line two baking sheets with parchment paper; set aside.

In a large bowl, whisk together flours, baking soda, and salt; set aside.

In the bowl of an electric mixer fitted with the paddle attachment, beat butter until light and fluffy. Add brown sugar and mix until well combined. Add eggs, one at a time, mixing well after each addition. Add vanilla and mix just to combine.

With the mixer on low, slowly add flour mixture and mix until well combined. Add oats, almonds, pumpkin seeds, sunflower seeds, coconut, raisins, mango, and papaya; mix to combine.

Form dough into eight equal portions, about 1 cup each, and form into patties, about 4 inches in diameter. Place on prepared baking sheets. Top evenly with banana chips. Transfer to oven and bake until golden and firm, 20 to 25 minutes. Let cool completely on baking sheets.