01 09 10

search you little tarte

Wednesday, January 14, 2015

Pinned

FollowYou Little Tarte on Pinterest

Kate is my social media consultant.  Generally speaking, by the time I hear about something online, she's already exhausted all of its possibilities and is on to the next big thing.  Imagine my thrill and surprise when, over winter break, she informed me that I absolutely had to put You Little Tarte on Pinterest.

I've actually heard of Pinterest.

I actually know what Pinterest is.

Now, Kate being Kate, she did not trust in my somewhat limited social media skills to actually set up my Pinterest.  She had bigger, better ideas than she thought I had.  She is, after all, a college student who (1) believes she knows everything about everything, and (2)believes that the answers to all questions are found on Pinterest.

Maybe she's right.  What do I know?  (Actually I know a lot about a myriad of subjects, but for Pinterest purposes I've chosen it defer to Kate, my resident social media guru.)

So, here it is.  You Little Tarte on Pinterest.  Honestly, it's a lot of fun.  I can definitely see the appeal.  And, to use Kate's word, I'm obsessed.  I could spend hours everyday pinning.  And, with all the time I've spent pinning, the one thing I just can't get over is how damn creative people are.  I'm not that creative, that's for sure.

Take a look at You Little Tarte on Pinterest.  Follow You Little Tarte on Pinterest.  (According to Kate, it's all about the followers.)  Pin You Little Tarte.  Tell your friends about You Little Tarte,

It's going to be a lot of fun. I promise.


Tuesday, January 13, 2015

Orange on a Winter Day


I'm a big fan of Fine Cooking Magazine.  Honestly, given how complete and easy to follow their instructions are, a monkey could cook a gourmet dinner, and I like that in a cooking magazine.  The editors at Fine Cooking always strike a nice balance between things you would never in a million years make (i.e. the cover recipes),  and things that are screaming out to be made immediately. (i.e. the fast easy and fast recipes).

This is a nice chicken recipe.  I know, I know.  Chicken again?  Well, until you can come up with an alternative, yup... it's chicken again.

But back to the chicken.  This recipe for Sear-Roasted Chicken with Orange Tarragon Pan Sauce is quick and tasty, all the things that I require in a chicken recipe.  My point is that chicken just isn't exciting enough to spend hours making it.  In fact, ease of prep is what makes chicken so appealing to me in the first place.  That and the fact that chicken pretty much takes on the taste of whatever you happen to do to it.

You can go one of two ways with this recipe.  You can prepare it according to the directions in the recipe.  Or, you can brown the chicken and place it in a baking dish.  Make the sauce in the same pan you used to brown the chicken, reducing the cause for half the time called for in the recipe, and then pour the prepared sauce over the chicken.  Place the whole assembly in the oven and cook for about 20 minutes.

Easy peasy.

The side dish, Millet and Chickpea Salad is light and has a nice crunch to it.  And who doesn't like a little crunch in their salad?  Sure, it has a bunch of ingredients, but I'll bet you have them all on hand.

The orange in both of the recipes lends a much needed bit of sparkle during these long, cold winter days.  In fact, if you close your eyes and think warm, you might actually be able to convince yourself that you're in Florida.  Maybe.

Recipe:  Sear-Roasted Chicken with Orange-Tarragon Pan Sauce
Fine Cooking Magazine, February/March, 2015

Ingredients:

4 boneless, skinless chicken breast halves (about 1-3/4 lb.)
Kosher salt and freshly ground black pepper
2 Tbs. olive oil
2 large shallots, peeled and thinly sliced
½ cup fresh orange juice
½ cup lower-salt chicken broth
2 Tbs. coarsely chopped fresh tarragon
1 Tbs. honey
1 tsp. finely grated orange zest

Directions:

Position a rack in the center of the oven and heat the oven to 450°F. Pat the chicken dry and sprinkle with 1 tsp. salt and ¾ tsp. pepper.

Heat the oil in a 12-inch ovenproof skillet over medium-high heat until shimmering hot. Cook the chicken breasts, undisturbed, until browned (they should easily release when you lift a corner), 5 to 6 minutes. Flip and transfer the skillet to the oven. Roast until just cooked through (165°F), about 15 minutes. Transfer the chicken to a plate, cover loosely with foil, and keep warm.

Put the skillet over medium heat (be careful of the hot handle), add the shallots and ½ tsp. salt, and cook, stirring and scraping up any browned bits, until softened, about 2 minutes. Add the orange juice, broth, tarragon, honey, and zest, and cook until the mixture is reduced by half, about 6 minute
Transfer the chicken to serving plates. Pour any juices that collected on the plate into the sauce and serve the sauce with the chicken.

Recipe:  Millet and Chickpea Salad
Fine Cooking Magazine, February/March, 2015

Ingredients:

3 Tbs. plus 1 tsp. olive oil
1/2 cup millet
Kosher salt
1/4 tsp. crumbled saffron threads
1 large orange, peeled and segmented, segments cut into thirds
1 jarred roasted red pepper, chopped
1/2 cup canned chickpeas, drained and rinsed
2 Tbs. finely chopped red onion
2 Tbs. sherry vinegar
1 tsp. honey
1/2 tsp. dried oregano

Directions:

Heat 1 tsp. of the oil in a 10-inch skillet over medium heat. Add the millet and toast, shaking the pan, until one shade darker, about 1 minute.

In a 1-quart saucepan, bring 1 cup water, 1/2 tsp. salt, and the saffron to a boil. Add the millet, cover, reduce the heat to low, and cook until tender, about 18 minutes. Scrape into a large bowl. Stir the orange segments, peppers, chickpeas, onion, the remaining 3 Tbs. oil, vinegar, honey, and oregano into the millet. Season to taste and serve.

Thursday, January 8, 2015

Black Ice


It wasn't until I moved to Pittsburgh that I really started to appreciate exactly how dangerous black ice can be.  In fact, back in California, black ice was one of those things that happened to other people in other places like Minnesota.  Or Buffalo.  Or Maine.  Places I never envisioned spending the winter.  Or the summer.  Or even a long weekend.  Places like Pittsburgh.

But here I am, living in black ice country.  Let me tell you, black ice is not fun.  At all.

My experience with black ice has not been good.  A couple of winters ago, I slipped on an icy sidewalk and fractured my back.  That little "accident" also resulted I'm my having the mother of all bone bruises.  I thought I was going to die.  That bone bruise made childbirth seem well, enjoyable.

My dear friend Mona had a run in with a set of icy steps last Saturday.  Let's just say that the steps won.  She is, fortunately, doing fine, but I thought I'd bring she and her family dinner so she didn't have to worry about it.

The bonus of bringing Mona dinner was that we also got to have a lovely visit when I dropped it off.  Mona was one of my very first friends in Pittsburgh, and I still am amazed that I was so fortunate to have found such a like minded friend so quickly.  That's one of the reasons I knew that Mona and her family would love this Baked Farro and Butternut Squash.  It seems simple, and it's pretty easy to make, but the flavors are complex and comforting.  Perfect for a cold winter day.

I also brought along a delicious celery and parmesan salad, and my favorite dark chocolate and sea salt brownies.  A perfect way to round out dinner.


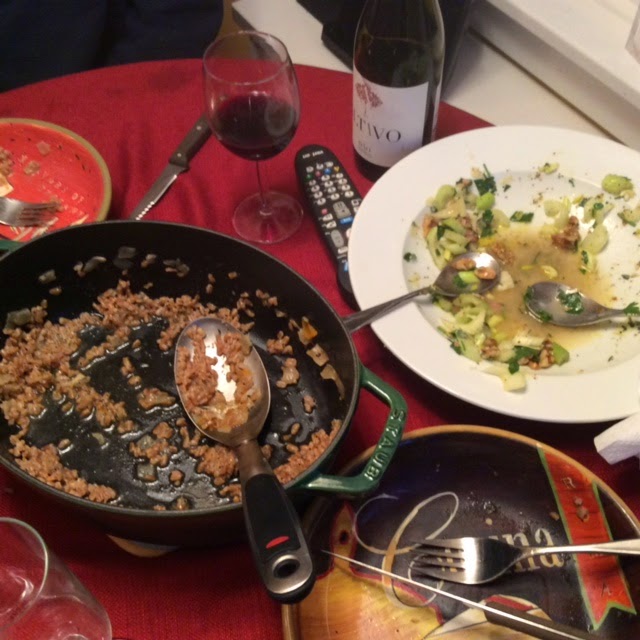
Mona took these pictures of dinner.  From all accounts (and photographic evidence), it appears dinner was a success.


Recipe:  Baked Farro and Butternut Squash
Ina Garten, Make It Ahead, 2014

Ingredients:

6 thick-cut slices applewood-smoked bacon
2 tablespoons good olive oil
1 tablespoon unsalted butter
1 1/2 cups chopped yellow onion (1 large)
2 teaspoons chopped fresh thyme leaves
Kosher salt and freshly ground black pepper
1 1/2 cups pearled farro
3 cups good chicken stock, preferably homemade
3 cups (3/4-to-1-inch-diced) peeled butternut squash
1/2 cup freshly grated parmesan cheese

Directions:
Preheat the oven to 375 degrees F. Place the bacon on a baking rack set on a sheet pan and bake it for 20 to 30 minutes, until browned (it won't be crisp). Cut the bacon in very large dice.

Meanwhile, in a small (9-inch) Dutch oven, such as Le Creuset, heat the olive oil and butter over medium heat. Add the onion and cook for 6 to 8 minutes, until tender and starting to brown. Add the thyme, 2 teaspoons salt and 1 teaspoon pepper and cook for 1 minute. Add the farro and chicken stock and bring to a simmer. Place the squash on top of the farro mixture, cover, and bake in the same oven with the bacon for 30 minutes, until the squash and farro are tender. Check once during cooking and add a little chicken stock if it's dry.

Sprinkle the bacon and parmesan on the squash and farro and bake uncovered for 15 to 20 minutes, until most of the liquid evaporates, the farro and butternut squash are tender, and the cheese has melted. Serve hot directly from the pot.

Recipe:  Celery and Parmesan Salad
Ina Garten

Ingredients:

1/2 cup good olive oil
2 teaspoons grated lemon zest
1/4 cup plus 1 tablespoon freshly squeezed lemon juice (3 lemons)
2 tablespoons minced shallots
1 teaspoon celery seed
1/2 teaspoon celery salt
1/2 teaspoon anchovy paste
Kosher salt and freshly ground black pepper
5 cups thinly sliced celery hearts, tender leaves included, sliced on an angle (about 12 stalks)
4 -ounce chunk aged Parmesan cheese
2/3 cup toasted walnuts, coarsely chopped
Whole flat-leaf parsley leaves

Directions:

At least 1 hour before you plan to serve the salad, whisk together the olive oil, lemon zest, 1/4 cup of lemon juice, the shallots, celery seed, celery salt, anchovy paste, 2 teaspoons salt, and 1 teaspoon pepper. Place the celery in a mixing bowl and toss it with the remaining 1 tablespoon of lemon juice and 1/2 teaspoon of salt. (Even though these ingredients are in the dressing, believe me-this step makes a difference.) Add enough dressing to moisten well. Cover and refrigerate for at least an hour to allow the celery to crisp and the flavors to develop.

When ready to serve, arrange the celery on a platter, shave the Parmesan onto the celery with a vegetable peeler, then sprinkle with walnuts, parsley leaves, salt, and pepper and serve immediately.

Recipe: Chocolate Sea Salt Brownies
Adapted from Mon Aimee

Ingredients:

12 tablespoons unsalted butter
2 oz unsweetened chocolate, finely chopped (suggested Oban chocolate)
1/4 cup plus 2 tablespoons unsweetened dutch process cocoa (suggested Cacao Rouge cocoa)
2 cups granulated sugar
3 large eggs
1 1/2 teaspoons vanilla
1 cup flour
1/2 teaspoons flaked sea salt

Directions:

Preheat the oven to 350F.

Line a 9 inch metal pan with foil draping over the edges.  Lightly butter the foil.

In a saucepan, melt the butter with the unsweetened chocolate.  Pour the chocolate mixture into a large bowl.  One ingredient at a time, whisk in the cocoa powder, eggs, sugar, vanilla, and flour.  Combine until smooth and shiny.

Pour into the prepared pan and sprinkle the sea salt evenly over the mixture.

Bake in the center of the oven for 35 minutes.  Center will be a bit soft.  Let the brownies cool in the pan for at least an hour.  Then refrigerate for at least another hour, until the center is firm.  Peel off the foil and cut into 16 equal sized squares.


Tuesday, January 6, 2015

It's A Challenge


Kate has challenged me to post a new recipe, one of my own, each week this year.  Hey.  It's 2015, and she's feeling frisky.  And ambitious.  For me.

As most of you know, I have a deep, abiding love for my cookbooks.  I love cookbooks.  I buy them constantly.  I use them daily.  I am not a recipe-maker-upper.  I follow recipes, often to the letter.  I do not usually come up with them myself.

Usually is the operative word here.  The truth is that I do, occasionally, come up with my own recipes.  These recipes often come as a result of (1) having made a published recipe 10,000 times and thus I've added my own special flair to it over time, or (2) I get a hankering for something and don't have a recipe for said item so I just wing it.  Surprisingly enough, these are often some of my best efforts in the kitchen.

So, in the spirit of accepting Kate's challenge, (sure, it's no work for her), here's this week's You Little Tarte recipe.  It's a coffeecake.  You all know how much I love, love, love coffeecake, so it somehow seems appropriate that this maiden voyage be with a coffeecake.

I know.  You're hooked.

For the holidays, Charlie gave me a cookbook called Cake Keeper Cakes by Lauren Chattman.  It really was the perfect gift.  After all, as stated above, I love coffee cake, and of the 100 recipes in this cookbook, roughly 99 of them qualify as coffeecakes.

I started by making the Apricot Jam Cake, which sounded pretty good, but a little heavy on the apricot jam (too cloying) and not heavy enough on some of the spices.  Once the batter was made, I decided it looked a little naked, so I dressed up with a little streusel.  What doesn't taste better with a little streusel (or a lot of streusel, for that matter)?

The end result was a real winner.  Sweet, but not cloying, and rich, as a result of my addition of streusel, with just a little crunch for interest.  This coffeecake, which I'm claiming as my own (with a little adaptation credit), is definitely up to Kate's challenge.


Recipe:  Apricot Jam Cake with Hazelnut Streusel Topping
Adapted from Cake Keeper Cakes by Lauren Chairman

Ingredients:

For the cake:

1 1/2 cups all purpose flour
1 teaspoon baking powder
1 teaspoon ground cinnamon
1/4 ground cloves
1/4 teaspoon ground nutmeg
1/4 teaspoon baking soda
1/4 teaspoon kosher salt
1 cup packed dark brown sugar
6 tablespoons softened unsalted butter
3/4 cup apricot jam
2 eggs, room temperature
3 tablespoons plain yogurt
1/2 cup toasted and skinned hazelnuts, chopped medium

For the hazelnut streusel:

4 tablespoons unsalted butter, melted and cooled
1/2 cup all purpose flour
1 teaspoon ground cinnamon
1/8 teaspoon ground cloves
1/8 teaspoon ground nutmeg
1/2 cup brown sugar
1/2 cup toasted and skinned hazelnut, chopped coarsely

Directions:

Preheat the oven to 350F.  Grease an 8 inch square baking pan and dust it with a little flour.

In a medium bowl, whisk together the dry ingredients: flour, baking powder, cinnamon, cloves, nutmeg, baking soda, and salt.

In the bowl of an electric mixer, cream the butter with the brown sugar, until fluffy, 2-3 minutes.  Scrape down the sides, and beat in the jam.

With the mixer on medium speed, add the eggs one at a time.  Add the yogurt.  Reduce the speed of the mixer to low, and add the flour mixture a little at a time, scraping down the sides after each addition.  Beat just until incorporated and add the nuts, missing only long enough to completely incorporate the nuts.

Pour the batter into the prepared pan.

To make the streusel topping, melt the butter in the microwave in a medium size bowl.  Add the remaining ingredients and mix well, until the mixture is complete incorporated and forms soft chunks of streusel.  Sprinkle the streusel mixture on top of the unbaked cake.

Bake until a toothpick inserted in the center comes out clean, approximately 1 hour.  Let the cake cook in the pan.  Cut into 9 squares and serve.  The cake will keep nicely in a cake keeper for about 3 days, if it lasts that long.


Saturday, January 3, 2015

A Most Misunderstood Vegetable


I give props to the person who first was brave enough to figure out that artichokes were edible.  I'm thinking it was a woman.  Guys just don't have that "Gee, this doesn't really look like food, but let's investigate" gene.  Women are selfless.  They are willing to poison themselves if it means keeping their families from eating something harmful or, God forbid, not delicious or worth the calories.  We also love to gloat when we're right.

"See, I told you it was food."

Having said all that, I must admit that I think artichokes, while tasty, are just way too much work.  And I don't like dealing with that furry stuff on the heart.  I think it's off-putting.  I do not need to de-fuzz my food before I eat it.  This is probably because I have only recently ridded the house of tennis ball fuzz, and when Kate returnes, even if just for a short visit, the yellow fuzz returns with her.

But I digress.  If you're looking for a shortcut, and who isn't, then frozen artichoke hearts are for you.  Yes.  You heard me right.  Frozen.

Now that you've gotten yourself up off the floor, let me tell you that Ina Garten even says frozen artichoke hearts are good.  As a matter of fact, she says they're one of the best frozen vegetables out there.  And if frozen artichoke hearts are good enough for Ina, then they are most certainly good enough for me.

Note:  I would not feel this way if say, Rachael Ray, was pushing frozen artichoke hearts.  Or Sandra Lee.  Or the Pioneer Woman.  I only feel this way because it's Ina, and she rarely takes a shortcut that involves something not purchased in a specialty food store.

Anyway, having established that frozen artichoke hearts are just fine, maybe even better than that, here's a recipe for roasted artichoke hearts.  These are nice on an antipasto platter, or as a side dish.  Either way, they're just delicious.

And, being resourceful, as we women (and my male readers as well) are, you can take full credit for having discovered that frozen is not only easy (perish the thought), but quite tasty as well.

Recipe:  Roasted Artichoke Hearts
Ina Garten

Ingredients:

4 boxes (9 ounces each) frozen artichoke hearts, defrosted
Good olive oil
Kosher salt and freshly ground black pepper
1 shallot, minced
3 tablespoons freshly squeezed lemon juice
1 teaspoon Dijon mustard
5 tablespoons white wine or champagne vinegar, divided
½ cup chopped fresh basil leaves
6 tablespoons capers, drained
2 jars roasted red peppers, sliced thin
½ cup minced red onion
½ cup chopped fresh parsley
2 pinches hot red pepper flakes (optional)

Directions:

Preheat the oven to 350 degrees.

Place the artichoke hearts in a bowl with ¼ cup olive oil, 1 teaspoon salt and ½ teaspoon pepper and toss until the artichoke hearts are coated. Dump the artichoke hearts on a sheet pan and spread out into one layer; roast in the oven for 20 minutes.

Meanwhile, make the vinaigrette. Place the minced shallot, lemon juice, mustard, 1 tablespoon vinegar, 1 teaspoon salt, and ½ teaspoon pepper in the bowl of a food processor fitted with the steel blade. Process for 5 seconds. Add the basil leaves and process into a green puree. With the processor running, slowly pour ½ cup olive oil into the bowl through the feed tube until the ingredients are finely pureed. Set aside.

Place the roasted artichoke hearts in a bowl and toss with enough vinaigrette to moisten. Add the capers, red peppers, red onion, parsley, 4 tablespoons vinegar and red pepper flakes (if using), and toss gently. Sprinkle generously with salt and pepper and let stand for 30 minutes for the flavors to blend. Serve at room temperature.