01 09 10

search you little tarte

Wednesday, November 18, 2015

My Happy Place

Okay... This is a bad picture, but it's the only one I have of the two of us up at the house.  What's with my bangs?  A little "aggressive".  It's a good thing I've had my hair cut since this was taken.

Sadly, we are back in Pittsburgh.  Sadly, I will have a few weeks of keeping in touch with progress on the house remotely.  Sadly, the Maine fall will turn to winter and I'll probably miss the first snowfall.  Sadly, sadly, sadly.

The funny thing is that I never really thought we would be lucky enough to have a place up there in  the far reaches of where rational, logical people live.  In fact, I was pretty much convinced that we would just never get around to leaving Pittsburgh, even once Ted retired.  You know how it is.  You get wrapped up in life and time passes and then, well, the magic window passes for doing something you always wanted to do.

I used to say to Ted, "Oh, we'll never leave Pittsburgh and buy a place in Maine".  He would tell me I was wrong.  Well, I'll now admit publicly that Ted was right and I was wrong.  We did do it.  We are doing it.  (Note to Ted:  You may want to paste and copy this paragraph because me admitting that I was wrong just doesn't come around all that often.)

We are about to embark (and I do mean embark), on a major kitchen and bathroom remodel up in Maine.  We are removing a fireplace in order to build me my dream kitchen, renovating two bathrooms, and adding one.  We have hired ourselves a general contractor, and I am ready, cell phone in hand, to get this party started.

The first step is to go before the Historical Preservation Society to get authorization to remove a chimney at the back of the house.  Hopefully they will see things the way Jonathan, my contractor and new bestie, and I do.  Jonathan, who has experience with this group of historical zealots, refers to them as the Hysterical Preservation Society.  This could be fun.  Or it could be unbelievably frustrating -- or both.  Either way, I'm sure I'll have lots to report to all of you.

I have finally come to really understand the meaning of the phrase "happy place".  Maine is my happy place.  This house, with all its weirdnesses and quirkiness, is my happy place.  This house, with all of its historical limitations, is my happy place.  My team of craftsmen (yes, including Tree Hugging Bob, and my antique roof specialist Victor), all contribute to making this my happy place.  This is the place Ted and I see our family gathering in years to come.  Our kids, their families.  All of us.  In the happiest of places.

Thank you Ted.  You were right.

Thursday, November 12, 2015

Tree Hugger

This is a sneaky picture I took of Bob, my arborist. As you can see, he's so wrapped up in his description of my abused trees that he barely notices the photo taking. I claimed to be taking pics of the trees -- which he loved.

I have an arborist.  How many people can say that?  Who has an arborist anyway?  Apparently I do.

Yup.  We now have an arborist as one of our it takes a village to renovate a house built in the mid-1800's.

As I mentioned in the past, we purchased our Maine house from a couple of fledgling DIYers.  The net result of said DIYing is that most everything they did, they did the wrong way.  To say they were shortcutters would not begin to describe their approach to home repair.

Such was the case with the beautiful trees growing on the property.  Let's just start by saying that there is absolutely no chance that either Ted or I would ever, in a million years, willingly (or even unwillingly) hoist ourselves into a tree to perform tree trimming or even a cat rescue.  This is why there are tree trimmers and firemen.

Unfortunately, the previous owner of my house did not share our views.

So, this morning Bob came over to consult on the shockingly detailed (and expensive) proposal he put together for us to Save the Trees.  

I think I'm safe in saying that  Bob has never met a tree he didn't love.  In fact, I think it's pretty safe  to assume that Bob has never met a living thing that he didn't want to rescue.  This includes bugs, house plants, and weeds.  Bob truly loves all things great and small.

I have to admit that I have, without so much as a second thought,  killed bugs that I've found in my house.  I have used bug spray to rid my immediate environment of pesky visitors, and have coated myself in deet to avoid being eaten alive sitting on my patio.  I have thrown plants out rather than coaxing them back to life.  I've most certainly killed my fair share of indoor trees from sheer neglect. Clearly Bob and I have a philosophical difference in our approach to all creatures great and small.

Several (very long) hours later, I knew things about trees that  I never 1) knew were possible to know, and 2) barely knew I cared about.  Bob went on (at considerable length) about fungus (which, of course we have and which, of course, it is essential to treat), pruning (which I have learned is an essential part of maintaining not only beautiful trees, but healthy trees as well), and all manner of other tree disease.

In addition to the tree rescue and maintenance, it seems that when my DIYers trimmed the trees, they would just throw all the limbs into the woods behind the manicured part of the yard.  Apparently this is not the proper way to do things.  Bob is bringing in a chipper.  I really wish I was going to be here for that.  Talk about satisfying!  Cleaning out the woods is an organizer such as myself dream scenario.
Tree limb graveyard.
And did I mention is was a whooping 40-ish degrees outside and raining?  Super fun.

Fun fact:  The optimal time to do tree maintenance is in December, just as the ground is freezing and all the leaves have fallen.  Who knew?  

Bob has a game plan.  I have a (rapidly diminishing balance in my) checkbook.  Together we can make healthier trees together.

Wednesday, November 11, 2015

Leave and Learn

This is what fall in Maine looks like... Leaves as far as the eye can see..
As previously noted, our house in Maine sits on a large piece of property with lots of (abused) trees.  Well, just because some of my trees are the horticultural equivalent of domestic violence doesn't mean that they don't shed their leaves come autumn.

I cannot even express the flood of leaves I witnessed when we arrived on Saturday.  So.  Many.  Leaves.  Zillions of leaves.  So many leaves that to walk through them required kind of a marching motion.  Children may scamper through leaves.  Middle aged people like me apparently march through leaves.

Needless to say, the OCD aspects of my personality required that the leave situation be dealt with immediately.  A quick call to my landscaper Brad -- do I need him on speed dial too? -- revealed that his guys had cleared the leaves about a week ago and that we were on the schedule for another visit this week.  Holy Moly.

So, this morning, bright and early, the guys were here with their leaf removal equipment.
A kid's dream leaf pile.
Blowing in the wind...
The leaf pile is as tall as the leaf collector.
Let's just say that leaf removal in Maine is not a job for a 12 year old and a rake.  Leaf removal in Maine requires a team of six big guys, various tractor like vehicles that push the leaves into gigantic piles, blowers, and two GIANT vacuum trucks to suck up all the leaves once they've been scooted into piles.  No number of Costco leaf bags could adequately tackle this job.

Okay, maybe six 12 year olds and six rakes could get the job done but there would, no doubt, be way more pile jumping and way less actual leaf maintenance going on.

So I'm a killjoy.  I have leaves to deal with.  Bring on the vacuum truck.  And the guys.  And the blowers.  And the tractor like vehicles that scoot the leaves into big piles.

The guys have now been working for a couple of hours.  They have already filled one vacuum truck and are now awaiting a second.  They are on their lunch break, totally unfazed by the mountains of dried leaves surrounding them.  Things are starting to look a little better.  That was until the foreman, Tim remarked "Gee, that oak hasn't really begun to shed yet. "  I guess they'll be back next week.

Monday, November 9, 2015

Live from Maine... It's You Little Tarte

The Horatio Moody House, Built in 1866,
Kennebunk, Maine

Well, we did it.  We finally did it.

For years we have been talking about buying a house in Maine.  We have looked at dozens of houses over the years when we've been up here visiting camp or college, but mostly we've been looking just to look.  Call it residential sightseeing.  We always talked about eventually retiring to Maine, but I really thought that it was just that: talk.

Well, Ted called my bluff.  We found the perfect "retirement" house.  (Note:  For now this will be our summer and whenever else we can get here house.)  And it's as perfect as a house built in 1866 can be.  Let's just say that we bought the house from  do-it-yourselfers who had only limited DIY skills.  Let's also just say that the house needed more work that we thought, despite having what we thought was an in-depth home inspection.  (For the record, we probably would have bought the house even if we had known that the whole place was held together with thumbtacks and masking tape, but it would have been good information to have.  Also for the record, the thumbtack industry was kept alive by the previous owners of this house -- I kid you not.)

I am excited that we are putting in a new kitchen, and it appears that it is going to be my dream kitchen.  Clearly I will have no excuse not to cook every night.  We are also adding one bathroom and re-doing two others.  Clearly I will have ample choices of where to shower every morning.  There's painting, floor refinishing, carpet, and the rest of the standard stuff going on as well.  There is also far less glamorous stuff going on like septic tie-ins to the city sewer, and a whole lot of electrical updating.  Super fun.  Really.  My organizational skills are being put to good use.  And just a note, there is nothing I cannot accomplish if I have a mini legal pad and a cell phone.  I am locked and loaded and am enjoying my unofficial role as co-general contractor.  (I have not actually established that the actual general contractor will be all that thrilled with this.)

Fun fact: Slate roofs, while really beautiful and really long lasting, need a certain amount of, shall we say, upkeep.  This upkeep is 1) best not performed by a DIYer with only limited roofing skills, and 2) requires not just a roofer but a craftsman to properly do the job.  A slate roof repair also requires scaffolding the entire house.  Yes.  Not only do I now have a slate craftsman listed in the contacts on my phone, I also have the name of a scaffolding company.  I'm going to leave to your imagination what such a repair might cost.  Hint: Double whatever your thinking.
A view of the house from the backyard. Yes, that is a gazebo (people in Maine like gazebos), and yes, that is a vegetable garden.  
I also have an arborist on my contact list.  When meeting with our new gardening service, I was informed that one of my birch trees didn't look good.  Could the owner of the gardening company recommend an arborist?  This is Maine.  I didn't want to be known as "that woman who didn't care about her 150 year old birch tree".  Jump ahead to my meeting with said arborist.  I have abused trees.  Yes, apparently my super handy DIYers liked to get up in the trees and trim them.  Whenever the spirit moved them.  (Fun fact:  tress in Maine are trimmed in December, after all the leaves have fallen and they are bare.  Apparently my DIYers didn't adhere to that wisdom so if the tree looked a little lopsided in say, April, they just chopped off a limb.  I guess trees don't like that and they rebel by getting sick.)  A good tree trimming is a lot like an really good haircut.  It needs to be done properly and with precision.  Again, not so much here.   Now I have abused trees.  They need treatment.  I thought Ted was going to have a coronary when I called with that bit of news.

And on and on.

The good news is that this really is my dream house.  It's a gorgeous Victorian built in 1866.  It even has a name: The Horatio Moody House.  The house is reputed to have two ghosts, though I have not yet "met" them.  So cool.  Kate, but the way, is less than thrilled with this fact, which leads me to think of all the fun scary things I can do when she's in residence.  Okay... maybe not.  The house sits on over 2 acres of beautiful property on a beautiful street in a seriously rigid historical district.  The houses around us are all stunning.  So we need craftsmen and arborists.  I have my dream house.  And someday I will succeed in working through all the repairs the previous owner did himself.


Thursday, November 5, 2015

Hidden Treasure


Truth be told, I've never been all that fond of hiding vegetables in other foods.  I know Jessica Seinfeld has made a career of hiding carrots and spinach in brownies, but I'm just not that sneaky.  (For the record,  I tried Jessica's recipe for "Healthy Brownies" and all I could taste was vegetables.  Maybe it was because I knew there was spinach hiding in the batter, or maybe it was because the very idea of tainting something as truly delicious as a brownie with spinach was offensive and distasteful to me... I'm not sure.)

So we have established that I am not a vegetables in cakes kind of gal.  That is until I tried this really absurdly good recipe from my go-to bundt cake cookbook Cake Keeper Cakes by Lauren Chattman.

This chocolate-zucchini bundt cake reminds me a little of a chocolate chip bundt my mother used to make.  It was really chocolatey and had lots of chocolate chips scattered throughout.  One thing I can be sure was not on the ingredient list was zucchini.  (Until I was an adult, I actually thought zucchini was a soft and mushy vegetable because my mother, once she discovered it, cooked it to within an inch of its life.  I think I am safe in assuming that zucchini would never have made an appearance in a chocolate cake, or any other cake for that matter.)

Here's the thing about zucchini.  Because it has such a high water content, and because it doesn't have a particularly strong taste,  really the only thing it adds to this cake is moisture.  The end result is the most chocolately, rich, delicious, moist cake around.


The really good news is that we can all pretend that we're eating something far better for us than your average chocolate cake.  Or we can all pretend that there isn't anything green  in the cake.  Either way, it works for me.

Recipe:  Chocolate-Zucchini Bundt Cake
Cake Keepers Cakes, by Lauren Chattman

Ingredients:

1/2 cup unsweetened Dutch process cocoa powder plus more for dusting the pan
1/2 cup sour cream
3 large eggs
2 teaspoons pure vanilla extract
2-1/2 cups unbleached all-purpose flour
2-1/2 teaspoons baking powder
1-1/2 teaspoons baking soda
1 teaspoon salt
2 teaspoons instant espresso powder
3/4 cup (1-1/2 sticks) butter, softened
1 cup granulated sugar
1 cup packed light brown sugar
2 cups coarsely shredded zucchini
1 cup semisweet chocolate chips
1 cup sliced almonds

Directions:

Preheat the oven to 350F. Grease a 12-cup Bundt pan and dust with unsweetened cocoa powder.
Whisk together the sour cream, eggs, and vanilla in a large glass measuring cup. Whisk together the flour, 1/2 cup cocoa powder, baking powder, baking soda, salt, and espresso powder in a medium bowl.

Combine the butter and sugars in a large mixing bowl and cream with an electric mixer on medium-high speed until fluffy, about 3 minutes, scraping down the sides of the bowl once or twice as necessary.

With the mixer on low speed, add 1/3 of the flour mixture and beat until incorporated. Add 1/2 of the sour cream mixture. Repeat, alternating flour and sour cream mixtures and ending with the flour mixture, scraping down the sides of the bowl between additions.Stir in the zucchini, chocolate chips, and nuts.

Scrape the batter into the prepared pan. Bake until a toothpick inserted in the center comes out clean, 45 to 50 minutes. Let cool in the pan for 10 minutes, then invert it onto a wire rack to cool completely. Slice and serve.

Store uneaten cake in a cake keeper or wrap in plastic and store at room temperature for up to 3 days.

Friday, July 24, 2015

Easy Peachy


I've always been a bigger fan of nectarines than of peaches.  The reason why is very simple.  The fuzz.  I just have never really liked fuzz on my fruit.  What can I say?  We all have our food things.   But I am also evolved enough to know a good recipe, or at least an interesting recipe, when I see one.

I was paging through the new issue of  Fine Cooking recently and happened on a whole article dedicated to sweet and savory peach recipes.  Intriguing.

As luck would have it, I had received a couple of nice looking, albeit fuzzy, peaches in my CSA basket.  I pretty much figured that I'd let them ripen up and then Ted, who is a fuzz fan, would eat them.  Easy peasy.  I didn't give those peaches another though.  After all, I'm a nectarine girl.

When I saw this recipe for Braised Chicken Thighs with Savory Marinated Peaches, two things came immediately to mind: dinner, and has Ted already eaten the peaches?  Lucky for me, the peaches were still unspoken for, and lucky for both Ted and I, dinner was served!

Recipe:  Braised Chicken Thighs with Savory Marinated Peaches
Fine Cooking, July, 2015

Ingredients:

1 Tbs. extra-virgin olive oil; more as needed
1 oz. thinly sliced prosciutto, cut crosswise into thin strips
3 lb. bone-in, skin-on chicken thighs (about 8)
Kosher salt and freshly ground black pepper
1 medium leek, white and light green part only, thinly sliced (1 cup)
3 medium cloves garlic, thinly sliced
2 Tbs. all-purpose flour
3 cups Sherry Vinegar and Rosemary Marinated Peaches, drained, marinade reserved (see below)
3 cups lower-salt chicken broth
2 Tbs. drained capers
2 Tbs. unsalted butter
2 Tbs. fresh tarragon leaves, coarsely chopped

Directions:

Position a rack in the center of the oven and heat the oven to 350°F.

Heat the oil in an 8-quart Dutch oven or other heavy-duty pot over medium heat. Add the prosciutto and cook, stirring occasionally, until crisp, about 5 minutes. With a slotted spoon, transfer to a bowl and set aside. if the pan is dry, add a little more oil.

Season the chicken lightly on all sides with salt and pepper. Working in batches, brown the chicken on both sides, about 12 minutes total. Transfer to a plate.

Turn the heat down to medium low. Pour off all but 1 Tbs. fat from the pot and then add the leek and garlic. cook, stirring often, until beginning to soften, about 5 minutes. Add the flour and cook, stirring, for 1 minute. Add the reserved marinade and cook, scraping up any browned bits from the bottom of the pan, until the liquid thickens, about 2 minutes. Add the broth, season lightly with salt and pepper, and bring to a boil. Arrange the chicken in the pot skin side up, return to a boil, and transfer the pot to the oven to braise, uncovered, until the chicken cooks through, about 25 minutes.

Take the pot out of the oven. Turn the broiler on high. Transfer the chicken, skin side up, to a foil-lined rimmed baking sheet.

Simmer the sauce in the pot over medium-high heat, stirring occasionally, until thickened and reduced by about half, about 10 minutes. Lower the heat to medium and stir in the capers and peaches; cook until heated through. Stir in the butter until it melts, then stir in 1 Tbs. of the tarragon and season to taste with salt and pepper.

Meanwhile, broil the chicken until the skin is crisp, about 3 minutes.

Return the chicken to the pot or transfer it to a large platter and spoon the sauce over it. garnish with the prosciutto and the remaining tarragon leaves, and serve.


Recipe:  Sherry Vinegar and Rosemary Marinated Peaches
Fine Cooking, July, 2015

Ingredients:

3 medium ripe peaches, pitted and sliced, diced, or cut into wedges
1/3 cup extra-virgin olive oil
2-1/2 Tbs. spiced dark rum (optional)
2 Tbs. sherry vinegar
1-1/2 tsp. finely chopped fresh rosemary
Pinch kosher salt
Pinch granulated sugar

Directions:

Gently combine all of the ingredients in a medium bowl and let marinate at room temperature for at least 20 minutes and up to 24 hours. After marinating, you can refrigerate the peaches for up to 1 day.


Saturday, July 11, 2015

Mix 'n Match


Tabbouleh salad is one of my favorite summer salads.  It is crisp and fresh, and the lemon juice and mint add a nice little twist of flavor.  Tabbouleh is a great side dish, but can it stand alone?

Therein lies the question. Can tabbouleh salad be reworked so that it becomes more than a Meatless Monday side dish?

The answer is a resounding yes!  YES!

My version of  tabbouleh salad as a main dish is honed from combining all my favorite ingredients into one mega delicious summer salad.

Let's go.

Recipe:  Main Course Tabbouleh Salad
Loosely adapted from Ina Garten

Ingredients:

1 1/2 cups boiling chicken stock, homemade if you have it
1 cup bulgur wheat
1/4 cup freshly squeezed lemon juice (2 lemons)
Olive oil
Kosher salt
1 whole (2 split) chicken breast, bone in, skin on
Freshly ground black pepper
1 cup minced scallions, white and green parts (1 bunch)
1 cup chopped fresh mint leaves (2 bunches)
1 cup chopped fresh flat-leaf parsley (1 bunch)
1 hothouse cucumber, unpeeled, halved lengthwise, seeded, and medium-diced
1/4 cup pitted kalamata olives
2 cups halved cherry tomatoes
8 ounces diced feta cheese

Directions:

Preheat the oven to 350 degrees F.

In a heat-proof bowl, pour the boiling chicken stock over the bulgur wheat. Add the lemon juice, 1/4 cup olive oil, and 1 1/2 teaspoons of salt. Stir. Cover the bowl with plastic wrap and allow the bulgur to stand at room temperature for about 1 hour.

Place the chicken breast on a baking sheet and rub it with olive oil. Sprinkle liberally with salt and pepper. Roast for 35 to 40 minutes, until just cooked. Set aside until cool enough to handle.

Remove the chicken meat from the bones and discard the skin. Cut the chicken into medium dice and add to the tabbouleh. Add the scallions, mint, parsley, cucumber, tomatoes, feta, olives, 1 teaspoon salt, and 1 teaspoon pepper. Season, to taste, and serve immediately or cover and refrigerate. The flavors will improve as it sits.


Sunday, July 5, 2015

Peachy Keen


I'm baaaaack. Yes. It's true.  I'm back and I'm blogging.

It's summer and  the living is easy.  The produce is delicious.  The fruit is as sweet as candy, and as a result I'm all about the fruit dessert.

I've got my CSA going again this summer, and last week's bounty included a couple of delectable peaches.  Sweet, juicy, and ripe -- and quick to spoil.  What better than a crisp to use up the last of the peaches before it's too late?

I knew you'd agree.
Crisp topping, peaches, and raspberries. What could be better?
This is one of my favorite Ina Garten summertime recipes.  It's easy and fairly quick -- if you don't count the whole skinning the peaches thing -- and guaranteed to be a real homer.  Scoop a little vanilla ice cream on top and you've got yourself a grand slam!

Recipe:  Peach Raspberry Crisp
Barefoot Contessa Cookbook, 1999

Ingredients

4 to 5 pounds firm, ripe peaches (10 to 12 large peaches)
1 orange, zested
1 1/4 cups granulated sugar
1 cup light brown sugar, packed
1 1/2 cups plus 2 to 3 tablespoons all-purpose flour
1/2 pint raspberries
1/4 teaspoon salt
1 cup quick-cooking oatmeal
1/2 pound cold unsalted butter, diced
Directions

Preheat the oven to 350 degrees F. Butter the inside of a 10 by 15 by 2 1/2-inch oval baking dish.

Immerse the peaches in boiling water for 30 seconds, then place them in cold water. Peel the peaches and slice them into thick wedges and place them into a large bowl. Add the orange zest, 1/4 cup granulated sugar, 1/2 cup brown sugar, and 2 tablespoons of flour. Toss well. Gently mix in the raspberries. Allow the mixture to sit for 5 minutes. If there is a lot of liquid, add 1 more tablespoon of flour. Pour the peaches into the baking dish and gently smooth the top.

Combine 1 1/2 cups flour, 1 cup granulated sugar, 1/2 cup brown sugar, salt, oatmeal, and the cold, diced butter in the bowl of an electric mixer fitted with a paddle attachment. Mix on low speed until the butter is pea-sized and the mixture is crumbly. Sprinkle evenly on top of the peaches and raspberries. Bake for 1 hour, until the top is browned and crisp and the juices are bubbly. Serve immediately, or store in the refrigerator and reheat in a preheated 350 degree F oven for 20 to 30 minutes, until warm.


Friday, May 15, 2015

It's What I Do


I know it's been awhile.  I'll admit it.

I've been cooking.  I just haven't been blogging.  And I have an excuse.  I just haven't been in the mood.  There's just been a lot going on -- nothing bad -- but a lot going on nonetheless.  So let me bring you up to date.

Charlie applied to law school.  Let me tell you, that's one long process.  Between the LSAT, the applications, my constant need to manage (and his constant need to tell me to lay off), and finally the acceptance letters, I feel like it's been about a year.  And it's been close.  The good news is that he's all set and will be off and running come fall.  All good news.  You may ask why I was so busy with Charlie's law school odyssey.  After all, he's an adult and he was the one applying to law school.  Well, the simple answer is that I wasn't.  I was just distracted by it.  Charlie had it all well in hand and barely conferred with us on important issues, let alone the minutiae, yet for some reason I felt compelled to obsess about it almost daily.

I'm a mother.  That's what I do.

Kate is... Kate.  Always lots going on in her life and somehow that translates to lots going on in my life.  I would like for there to be less of Kate's life going on in my own, and we are working on that.  She too has it well in hand, yet I obsess.

I'm a mother.  That's what I do.

The simple truth is that my kids have been distracting me of late.  To be fair, Ted has been distracted by them as well, but he's better at compartmentalizing than I am.  I'm working on that.

So, in an effort to move forward and not be so obsessive about things over which I have no control, I have made a commitment to start blogging again.  It's summer and all those delicious summer fruits and veggies will make this easy.  I hope.

Today's recipe from my fav Smitten Kitchen is something that, to be honest, wouldn't generally interest me.  I haven't jumped on the kale bandwagon with the same vigor as many others, but I guess the presence of bread and melted cheese somehow made the kale sound a whole lot more enticing.  In any case, this is a delicious one pan meal, quick and easy, and guaranteed to ease whatever you happen to be obsessing about.

Recipe:  Mushrooms and Greens with Toast
Adapted just a little from Tara O’Brady’s Seven Spoons Cookbook

Serves 4

Ingredients:

3 tablespoons unsalted butter, divided
1 tablespoon olive oil
1 1/2 pounds mixed mushrooms, cleaned, trimmed and torn into bite size pieces (see suggestions above)
2 thick slices bread from a large, crusty loaf (I’d use 4 from a smaller loaf)
2 cloves garlic or 1 shallot, minced
1 tablespoon white wine vinegar, or more to taste (I used 2)
1 fresh red chile, stemmed, seeded and minced or red pepper flakes, to taste
Coarse salt and freshly ground black pepper
6 ounces chopped fresh greens (kale, chard, spinach or nettles)
8 ounces of a good melting cheese, thickly sliced (Chèvre, mozzarella, burrata, taleggio or fontina)

Directions:

Melt 2 tablespoons butter and olive oil together in a large, heavy skillet over medium-high heat. One fully hot, add mushrooms to pan and cook, stirring regularly, until they’ve released their water and started to turn golden brown, about 8 minutes.

Meanwhile, grill or toast your bread.

One the mushrooms have a nice color on them, add the garlic or shallots and cook, stirring constantly, for 1 minute. Drizzle with vinegar, most of the chile or chile flakes, salt and pepper and stir to combine. Add the greens; pretty much any kind aside from baby spinach will benefit from about 5 to 8 minutes cooking time, just until collapsed. If you’re me, you’ll add 1 more tablespoon vinegar for brightness at this point. Stir in remaining tablespoon butter and adjust seasonings to taste. Rip bread into irregular croutons and push them into the sauteed vegetables. Lay pieces of cheese atop everything. Turn the heat down to medium low, place a lid on the pan and let the cheese melt, which will take 5 to 10 minutes, depending on the pan and the kind of cheese you used.

Sprinkle with remaining chile, “hand out forks, then bring the the pan to the table.”

Sunday, March 29, 2015

Nuts for Nuts


I'll admit it.  Ted and I enjoy a little cocktail on occasion.  And if you're going to enjoy a little cocktail, you'll need a little nibble to go with it.  This recipe for Chipotle and Rosemary Roasted Nuts is the perfect accompaniment, not only for cocktail hour, but at any hour.

Feel free to use any combination of nuts you like.  Ina went for a fairly traditional mix, as did I, but I'm not all that creative.  Really, anything goes.  Anyway you do it, the cocktails will taste even better with a handful or two of these little gems.

Recipe:  Chipotle and Rosemary Roasted Nuts
Ina Garten

Ingredients:

Vegetable oil
3 cups whole roasted unsalted cashews (14 ounces)
2 cups whole walnut halves (7 ounces)
2 cups whole pecan halves (7 ounces)
1/2 cup whole almonds (3 ounces)
1/3 cup pure maple syrup
1/4 cup light brown sugar, lightly packed
3 tablespoons freshly squeezed orange juice
2 teaspoons ground chipotle powder
4 tablespoons minced fresh rosemary leaves
Kosher salt

Directions:

Preheat the oven to 350 degrees F. Brush a sheet pan generously with vegetable oil. Combine the cashews, walnuts, pecans, almonds, 2 tablespoons of the vegetable oil, the maple syrup, brown sugar, orange juice and chipotle powder on the sheet pan; toss to coat. Add 2 tablespoons of the rosemary and 2 teaspoons of salt and toss again.

Spread the nuts in one layer. Roast for 25 minutes, stirring twice with a large metal spatula, until the nuts are glazed and golden brown. Remove from the oven and sprinkle with 2 more teaspoons of salt and the remaining 2 tablespoons of rosemary. Toss well and set aside at room temperature, stirring occasionally to prevent sticking as they cool. Taste for seasoning. Serve warm or cool completely and store in airtight containers at room temperature for up to a week.


Wednesday, March 25, 2015

Spring Stew


Generally speaking, I think of stew as a winter dish.  It's comforting, stick-to-the-ribs kind of fare, perfect for cold blustery evenings.  In fact, usually around this time of the year, I retire my dutch oven in favor of my grill pan and give up on the whole stew thing.

The funny thing is that even as the chill goes out of the air, I still enjoy a good braised dish.  Enter David Tanis and his St. Patrick's Day inspired Irish Stew.  Made with lamb, it's just perfect for these very early days of spring.  Lamb is lighter than beef and this stew has a decidedly springier vibe.

Be prepared.  This recipe makes an absolute ton of stew so either (1) invite a crowd, (2) cut the recipe
 in half, or (3) plan for lots of leftovers.

Recipe:  Irish Stew
David Tanis, New York Times, March 11, 2015

Ingredients:

3 pounds lamb shoulder cut in 2-inch chunks (or use thick shoulder chops)
 Salt and pepper
4 tablespoons vegetable oil
2 pounds onions (about 6 medium), cut in wedges
1 pound carrots (about 6 medium), cut in 3-inch lengths
4 cups chicken, veal or beef broth (or water)
1 large sprig thyme
3 pounds russet potatoes (about 12 small), peeled and halved, or cut in 2-inch thick slices

Directions:

Pat lamb dry and season well with salt and pepper. Put oil in a heavy-bottomed soup pot over medium-high heat. Brown meat on all sides, working in batches.

Set meat aside and add onions and carrots to pot. Season with salt and pepper. Cook vegetables, stirring, until lightly browned, about 5 minutes. Heat oven to 350 degrees.

Return meat to pot, add broth and bring to a simmer. Put in thyme sprig and arrange potatoes on top (it’s fine if potatoes are not completely submerged). Season potatoes, cover pot and transfer to oven.
Bake for about 1 hour, until lamb is quite tender when probed with a skewer or paring knife. Remove fat from top of broth. Ladle stew into shallow bowls and serve.

Alternatively, cook stew on stovetop instead of baking; keep covered at a gentle simmer for about 1 hour. For a thicker stew, crush a few of the potatoes from the stew and simmer in broth, or thicken with a slurry of flour and water (about 4 tablespoons flour).

Monday, March 23, 2015

Fresh From the Oven


I am a lover of all things baked.  I am particularly fond of breakfast pastries, but let's be honest, muffins, scones, and coffeecakes are generally not the most virtuous way to start out the day.  In fact, usually I try to maintain my careful eating until at least mid-afternoon.  No sense in starting out in the hole.  That's what I always say.  Better to dig the hole around 4:00 p.m.
I was out of currants so I used gold raisins.
Add the cold butter and then the liquids.
Finish off with an egg yolk wash and a sprinkle of turbaned sugar, and then into the oven.
But if there's one thing I can't pass up, it's a fresh from the oven scone.  I am greatly aided by the fact that I live in a city with a paucity of bakeries, at least bakeries worth frequenting.  Things are getting a little better with a couple of new ones opening recently but generally, if I want something baked, I bake it myself.

This brings me to today's recipe for Flour Bakery's Classic Currant Scones.  My friend Mona reminded me of these when we were catching up the other day.  Flour Bakery is the most divine bakery ever.  If you're in Boston anytime soon, you really must stop in to sample some of Joanne Chang's goodies.

These scones are light, airy, rich, and so easy to make.  The key to success is to keep all of the ingredients as cold as possible.   Make sure to cut up your butter and combine the egg, buttermilk, and creme fraiche and then return everything to the refrigerator until the moment you're ready to add each one to the flour mixture.

You can prep these scones and then refrigerate them unbaked until you're ready to bake them off just before serving.  Preheat the oven and then pop the tray into the oven directly from the refrigerator.  The heat from the oven and the cold butter in the scones will cause steam which, in turn, will make the lightest scones ever.

Recipe:  Flour Bakery's Classic Currant Scones
Makes 8 scones

Note:  I actually cut the scones and baked them off that way instead of scoring the dough and cutting afterwards.  They bake much faster, which is key when you're really in the mood for a scone.  Bake for about 30 minutes, until golden brown.

Extra Note:  I was out of currants so I used golden raisins.

Ingredients:

2 3/4 cups (385 grams) unbleached all-purpose f lour
1 1/2 teaspoons baking powder
1/2 teaspoon baking soda
1/4 teaspoon kosher salt
1/3 cup (70 grams) granulated sugar
1/2 cup (80 grams) dried currants
1/2 cup (1 stick, 114 grams) cold unsalted butter, cut into 8 to 10 pieces
1/2 cup (120 grams) cold nonfat buttermilk
1/2 cup (120 grams) cold crème fraîche
1 cold egg
1 egg yolk, lightly beaten
2 tablespoons sanding sugar, pearl sugar, or granulated sugar

Directions:

Position a rack in the center of the oven, and heat the oven to 350 degrees F.

Using a stand mixer fitted with the paddle attachment (or a handheld mixer), mix together the flour, baking powder, baking soda, salt, granulated sugar, and currants on low speed for 10 to 15 seconds, or until combined. Scatter the butter over the top and beat on low speed for about 30 seconds, or until the butter
is somewhat broken down and grape-size pieces are still visible.

In a small bowl, whisk together the buttermilk, crème fraîche, and whole egg until thoroughly mixed. On low speed, pour the buttermilk mixture into the flour-butter mixture and beat for 20 to 30 seconds, or just until the dough comes together. There will still be a little loose flour mixture at the bottom of the bowl.

Remove the bowl from the mixer stand. Gather and lift the dough with your hands and turn it over in the bowl, so that it starts to pick up the loose flour at the bottom. Turn over the dough several times until all of the loose flour is mixed in.

Dump the dough onto a baking sheet and pat it into an 8-inch circle about 1 inch thick. Brush the egg yolk evenly over the entire top of the dough circle. Sprinkle the sanding sugar evenly over the top, then cut the circle into 8 wedges, as if cutting a pizza. (At this point, the unbaked scones can be tightly wrapped in plastic wrap and frozen for up to 1 week. Proceed as directed, baking directly from the freezer and adding 5 to 10 minutes to the baking time.)

Bake for 50 to 55 minutes, or until the entire circle is golden brown. Transfer to a wire rack to cool for 30 minutes, then cut into the prescored wedges (the cuts will be visible but will have baked together) and serve.

The scones taste best on the day they are baked, but they can be stored in an airtight container at room temperature for up to 3 days. If you keep them for longer than 1 day, refresh them in a 300-degree-F oven for 4 to 5 minutes. Or, you can freeze them, wrapped tightly in plastic wrap, for up to 1 week; reheat, directly from the freezer, in a 300-degree-F oven for 8 to 10 minutes.

Wednesday, February 25, 2015

Feeling Trendy


I've always made coq au vin with red wine.  I'm not a cooking renegade, so I've always made it the traditional way, or what I thought was the traditional way.  And that was with red wine.

Well, so much for that.

Lately, coq au vine jaune has been just about everywhere.  Is it because substituting a full bodied white wine for the tried and true red is new and trendy?  Or is this just the best kept secret, from me anyway, ever?

After a little research session with my close friend Google, it turns out that coq au jaune has been around in different incarnations for some time.  Not forever, but regional French chefs have, for years and years, been playing with different wine pairings in coq au vin.

Where the hell have I been?

In my defense, and I have kids so I've got a lot of experience defending myself and my lack of cool, despite being a tried and true version of coq au vin, coq au vin jaune has been gaining in popularity of late.  So, actually if you think about it, I'm actually with trend by blogging about it now.

True, it would have been more impressive had I caught on to this particular trend at the beginning, but I'm a 55 year old woman living in Pittsburgh.  I have no other defense.

So, on to the recipe.  It's divine.  So good.  So satisfying.  The really nice thing about this recipe is that it's a little lighter than its red wine counterpart.  It's still rich and delicious, but not quite as heavy.

This is not a recipe you're going to throw together in 15 minutes.  It takes time.  Don't skip steps or shorten up the recommended timing.  Cooking the stew slowly is what produces the deliciously tender chicken and the rich and velvety sauce.  It will seem, at the beginning, and even towards the middle of the cooking time, that you have a lot of liquid.  Be patient.  It will develop into a sauce roughly the consistency of half and half, perfect for spooning over noodles or rice.

Take your time and revel in your (almost) trendiness.  I did.

Recipe:  Coq au Vin Jaune
Wall Street Journal, February 14, 2015

Total Time: 2 hours Serves: 5-7

Ingredients:

½ cup all-purpose flour
1 (6-pound) capon, cut into 8 pieces, or 6 pounds chicken thighs and/or breasts
Sea salt and freshly ground black pepper
8 tablespoons clarified unsalted butter
1 large onion, finely minced
5 cloves garlic, thinly sliced
4½ cups Vin Jaune or other big, rich white wine, such as Riesling
1½ pounds white button mushrooms, thickly sliced
3 ounces dried morels, soaked in warm water at least 30 minutes, soaking liquid reserved
⅔ cup crème fraîche or sour cream
2½ cups chicken stock or water, as needed
Freshly squeezed lemon juice, as needed
Sherry vinegar, as needed
Chopped fresh parsley and/or chives, for garnish
Cooked, buttered noodles or rice, for serving

Directions:

Place flour in a large Ziploc bag. Add chicken, seal bag and shake to coat chicken in flour on all sides. Remove chicken from bag, shaking off excess flour, and season with salt and pepper.

Preheat oven to 300 degrees. Heat half the clarified butter in a large lidded Dutch oven over medium-high heat. Once hot, cook chicken pieces, working in batches if necessary, until lightly browned, 5-10 minutes per side. Add onions and garlic, and cook, stirring, until beginning to soften, 2-3 minutes. Deglaze pan with ⅓ cup of wine, scraping up brown bits from bottom. With all chicken pieces in pan, cover, place in oven and cook 20 minutes.

Meanwhile, heat remaining clarified butter in a large skillet over medium-high heat. Once melted, add button mushrooms, and sauté, tossing frequently, until very tender and slightly caramelized, about 15 minutes. Set aside.

Remove chicken from oven and add all but ½ cup of remaining wine to pan. Place on stove over medium-low heat and simmer to marry flavors and let some alcohol evaporate, 10 minutes. Add morels and soaking liquid to pot. Simmer, stirring frequently, 20 minutes more.

Stir crème fraîche into pot along with sautéed button mushrooms and simmer until chicken is very tender, 30 minutes more. Sauce should be just thick enough to coat a spoon, similar to half-and-half. If too thick, stir in remaining wine, then stock or water, ¼ cup at a time, to reach desired consistency. Season with salt, pepper and lemon juice or vinegar, as needed.

Garnish with herbs, if using, and serve with noodles or rice.


Sunday, February 15, 2015

Cold Weather Chicken


There's a reason you haven't been hearing much from me.  I'm just not in the mood.  I've had enough winter.  I've had enough braised meat.  I've had enough citrus.  And I've had enough cold, dreary days.  Yup, spring can't come faust enough for me.

Unfortunately, the weather gods have other ideas.  Snow is falling, the wind is blowing, and the snow drifts are growing.  Temperatures are plummeting.  Punxsutawney Phil wasn't kidding when he said six more weeks of winter.  We've settled in for the long hall.

I feel a little guilty complaining because Kate is up there in the wilds of Maine.  At last report, there was something like three feet of snow on the ground on the Bates campus.  The "icicle problem" has become so widespread that Bates sent an "Icicle Safety" email to all students.  My daughter, of course, thought this funny.  "What?  Do they think we're idiots?  Like we would walk under icicles?"  In a word, yes, they do think you're all idiots.  And for good reason.  You're college students.  Good judgment is never to be assumed.

So, anyway...

Despite my lack of interest in all things culinary, except for maybe hot cocoa, I had to cook dinner tonight.  I just couldn't justify macaroni and cheese, (what I really wanted), and instead opted for the cover recipe from this month's Cooking Light: Chicken 25 Ways, Weeknight Lemon Chicken Skillet Dinner.

I'm going to start by saying that this isn't really lemon chicken.  Rather, it's a chicken dish with all kinds of other good stuff (potatoes, green beans, mushrooms), and a couple of slices of lemon,  Yes, the lemon adds some nice sparkle to the dish, but it's really not lemon chicken.

What it is, is very good.  It's takes a couple of steps to get it going, but nothing too difficult.  The ingredients are monthly things you're apt to have on hand, and it's really tasty.  It's satisfying on a cold winter night, without being too heavy, and will make you feel less guilty about having mac and cheese tomorrow night.

Recipe:  Weeknight Lemon Chicken Skillet Dinner
Slightly adapted from Cooking Light, January/February, 2015

Ingredients:

12 ounces baby red potatoes, halved
1 tablespoon olive oil, divided
4 (6-ounce) skinless, boneless chicken breast halves, pounded to 3/4-inch thickness
3/4 teaspoon kosher salt, divided
1/2 teaspoon freshly ground black pepper, divided
2 thyme sprigs
4 ounces cremini mushrooms, quartered
1 tablespoon chopped fresh thyme
1/4 cup whole milk
5 teaspoons all-purpose flour
1 3/4 cups unsalted chicken stock (such as Swanson)
8 very thin lemon slices
8 ounces fresh trimmed haricots verts
2 tablespoons chopped fresh flat-leaf parsley

Directions:

Preheat oven to 450°.

Place potatoes in a medium saucepan; cover with water. Bring to a boil, and simmer 12 minutes or until tender. Drain.

Heat a large ovenproof skillet over medium-high heat. Add 1 teaspoon oil to pan. Sprinkle chicken with 1/4 teaspoon salt and 1/4 teaspoon pepper. Add chicken and thyme sprigs to pan; cook 5 minutes or until chicken is browned. Turn chicken over. Place pan in oven; bake at 450° for 15 minutes or until chicken is done. Remove chicken from pan.

Return pan to medium-high heat. Add remaining 2 teaspoons oil. Add potatoes, cut sides down; mushrooms; and 1 tablespoon thyme; cook 3 minutes or until browned, stirring once. Combine milk and flour in a small bowl, stirring with a whisk. Add remaining salt, remaining pepper, flour mixture, stock, lemon, and beans to pan; simmer 1 minute or until slightly thickened. Add chicken; cover, reduce heat, and simmer 3 minutes or until beans are crisp-tender. Sprinkle with parsley.

Wednesday, January 14, 2015

Pinned

FollowYou Little Tarte on Pinterest

Kate is my social media consultant.  Generally speaking, by the time I hear about something online, she's already exhausted all of its possibilities and is on to the next big thing.  Imagine my thrill and surprise when, over winter break, she informed me that I absolutely had to put You Little Tarte on Pinterest.

I've actually heard of Pinterest.

I actually know what Pinterest is.

Now, Kate being Kate, she did not trust in my somewhat limited social media skills to actually set up my Pinterest.  She had bigger, better ideas than she thought I had.  She is, after all, a college student who (1) believes she knows everything about everything, and (2)believes that the answers to all questions are found on Pinterest.

Maybe she's right.  What do I know?  (Actually I know a lot about a myriad of subjects, but for Pinterest purposes I've chosen it defer to Kate, my resident social media guru.)

So, here it is.  You Little Tarte on Pinterest.  Honestly, it's a lot of fun.  I can definitely see the appeal.  And, to use Kate's word, I'm obsessed.  I could spend hours everyday pinning.  And, with all the time I've spent pinning, the one thing I just can't get over is how damn creative people are.  I'm not that creative, that's for sure.

Take a look at You Little Tarte on Pinterest.  Follow You Little Tarte on Pinterest.  (According to Kate, it's all about the followers.)  Pin You Little Tarte.  Tell your friends about You Little Tarte,

It's going to be a lot of fun. I promise.


Tuesday, January 13, 2015

Orange on a Winter Day


I'm a big fan of Fine Cooking Magazine.  Honestly, given how complete and easy to follow their instructions are, a monkey could cook a gourmet dinner, and I like that in a cooking magazine.  The editors at Fine Cooking always strike a nice balance between things you would never in a million years make (i.e. the cover recipes),  and things that are screaming out to be made immediately. (i.e. the fast easy and fast recipes).

This is a nice chicken recipe.  I know, I know.  Chicken again?  Well, until you can come up with an alternative, yup... it's chicken again.

But back to the chicken.  This recipe for Sear-Roasted Chicken with Orange Tarragon Pan Sauce is quick and tasty, all the things that I require in a chicken recipe.  My point is that chicken just isn't exciting enough to spend hours making it.  In fact, ease of prep is what makes chicken so appealing to me in the first place.  That and the fact that chicken pretty much takes on the taste of whatever you happen to do to it.

You can go one of two ways with this recipe.  You can prepare it according to the directions in the recipe.  Or, you can brown the chicken and place it in a baking dish.  Make the sauce in the same pan you used to brown the chicken, reducing the cause for half the time called for in the recipe, and then pour the prepared sauce over the chicken.  Place the whole assembly in the oven and cook for about 20 minutes.

Easy peasy.

The side dish, Millet and Chickpea Salad is light and has a nice crunch to it.  And who doesn't like a little crunch in their salad?  Sure, it has a bunch of ingredients, but I'll bet you have them all on hand.

The orange in both of the recipes lends a much needed bit of sparkle during these long, cold winter days.  In fact, if you close your eyes and think warm, you might actually be able to convince yourself that you're in Florida.  Maybe.

Recipe:  Sear-Roasted Chicken with Orange-Tarragon Pan Sauce
Fine Cooking Magazine, February/March, 2015

Ingredients:

4 boneless, skinless chicken breast halves (about 1-3/4 lb.)
Kosher salt and freshly ground black pepper
2 Tbs. olive oil
2 large shallots, peeled and thinly sliced
½ cup fresh orange juice
½ cup lower-salt chicken broth
2 Tbs. coarsely chopped fresh tarragon
1 Tbs. honey
1 tsp. finely grated orange zest

Directions:

Position a rack in the center of the oven and heat the oven to 450°F. Pat the chicken dry and sprinkle with 1 tsp. salt and ¾ tsp. pepper.

Heat the oil in a 12-inch ovenproof skillet over medium-high heat until shimmering hot. Cook the chicken breasts, undisturbed, until browned (they should easily release when you lift a corner), 5 to 6 minutes. Flip and transfer the skillet to the oven. Roast until just cooked through (165°F), about 15 minutes. Transfer the chicken to a plate, cover loosely with foil, and keep warm.

Put the skillet over medium heat (be careful of the hot handle), add the shallots and ½ tsp. salt, and cook, stirring and scraping up any browned bits, until softened, about 2 minutes. Add the orange juice, broth, tarragon, honey, and zest, and cook until the mixture is reduced by half, about 6 minute
Transfer the chicken to serving plates. Pour any juices that collected on the plate into the sauce and serve the sauce with the chicken.

Recipe:  Millet and Chickpea Salad
Fine Cooking Magazine, February/March, 2015

Ingredients:

3 Tbs. plus 1 tsp. olive oil
1/2 cup millet
Kosher salt
1/4 tsp. crumbled saffron threads
1 large orange, peeled and segmented, segments cut into thirds
1 jarred roasted red pepper, chopped
1/2 cup canned chickpeas, drained and rinsed
2 Tbs. finely chopped red onion
2 Tbs. sherry vinegar
1 tsp. honey
1/2 tsp. dried oregano

Directions:

Heat 1 tsp. of the oil in a 10-inch skillet over medium heat. Add the millet and toast, shaking the pan, until one shade darker, about 1 minute.

In a 1-quart saucepan, bring 1 cup water, 1/2 tsp. salt, and the saffron to a boil. Add the millet, cover, reduce the heat to low, and cook until tender, about 18 minutes. Scrape into a large bowl. Stir the orange segments, peppers, chickpeas, onion, the remaining 3 Tbs. oil, vinegar, honey, and oregano into the millet. Season to taste and serve.

Thursday, January 8, 2015

Black Ice


It wasn't until I moved to Pittsburgh that I really started to appreciate exactly how dangerous black ice can be.  In fact, back in California, black ice was one of those things that happened to other people in other places like Minnesota.  Or Buffalo.  Or Maine.  Places I never envisioned spending the winter.  Or the summer.  Or even a long weekend.  Places like Pittsburgh.

But here I am, living in black ice country.  Let me tell you, black ice is not fun.  At all.

My experience with black ice has not been good.  A couple of winters ago, I slipped on an icy sidewalk and fractured my back.  That little "accident" also resulted I'm my having the mother of all bone bruises.  I thought I was going to die.  That bone bruise made childbirth seem well, enjoyable.

My dear friend Mona had a run in with a set of icy steps last Saturday.  Let's just say that the steps won.  She is, fortunately, doing fine, but I thought I'd bring she and her family dinner so she didn't have to worry about it.

The bonus of bringing Mona dinner was that we also got to have a lovely visit when I dropped it off.  Mona was one of my very first friends in Pittsburgh, and I still am amazed that I was so fortunate to have found such a like minded friend so quickly.  That's one of the reasons I knew that Mona and her family would love this Baked Farro and Butternut Squash.  It seems simple, and it's pretty easy to make, but the flavors are complex and comforting.  Perfect for a cold winter day.

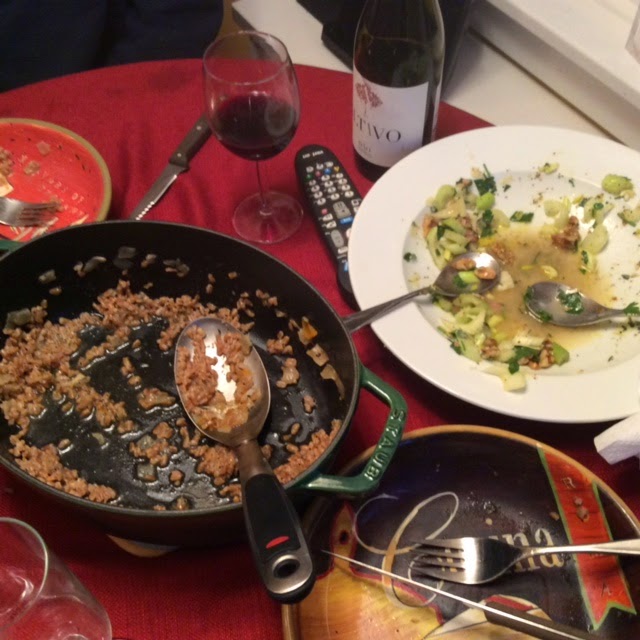
I also brought along a delicious celery and parmesan salad, and my favorite dark chocolate and sea salt brownies.  A perfect way to round out dinner.


Mona took these pictures of dinner.  From all accounts (and photographic evidence), it appears dinner was a success.


Recipe:  Baked Farro and Butternut Squash
Ina Garten, Make It Ahead, 2014

Ingredients:

6 thick-cut slices applewood-smoked bacon
2 tablespoons good olive oil
1 tablespoon unsalted butter
1 1/2 cups chopped yellow onion (1 large)
2 teaspoons chopped fresh thyme leaves
Kosher salt and freshly ground black pepper
1 1/2 cups pearled farro
3 cups good chicken stock, preferably homemade
3 cups (3/4-to-1-inch-diced) peeled butternut squash
1/2 cup freshly grated parmesan cheese

Directions:
Preheat the oven to 375 degrees F. Place the bacon on a baking rack set on a sheet pan and bake it for 20 to 30 minutes, until browned (it won't be crisp). Cut the bacon in very large dice.

Meanwhile, in a small (9-inch) Dutch oven, such as Le Creuset, heat the olive oil and butter over medium heat. Add the onion and cook for 6 to 8 minutes, until tender and starting to brown. Add the thyme, 2 teaspoons salt and 1 teaspoon pepper and cook for 1 minute. Add the farro and chicken stock and bring to a simmer. Place the squash on top of the farro mixture, cover, and bake in the same oven with the bacon for 30 minutes, until the squash and farro are tender. Check once during cooking and add a little chicken stock if it's dry.

Sprinkle the bacon and parmesan on the squash and farro and bake uncovered for 15 to 20 minutes, until most of the liquid evaporates, the farro and butternut squash are tender, and the cheese has melted. Serve hot directly from the pot.

Recipe:  Celery and Parmesan Salad
Ina Garten

Ingredients:

1/2 cup good olive oil
2 teaspoons grated lemon zest
1/4 cup plus 1 tablespoon freshly squeezed lemon juice (3 lemons)
2 tablespoons minced shallots
1 teaspoon celery seed
1/2 teaspoon celery salt
1/2 teaspoon anchovy paste
Kosher salt and freshly ground black pepper
5 cups thinly sliced celery hearts, tender leaves included, sliced on an angle (about 12 stalks)
4 -ounce chunk aged Parmesan cheese
2/3 cup toasted walnuts, coarsely chopped
Whole flat-leaf parsley leaves

Directions:

At least 1 hour before you plan to serve the salad, whisk together the olive oil, lemon zest, 1/4 cup of lemon juice, the shallots, celery seed, celery salt, anchovy paste, 2 teaspoons salt, and 1 teaspoon pepper. Place the celery in a mixing bowl and toss it with the remaining 1 tablespoon of lemon juice and 1/2 teaspoon of salt. (Even though these ingredients are in the dressing, believe me-this step makes a difference.) Add enough dressing to moisten well. Cover and refrigerate for at least an hour to allow the celery to crisp and the flavors to develop.

When ready to serve, arrange the celery on a platter, shave the Parmesan onto the celery with a vegetable peeler, then sprinkle with walnuts, parsley leaves, salt, and pepper and serve immediately.

Recipe: Chocolate Sea Salt Brownies
Adapted from Mon Aimee

Ingredients:

12 tablespoons unsalted butter
2 oz unsweetened chocolate, finely chopped (suggested Oban chocolate)
1/4 cup plus 2 tablespoons unsweetened dutch process cocoa (suggested Cacao Rouge cocoa)
2 cups granulated sugar
3 large eggs
1 1/2 teaspoons vanilla
1 cup flour
1/2 teaspoons flaked sea salt

Directions:

Preheat the oven to 350F.

Line a 9 inch metal pan with foil draping over the edges.  Lightly butter the foil.

In a saucepan, melt the butter with the unsweetened chocolate.  Pour the chocolate mixture into a large bowl.  One ingredient at a time, whisk in the cocoa powder, eggs, sugar, vanilla, and flour.  Combine until smooth and shiny.

Pour into the prepared pan and sprinkle the sea salt evenly over the mixture.

Bake in the center of the oven for 35 minutes.  Center will be a bit soft.  Let the brownies cool in the pan for at least an hour.  Then refrigerate for at least another hour, until the center is firm.  Peel off the foil and cut into 16 equal sized squares.


Tuesday, January 6, 2015

It's A Challenge


Kate has challenged me to post a new recipe, one of my own, each week this year.  Hey.  It's 2015, and she's feeling frisky.  And ambitious.  For me.

As most of you know, I have a deep, abiding love for my cookbooks.  I love cookbooks.  I buy them constantly.  I use them daily.  I am not a recipe-maker-upper.  I follow recipes, often to the letter.  I do not usually come up with them myself.

Usually is the operative word here.  The truth is that I do, occasionally, come up with my own recipes.  These recipes often come as a result of (1) having made a published recipe 10,000 times and thus I've added my own special flair to it over time, or (2) I get a hankering for something and don't have a recipe for said item so I just wing it.  Surprisingly enough, these are often some of my best efforts in the kitchen.

So, in the spirit of accepting Kate's challenge, (sure, it's no work for her), here's this week's You Little Tarte recipe.  It's a coffeecake.  You all know how much I love, love, love coffeecake, so it somehow seems appropriate that this maiden voyage be with a coffeecake.

I know.  You're hooked.

For the holidays, Charlie gave me a cookbook called Cake Keeper Cakes by Lauren Chattman.  It really was the perfect gift.  After all, as stated above, I love coffee cake, and of the 100 recipes in this cookbook, roughly 99 of them qualify as coffeecakes.

I started by making the Apricot Jam Cake, which sounded pretty good, but a little heavy on the apricot jam (too cloying) and not heavy enough on some of the spices.  Once the batter was made, I decided it looked a little naked, so I dressed up with a little streusel.  What doesn't taste better with a little streusel (or a lot of streusel, for that matter)?

The end result was a real winner.  Sweet, but not cloying, and rich, as a result of my addition of streusel, with just a little crunch for interest.  This coffeecake, which I'm claiming as my own (with a little adaptation credit), is definitely up to Kate's challenge.


Recipe:  Apricot Jam Cake with Hazelnut Streusel Topping
Adapted from Cake Keeper Cakes by Lauren Chairman

Ingredients:

For the cake:

1 1/2 cups all purpose flour
1 teaspoon baking powder
1 teaspoon ground cinnamon
1/4 ground cloves
1/4 teaspoon ground nutmeg
1/4 teaspoon baking soda
1/4 teaspoon kosher salt
1 cup packed dark brown sugar
6 tablespoons softened unsalted butter
3/4 cup apricot jam
2 eggs, room temperature
3 tablespoons plain yogurt
1/2 cup toasted and skinned hazelnuts, chopped medium

For the hazelnut streusel:

4 tablespoons unsalted butter, melted and cooled
1/2 cup all purpose flour
1 teaspoon ground cinnamon
1/8 teaspoon ground cloves
1/8 teaspoon ground nutmeg
1/2 cup brown sugar
1/2 cup toasted and skinned hazelnut, chopped coarsely

Directions:

Preheat the oven to 350F.  Grease an 8 inch square baking pan and dust it with a little flour.

In a medium bowl, whisk together the dry ingredients: flour, baking powder, cinnamon, cloves, nutmeg, baking soda, and salt.

In the bowl of an electric mixer, cream the butter with the brown sugar, until fluffy, 2-3 minutes.  Scrape down the sides, and beat in the jam.

With the mixer on medium speed, add the eggs one at a time.  Add the yogurt.  Reduce the speed of the mixer to low, and add the flour mixture a little at a time, scraping down the sides after each addition.  Beat just until incorporated and add the nuts, missing only long enough to completely incorporate the nuts.

Pour the batter into the prepared pan.

To make the streusel topping, melt the butter in the microwave in a medium size bowl.  Add the remaining ingredients and mix well, until the mixture is complete incorporated and forms soft chunks of streusel.  Sprinkle the streusel mixture on top of the unbaked cake.

Bake until a toothpick inserted in the center comes out clean, approximately 1 hour.  Let the cake cook in the pan.  Cut into 9 squares and serve.  The cake will keep nicely in a cake keeper for about 3 days, if it lasts that long.


Saturday, January 3, 2015

A Most Misunderstood Vegetable


I give props to the person who first was brave enough to figure out that artichokes were edible.  I'm thinking it was a woman.  Guys just don't have that "Gee, this doesn't really look like food, but let's investigate" gene.  Women are selfless.  They are willing to poison themselves if it means keeping their families from eating something harmful or, God forbid, not delicious or worth the calories.  We also love to gloat when we're right.

"See, I told you it was food."

Having said all that, I must admit that I think artichokes, while tasty, are just way too much work.  And I don't like dealing with that furry stuff on the heart.  I think it's off-putting.  I do not need to de-fuzz my food before I eat it.  This is probably because I have only recently ridded the house of tennis ball fuzz, and when Kate returnes, even if just for a short visit, the yellow fuzz returns with her.

But I digress.  If you're looking for a shortcut, and who isn't, then frozen artichoke hearts are for you.  Yes.  You heard me right.  Frozen.

Now that you've gotten yourself up off the floor, let me tell you that Ina Garten even says frozen artichoke hearts are good.  As a matter of fact, she says they're one of the best frozen vegetables out there.  And if frozen artichoke hearts are good enough for Ina, then they are most certainly good enough for me.

Note:  I would not feel this way if say, Rachael Ray, was pushing frozen artichoke hearts.  Or Sandra Lee.  Or the Pioneer Woman.  I only feel this way because it's Ina, and she rarely takes a shortcut that involves something not purchased in a specialty food store.

Anyway, having established that frozen artichoke hearts are just fine, maybe even better than that, here's a recipe for roasted artichoke hearts.  These are nice on an antipasto platter, or as a side dish.  Either way, they're just delicious.

And, being resourceful, as we women (and my male readers as well) are, you can take full credit for having discovered that frozen is not only easy (perish the thought), but quite tasty as well.

Recipe:  Roasted Artichoke Hearts
Ina Garten

Ingredients:

4 boxes (9 ounces each) frozen artichoke hearts, defrosted
Good olive oil
Kosher salt and freshly ground black pepper
1 shallot, minced
3 tablespoons freshly squeezed lemon juice
1 teaspoon Dijon mustard
5 tablespoons white wine or champagne vinegar, divided
½ cup chopped fresh basil leaves
6 tablespoons capers, drained
2 jars roasted red peppers, sliced thin
½ cup minced red onion
½ cup chopped fresh parsley
2 pinches hot red pepper flakes (optional)

Directions:

Preheat the oven to 350 degrees.

Place the artichoke hearts in a bowl with ¼ cup olive oil, 1 teaspoon salt and ½ teaspoon pepper and toss until the artichoke hearts are coated. Dump the artichoke hearts on a sheet pan and spread out into one layer; roast in the oven for 20 minutes.

Meanwhile, make the vinaigrette. Place the minced shallot, lemon juice, mustard, 1 tablespoon vinegar, 1 teaspoon salt, and ½ teaspoon pepper in the bowl of a food processor fitted with the steel blade. Process for 5 seconds. Add the basil leaves and process into a green puree. With the processor running, slowly pour ½ cup olive oil into the bowl through the feed tube until the ingredients are finely pureed. Set aside.

Place the roasted artichoke hearts in a bowl and toss with enough vinaigrette to moisten. Add the capers, red peppers, red onion, parsley, 4 tablespoons vinegar and red pepper flakes (if using), and toss gently. Sprinkle generously with salt and pepper and let stand for 30 minutes for the flavors to blend. Serve at room temperature.