With Thanksgiving just around the corner, I'm thinking that this is not the week for macaroni and cheese. What I am thinking is that maybe I should try and keep it lighter at dinner so I won't feel as guilty as I reach for a second serving of stuffing. As such, this is a week for salmon.
I used to love salmon and then I didn't. Now I'm back to liking it because it's kind of the chicken of the fish family. You can do almost anything to it and it still tastes pretty good. Plus, it's full of all those healthy omega 3's and that's good. So, in order to justify reckless abandon on Thursday, tonight we're having salmon.
For a long time I made a broiled salmon dish that had a mustard glaze on top. It was delicious but I started feeling like all that mustard was a little heavy. I began playing with the recipe I was using and came up with my own version of broiled salmon with mustard, which I am sharing with you below. The addition of lemon juice and lemon zest gives the fish just the right lightness. I like it better than the original.
If 50 is the new 40, can't salmon be the new chicken?
Broiled Salmon with Mustard, Lemon and Herbs
Ingredients:
4 salmon fillets, about 6 ounces each, with or without skin
2 garlic cloves, chopped
1 1/2 tablespoons Dijon mustard
1 1/2 tablespoons whole grain mustard
3/4 teaspoon fresh rosemary, chopped
3/4 teaspoon fresh thyme, chopped
3/4 teaspoon fresh dill, chopped
1 tablespoon white wine
1 tablespoon olive oil
1 tablespoon freshly squeezed lemon juice
1 teaspoon grated lemon zest
salt and pepper
Preheat broiler. Spray a broiler pan with nonstick cooking spray.
Sprinkle salmon fillets with salt and pepper and place on the broiler pan. Broil the fish for 5 minutes. In the meantime, combine the garlic, both mustards, rosemary, thyme, dill, wine, olive oil, lemon juice and zest in a small bowl. Spoon the mustard mixture over the fish and continue broiling for another 5 minutes, until the top is golden brown and fish is cooked through.
search you little tarte
Monday, November 22, 2010
Sunday, November 21, 2010
Say Hello to Mr. Popover
Note: There are two posts today. Read on for "On the Side".
So, you have the turkey, the yams, the stuffing, a vegetable, and even the pies. But you still need some kind of bread to complete the holiday spread. Now, having gone to so much trouble to make all this delicious homemade food, are you really just going to slap some dinner rolls from the grocery store on the table? I didn't think so.
Say hello to Mr. Popover, the perfect holiday bread. I mean, how can you not love something so tall and puffy? Popovers are absolutely my favorite aspect of any holiday meal. If you've never made them before, you have missed out. Now is your chance to make something that takes almost no effort and is a sure crowd pleaser.
If you have popover pans that's great, but you can also make them in Pyrex custard cups and they'll still be perfect. The great thing about popovers is that they are so easy. There's only one rule: do not peek into the oven while they are baking. That's it. Just mix, pour, and popover.
You can mix the batter ahead of time and then just bake them off right before dinner. I promise that no matter how many you make, they'll all be gone. The good news is that since they're so simple to make, you'll always be able to make more!
Popovers
(Barefoot Contessa Parties, 2001)
Ingredients:
1 1/2 tablespoons unsalted butter, melted, plus softened butter for greasing pans
1 1/2 cups all-purpose flour
3 extra large eggs, at rooms temperature
1 1/2 cups milk, at room temperature
Preheat the oven to 425.
Generously grease aluminum popover pans or Pyrex muffin cups with softened butter. You'll need enough pans to make 12 popovers. Place the pans in the oven for exactly 2 minutes to preheat. Meanwhile, whisk together the flour, salt, eggs, milk, and melted butter until smooth. The batter will be thin. Fill the popover pans less than half full and bake for exactly 30 minutes. Do not peek
Note: I transfer the batter from the mixing bowl into a large measuring cup to pour into the popover pans.
On the Side
I have to start by saying that I'm not usually all that creative about side dishes, even at the holidays. I've never made a green bean casserole although I'm sure it's very delicious. As I have mentioned, no one in my house gets excited about the veggies at Thanksgiving, so I have to admit I usually just make one so that I can at least look like I'm putting something green on the plate. (Ted is offended that I have not pointed out that he loves vegetables and especially these brussels sprouts. To be fair, I have yet to find any food item that Ted does not love.)But I do love the look of brussels sprouts, especially when they are available on the stalk. They're just so pretty. I almost feel like I could use them as a centerpiece (and I'm sure it's been done). And, like artichokes, you have to give the first person to have eaten them some credit. They just don't look edible. But, alas, they are and they're quite tasty.
You can do lots of things with them as well. Brussels sprouts are delicious roasted with a little balsamic vinegar . They are also really good when they are sauteed. But my favorite preparation of this particular vegetable is in a chiffonade with poppy seeds. They require a little more preparation than other recipes but they are absolutely divine. And once you get them all cut up, the cooking goes very quickly.
You should definitely try this recipe for brussels sprouts if for no other reason than you can look chic and gourmet when you buy them on the stalk. (The recipe works just fine if you buy them already separated but the stalk is nifty just the same.)
Not only is this a really good recipe, it's very light. This is a good thing after all the stuffing, yams, and pie. And, as an added bonus, you get to toss around the word "chiffonade" which will make you sound like quite the chef!
Brussels Sprouts Chiffonade with Poppy Seeds
(Bon Appetit, November, 2004)
Ingredients:
1 1/2 pounds fresh brussels sprouts, halved and cored
6 tablespoons unsalted butter
1 tablespoon fresh lemon juice
1 tablespoon poppy seeds
Cut the brussels sprouts into thin (1/8 - 1/4 inch wide) shreds. Melt the better in a heavy large skillet over medium-high heat. Add the brussels sprouts and todd until just beginning to wilt, about 5 minutes. Add the lemon juice and poppy seeds; toss to blend. Season with salt and pepper.
Thursday, November 18, 2010
Take Your Time
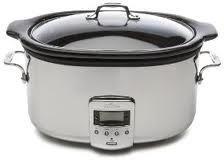
I love my slow cooker. In the old days, they were called crock pots, but now they've gotten really fancy and are called slow cookers. Who knew that they would ever evolve into the high-tech-you-can-cook-anything-in-them appliances they are now. I have the All-Clad, and it's fantastic. I have to say that if you don't have a slow cooker, you should go out and get one. Really. You don't even have to get one as fancy as mine. They come with fewer bells and whistles than mine, and they all work just fine.
I have to admit, my slow cooker is kind of a seasonal thing. I usually pull it out once the weather gets cooler and mostly on school nights. Kate plays tennis after school every day, and I don't get home with her until about 6:45 p.m. Ted usually gets in around 7:00 or 7:15. It's nice to have dinner ready to serve without pulling out every pot in the kitchen. I feel a little like Suzy Homemaker when I use it, but I can live with that if it means I don't have to scour a frying pan at 8:30 at night.
Being the somewhat over enthusiastic person that I am, of course I went out and bought a bunch of slow cooker cookbooks when I originally started slow cooking. Soon afterward, I realized that I could use any braised recipe and adapt it to the slow cooker. Anything that benefits from a long, slow braise is well suited to the slow cooker so don't feel like you have to rush out to Borders.
Having said all that, my favorite slow cooker cookbook is called The Gourmet Slow Cooker by Lynn Alley. The recipes are incredibly easy and just delicious. The recipe for Provencal Chicken Stew below is a favorite in my house.
If you don't have a slow cooker, I think this would probably work just as well if you cook it covered on the stove over a simmer until the meat is tender.
Provencal Chicken Stew
(The Gourmet Slow Cooker, 2003)
Note: I usually throw a couple of extra half breasts into this recipe because my family likes breast meat.
Ingredients:
3/4 cup plus 2 tablespoons all-purpose flour
1 teaspoon salt
1 chicken, cut into serving pieces, skinned
1/4 cup olive oil
1 yellow onion, finely chopped
1 clove garlic, minced
1/2 cup dry white wine
1 (14 1/2 ounce) can crushed tomatoes
Freshly ground black pepper
1/4 cup chopped fresh parsley, for garnish
1/4 cup fresh basil leaves, cut into chiffonade, for garnish
1 cup pitted kalamata olives, for garnish
Combine the 3/4 cup flour and the salt in a shallow dish or resealable plastic bag. Add the chicken, coat with the flour, and shake off any excess.
Heat a large saute pan over medium-high heat and add the oil. Add the chicken pieces and cook, turning once, for 8-10 minutes, until browned on both sides. Using tongs, transfer to paper towels to drain, then arrange in the bottom of a slow cooker.
Set the same saute pan over medium high heat and add the onion and the 2 tablespoons of flour. Sate, stirring frequently, for 8 - 10 minutes, or until lightly browned. Add the garlic and stir for 1 -2 minutes. Add the wine and stir to scrape up the brown bits from the bottom of the pan. Increase the heat to high and add the tomatoes and pepper to taste. Cook, stirring frequently, for 10-15 minutes, until some of the tomato liquid evaporates.
Pour the onion mixture over the chicken in the slow cooker. Cover and cook on low for 3 -8 hours, until the chicken is tender. At 3 to 4 hours, the chicken will still be firm and hold its shape. At 6 to 8 hours, the meat will be falling off the bone.
Divide the chicken among dinner plates and garnish with the parsley, basil, and olives.
I usually serve this with egg noodles.
I have to admit, my slow cooker is kind of a seasonal thing. I usually pull it out once the weather gets cooler and mostly on school nights. Kate plays tennis after school every day, and I don't get home with her until about 6:45 p.m. Ted usually gets in around 7:00 or 7:15. It's nice to have dinner ready to serve without pulling out every pot in the kitchen. I feel a little like Suzy Homemaker when I use it, but I can live with that if it means I don't have to scour a frying pan at 8:30 at night.
Being the somewhat over enthusiastic person that I am, of course I went out and bought a bunch of slow cooker cookbooks when I originally started slow cooking. Soon afterward, I realized that I could use any braised recipe and adapt it to the slow cooker. Anything that benefits from a long, slow braise is well suited to the slow cooker so don't feel like you have to rush out to Borders.
Having said all that, my favorite slow cooker cookbook is called The Gourmet Slow Cooker by Lynn Alley. The recipes are incredibly easy and just delicious. The recipe for Provencal Chicken Stew below is a favorite in my house.
If you don't have a slow cooker, I think this would probably work just as well if you cook it covered on the stove over a simmer until the meat is tender.
Provencal Chicken Stew
(The Gourmet Slow Cooker, 2003)
Note: I usually throw a couple of extra half breasts into this recipe because my family likes breast meat.
Ingredients:
3/4 cup plus 2 tablespoons all-purpose flour
1 teaspoon salt
1 chicken, cut into serving pieces, skinned
1/4 cup olive oil
1 yellow onion, finely chopped
1 clove garlic, minced
1/2 cup dry white wine
1 (14 1/2 ounce) can crushed tomatoes
Freshly ground black pepper
1/4 cup chopped fresh parsley, for garnish
1/4 cup fresh basil leaves, cut into chiffonade, for garnish
1 cup pitted kalamata olives, for garnish
Combine the 3/4 cup flour and the salt in a shallow dish or resealable plastic bag. Add the chicken, coat with the flour, and shake off any excess.
Heat a large saute pan over medium-high heat and add the oil. Add the chicken pieces and cook, turning once, for 8-10 minutes, until browned on both sides. Using tongs, transfer to paper towels to drain, then arrange in the bottom of a slow cooker.
Set the same saute pan over medium high heat and add the onion and the 2 tablespoons of flour. Sate, stirring frequently, for 8 - 10 minutes, or until lightly browned. Add the garlic and stir for 1 -2 minutes. Add the wine and stir to scrape up the brown bits from the bottom of the pan. Increase the heat to high and add the tomatoes and pepper to taste. Cook, stirring frequently, for 10-15 minutes, until some of the tomato liquid evaporates.
Pour the onion mixture over the chicken in the slow cooker. Cover and cook on low for 3 -8 hours, until the chicken is tender. At 3 to 4 hours, the chicken will still be firm and hold its shape. At 6 to 8 hours, the meat will be falling off the bone.
Divide the chicken among dinner plates and garnish with the parsley, basil, and olives.
I usually serve this with egg noodles.
Wednesday, November 17, 2010
Pie in the Sky
So, we've talked about all the big entree items. The turkey, the stuffing, the yams, and the cranberries. I haven't really gotten into the whole vegetable thing because, frankly, no one in my house even glances at them on the buffet table. (Tomorrow I'll include a vegetable that I like because some of you might actually want to eat veggies along with your dinner.) But now we're on to the star of the show, as far as I'm concerned. We're on to dessert and the pie.
I have saved the best for last. I love pie and I especially love the pies that are traditional at Thanksgiving. I mean, what better way to cap off a completely gluttonous meal than with a dessert filled with more calories and then topped off with whipped cream. Perfection. Even though I am usually absolutely ill by the time the dessert rolls around, I can always find more room for, as my Grandma Mary would have said, "a little something sweet". Ted has always said that no matter how good the turkey is, everyone always oohs and aahs about the dessert. He's right. Dessert is the show stopper in a way that nothing else can be.
First a word about pie crust. Don't let it intimidate you. You're bigger and stronger that it is and you can do it. You just have to own it and put yourself in charge. Use your food processor to mix it and then roll it out on a heavily floured surface. A pie crust that sticks to the counter is useless. Make sure when you're rolling the crust out that you keep moving it around to prevent sticking. And follow the instructions to keep it cold. The refrigerator is your friend!
My favorite is pumpkin pie. I never feel quite as bad about eating it as I would something like chocolate cake. I mean, pumpkin's a vegetable, isn't it? I'll admit, pie isn't a traditional serving of vegetables, but it's a veggie nonetheless. And the great thing about pumpkin pie is that it's easy to make and can be prepared ahead of time since it needs to hang out in the refrigerator to firm up. I also love pumpkin cheesecake, and it's the same deal as the pie. Make it ahead and then just look forward to it.
Apple pie is another sure winner at Thanksgiving. And here's the thing. Everybody should be able to make an apple pie. After all, it's about the most American dessert going. If you can make a good apple pie, you're set not only for Thanksgiving but for Fourth of July and just about any other big bang up holiday. There's no event where an apple pie wouldn't work.
Here are a couple of my favorite Thanksgiving pies. Make one or make them all. I promise you and your pies will be the star of the show.
* Note: I've been making these recipes for years and I've changed them up from the originals. In some cases, I don't even remember where I got the original recipe so I'm going to claim them as my own. I think that by now I get to.
Pumpkin Cheesecake
(Originally from Mary Sue Milliken & Susan Feniger but I've tinkered. A lot.)
Ingredients:
Crust:
1/2 cup pecans
2 tablespoons sugar
1 cup gingersnap crumbs (from about 20 cookies)
5 tablespoons butter, melted
Filling:
2 pounds cream cheese. softened
1 3/4 cups pumpkin puree
1/2 cup light brown sugar, firmly packed
1/2 cup granulated sugar
2 teaspoons ground cinnamon
1/2 teaspoon ground nutmeg
1/2 teaspoon salt
1 tablespoon grated fresh ginger
3 large eggs, room temperature
Directions:
Preheat the oven to 325. Place the pecans and sugar in the bowl of a food processor and process until finely chopped, about 20 seconds. Pour into a large bowl, add the gingersnap crumbs and mix. Pour in the melted butter and stir to combine. Turn mixture in to a 9-inch spring form pan. Bake for 10 minutes and then set aside to cool.
In a large bowl, beat the cream cheese with an electric mixer at low speed until soft and smooth, about 1 minute. In another bowl, combine the pumpkin, brown sugar, granulated sugar, cinnamon, nutmeg, salt, and ginger. Again with the electric mixer, mix together well, scraping down the sides of the bowl occasionally. Add the eggs one at a time, beating well between each addition. Add the pumpkin mixture to the softened cream cheese and mix thoroughly, scraping down the sides of the bowl, but do not over mix. Pour the batter into the prepared pan, tapping the bottom gently on the courter to eliminate air packets. Place the cake inside a large roasting pan and pour in very hot tap water until it reaches halfway up the sides of the cake pan.
Bake for 1 hour, or until the center feels firm when pressed. Immediately remove the cake pan from the water bath and set aside to cool on a rack. Refrigerate at least four hours but overnight is better.
Remove from spring form pan to serve.
Pumpkin Pie
Pastry:
(Martha Stewart)
Ingredients:
2 1/2 cups all purpose flour
1 teaspoon salt
1 teaspoon sugar
1 cup (2 sticks) unsalted butter, chilled and cut into small pieces
1/4 - 1/2 ice water
In the bowl of a food processor, combine flour, salt, and sugar. Add butter, and process until the mixture resembles coarse meal, 8-10 seconds.
With the machine running, add ice water in a slow, steady stream through the feed tube. Pulse until dough holds together without being wet or sticky; be careful not to process more than about 30 seconds. To test, squeeze a small amount together. If it is crumbly, add a little more ice water, 1 tablespoon at a time.
Divide dough into two equal balls. Flatten each ball into a disk, and wrap in plastic. Transfer to the refrigerator, and chill at least 1 hour. Dough may be stored, frozen, up to 1 month.
Filling:
(Me)
1 can (16 ounces) unsweeted solid pack pumpkin puree
1/2 cup light brown sugar, firmly packed
1 tablespoon all purpose flour
1 teaspoon ground ginger
1/2 teaspoon cinnamon
1/2 teaspoon ground nutmeg
1/2 teaspoon salt
3 eggs
1 cup heavy cream
1/4 cup milk
1/4 cup dark molasses
1 1/2 teaspoon vanilla
Preheat oven to 375.
Roll one pastry disk into a 12-inch round. Transfer to a 9 -10-inch pie pan. Trim dough evenly along edge, leaving a 1/2 inch overhang. Pinch to form a decorative edge. Chill for 15 minutes.
To make the filling, in a large bowl, mix the pumpkin puree, brown sugar, flour, ginger, cinnamon, nutmeg and salt until smooth. Whisk in the eggs, cream, milk, molasses and vanilla. Pour into prepared pie crust. Bake 20 minutes. Reduce oven temperature to 325 and bake until the filling no longer jiggles when pan is shaken, about 30 minutes longer. Transfer to a rack to cool.
Serve immediately or refrigerate overnight.
Double Crust Apple Cranberry Pie
(Food & Wine)
Ingredients:
Use Pastry recipe above.
Filling:
1 1/2 pounds tart apples
1 cup fresh cranberries
3/4 cup plus 1 tablespoon granulated sugar
2 tablespoons all purpose flour
2 teaspoons finely grated orange zest
1/4 teaspoon cinnamon
1/8 teaspoon salt
2 tablespoons unsalted butter, cut into small pieces
On a floured surface, roll out one disk of pastry into an 11-inch round. Transfer the round to a 9-inch pie pan and fit it against the bottom and sides without stretching. Using a small sharp knife, trim the pastry flush with the rim. Refrigerate the pie shell for 30 minutes.
Using a small sharp knife, peel, quarter and core the apples. Slice them lengthwise 1/4 inch thick. In a medium bowl, toss the apples with the cranberries, 3/4 cup of sugar, flour, orange zest, cinnamon and salt. Mix well. Pour the filling into the pie shell. Dot with the butter.
Preheat the oven to 400. Lightly moisten the edge of the pie shell with cold water. Roll out the other disk of pastry into a 12-inch round and drape it over the pie. Trim the overhang to 1.2 inch. Tuck the excess dough under the rim of the bottom pie shell and press to seal. Crimp decoratively. Cut 3 or 4 steam vents in the top. Sprinkle with 1 tablespoon of sugar.
Bake the pie for 20 minutes. Cover the rim with foil to prevent over browning. Bake for 30 minutes more, or until the apples feel tender when a cake tester is inserted into the center of the pie. Transfer to a rack to cool.
I have saved the best for last. I love pie and I especially love the pies that are traditional at Thanksgiving. I mean, what better way to cap off a completely gluttonous meal than with a dessert filled with more calories and then topped off with whipped cream. Perfection. Even though I am usually absolutely ill by the time the dessert rolls around, I can always find more room for, as my Grandma Mary would have said, "a little something sweet". Ted has always said that no matter how good the turkey is, everyone always oohs and aahs about the dessert. He's right. Dessert is the show stopper in a way that nothing else can be.
First a word about pie crust. Don't let it intimidate you. You're bigger and stronger that it is and you can do it. You just have to own it and put yourself in charge. Use your food processor to mix it and then roll it out on a heavily floured surface. A pie crust that sticks to the counter is useless. Make sure when you're rolling the crust out that you keep moving it around to prevent sticking. And follow the instructions to keep it cold. The refrigerator is your friend!
My favorite is pumpkin pie. I never feel quite as bad about eating it as I would something like chocolate cake. I mean, pumpkin's a vegetable, isn't it? I'll admit, pie isn't a traditional serving of vegetables, but it's a veggie nonetheless. And the great thing about pumpkin pie is that it's easy to make and can be prepared ahead of time since it needs to hang out in the refrigerator to firm up. I also love pumpkin cheesecake, and it's the same deal as the pie. Make it ahead and then just look forward to it.
Apple pie is another sure winner at Thanksgiving. And here's the thing. Everybody should be able to make an apple pie. After all, it's about the most American dessert going. If you can make a good apple pie, you're set not only for Thanksgiving but for Fourth of July and just about any other big bang up holiday. There's no event where an apple pie wouldn't work.
Here are a couple of my favorite Thanksgiving pies. Make one or make them all. I promise you and your pies will be the star of the show.
* Note: I've been making these recipes for years and I've changed them up from the originals. In some cases, I don't even remember where I got the original recipe so I'm going to claim them as my own. I think that by now I get to.
Pumpkin Cheesecake
(Originally from Mary Sue Milliken & Susan Feniger but I've tinkered. A lot.)
Ingredients:
Crust:
1/2 cup pecans
2 tablespoons sugar
1 cup gingersnap crumbs (from about 20 cookies)
5 tablespoons butter, melted
Filling:
2 pounds cream cheese. softened
1 3/4 cups pumpkin puree
1/2 cup light brown sugar, firmly packed
1/2 cup granulated sugar
2 teaspoons ground cinnamon
1/2 teaspoon ground nutmeg
1/2 teaspoon salt
1 tablespoon grated fresh ginger
3 large eggs, room temperature
Directions:
Preheat the oven to 325. Place the pecans and sugar in the bowl of a food processor and process until finely chopped, about 20 seconds. Pour into a large bowl, add the gingersnap crumbs and mix. Pour in the melted butter and stir to combine. Turn mixture in to a 9-inch spring form pan. Bake for 10 minutes and then set aside to cool.
In a large bowl, beat the cream cheese with an electric mixer at low speed until soft and smooth, about 1 minute. In another bowl, combine the pumpkin, brown sugar, granulated sugar, cinnamon, nutmeg, salt, and ginger. Again with the electric mixer, mix together well, scraping down the sides of the bowl occasionally. Add the eggs one at a time, beating well between each addition. Add the pumpkin mixture to the softened cream cheese and mix thoroughly, scraping down the sides of the bowl, but do not over mix. Pour the batter into the prepared pan, tapping the bottom gently on the courter to eliminate air packets. Place the cake inside a large roasting pan and pour in very hot tap water until it reaches halfway up the sides of the cake pan.
Bake for 1 hour, or until the center feels firm when pressed. Immediately remove the cake pan from the water bath and set aside to cool on a rack. Refrigerate at least four hours but overnight is better.
Remove from spring form pan to serve.
Pumpkin Pie
Pastry:
(Martha Stewart)
Ingredients:
2 1/2 cups all purpose flour
1 teaspoon salt
1 teaspoon sugar
1 cup (2 sticks) unsalted butter, chilled and cut into small pieces
1/4 - 1/2 ice water
In the bowl of a food processor, combine flour, salt, and sugar. Add butter, and process until the mixture resembles coarse meal, 8-10 seconds.
With the machine running, add ice water in a slow, steady stream through the feed tube. Pulse until dough holds together without being wet or sticky; be careful not to process more than about 30 seconds. To test, squeeze a small amount together. If it is crumbly, add a little more ice water, 1 tablespoon at a time.
Divide dough into two equal balls. Flatten each ball into a disk, and wrap in plastic. Transfer to the refrigerator, and chill at least 1 hour. Dough may be stored, frozen, up to 1 month.
Filling:
(Me)
1 can (16 ounces) unsweeted solid pack pumpkin puree
1/2 cup light brown sugar, firmly packed
1 tablespoon all purpose flour
1 teaspoon ground ginger
1/2 teaspoon cinnamon
1/2 teaspoon ground nutmeg
1/2 teaspoon salt
3 eggs
1 cup heavy cream
1/4 cup milk
1/4 cup dark molasses
1 1/2 teaspoon vanilla
Preheat oven to 375.
Roll one pastry disk into a 12-inch round. Transfer to a 9 -10-inch pie pan. Trim dough evenly along edge, leaving a 1/2 inch overhang. Pinch to form a decorative edge. Chill for 15 minutes.
To make the filling, in a large bowl, mix the pumpkin puree, brown sugar, flour, ginger, cinnamon, nutmeg and salt until smooth. Whisk in the eggs, cream, milk, molasses and vanilla. Pour into prepared pie crust. Bake 20 minutes. Reduce oven temperature to 325 and bake until the filling no longer jiggles when pan is shaken, about 30 minutes longer. Transfer to a rack to cool.
Serve immediately or refrigerate overnight.
Double Crust Apple Cranberry Pie
(Food & Wine)
Ingredients:
Use Pastry recipe above.Filling:
1 1/2 pounds tart apples
1 cup fresh cranberries
3/4 cup plus 1 tablespoon granulated sugar
2 tablespoons all purpose flour
2 teaspoons finely grated orange zest
1/4 teaspoon cinnamon
1/8 teaspoon salt
2 tablespoons unsalted butter, cut into small pieces
On a floured surface, roll out one disk of pastry into an 11-inch round. Transfer the round to a 9-inch pie pan and fit it against the bottom and sides without stretching. Using a small sharp knife, trim the pastry flush with the rim. Refrigerate the pie shell for 30 minutes.
Using a small sharp knife, peel, quarter and core the apples. Slice them lengthwise 1/4 inch thick. In a medium bowl, toss the apples with the cranberries, 3/4 cup of sugar, flour, orange zest, cinnamon and salt. Mix well. Pour the filling into the pie shell. Dot with the butter.
Preheat the oven to 400. Lightly moisten the edge of the pie shell with cold water. Roll out the other disk of pastry into a 12-inch round and drape it over the pie. Trim the overhang to 1.2 inch. Tuck the excess dough under the rim of the bottom pie shell and press to seal. Crimp decoratively. Cut 3 or 4 steam vents in the top. Sprinkle with 1 tablespoon of sugar.
Bake the pie for 20 minutes. Cover the rim with foil to prevent over browning. Bake for 30 minutes more, or until the apples feel tender when a cake tester is inserted into the center of the pie. Transfer to a rack to cool.
Tuesday, November 16, 2010
Coffee, Tea or Stew
Ted was out of town last week and I drank instant coffee. Every morning. That's right, I drank instant coffee. The simple truth is that I cannot make a decent pot of coffee to save my life. Here I am, a grown woman, who can pretty much whip up anything in the kitchen, and I cannot master the coffee to water ratio required to make drinkable coffee. It's sad but true.
Ted has tried showing me how to do it more times than I can count. I have googled "how to make coffee" several times. I have even watched videos on You Tube. But when it comes down to it, the coffee is always too strong or, more often, like "hot office beverage".
So, I stick with what I know. I cook with it. I add coffee as an ingredient to lots of things. Coffee makes chocolate taste more chocolaty and in the case of the beef stew recipe below, it provides a slight bitterness that goes beautifully with the bourbon and beef stock.
The good news is that Ted doesn't go out of town for more than a day or two very often so I can be assured of a nice cup of coffee (which Ted makes flawlessly) every morning. Just one more thing on the long list of reasons why I love him.
Beef Stew with Guinness
(Nathan Lippy)
This stew has a lot of liquid. Serve it with crusty bread.
Ingredients:
2 pounds beef, cut into 1 1/2 inch cubes
2 tablespoons garlic, chopped
1 cup carrots, rough chop
1 large yellow onion, rough chop
1/2 cup celery, rough chop
1/2 cup Jack Daniels
2 cups potatoes, rough chop
2 pint cans Guinness
1 quart beef stock
4 fresh thyme sprigs
2 fresh rosemary sprigs
1/2 cup leftover coffee (we want the bitterness)
Drizzle of olive oil
Salt and pepper
In a large stockpot, heat up a drizzle of oliver oil over medium heat. Add the beef and brown for about 5-7 minutes.
Once the meat is beautifully browned, add the garlic and the other vegetables except for the potatoes and caramelize until they have a bit of color (about 8-10 minutes). Deglaze by adding the Jack Daniels to release the brown bits at the bottom of the pot. The liquid will boil, loosening the caramelization and adding flavor back to the stew. Cook for 1 minute.
Add all liquid, the whole sprigs of herbs (tie herbs together with some string), potatoes, some salt and pepper and reduce the heat to a simmer (the soup should have small bubbles rise on the sides of the pot) for 1 hour or longer until the meat is super-tender.
Serve steamy hot with ciabatta or a simple French baguette.
Ted has tried showing me how to do it more times than I can count. I have googled "how to make coffee" several times. I have even watched videos on You Tube. But when it comes down to it, the coffee is always too strong or, more often, like "hot office beverage".
So, I stick with what I know. I cook with it. I add coffee as an ingredient to lots of things. Coffee makes chocolate taste more chocolaty and in the case of the beef stew recipe below, it provides a slight bitterness that goes beautifully with the bourbon and beef stock.
The good news is that Ted doesn't go out of town for more than a day or two very often so I can be assured of a nice cup of coffee (which Ted makes flawlessly) every morning. Just one more thing on the long list of reasons why I love him.
Beef Stew with Guinness
(Nathan Lippy)
This stew has a lot of liquid. Serve it with crusty bread.
Ingredients:
2 pounds beef, cut into 1 1/2 inch cubes
2 tablespoons garlic, chopped
1 cup carrots, rough chop
1 large yellow onion, rough chop
1/2 cup celery, rough chop
1/2 cup Jack Daniels
2 cups potatoes, rough chop
2 pint cans Guinness
1 quart beef stock
4 fresh thyme sprigs
2 fresh rosemary sprigs
1/2 cup leftover coffee (we want the bitterness)
Drizzle of olive oil
Salt and pepper
In a large stockpot, heat up a drizzle of oliver oil over medium heat. Add the beef and brown for about 5-7 minutes.
Once the meat is beautifully browned, add the garlic and the other vegetables except for the potatoes and caramelize until they have a bit of color (about 8-10 minutes). Deglaze by adding the Jack Daniels to release the brown bits at the bottom of the pot. The liquid will boil, loosening the caramelization and adding flavor back to the stew. Cook for 1 minute.
Add all liquid, the whole sprigs of herbs (tie herbs together with some string), potatoes, some salt and pepper and reduce the heat to a simmer (the soup should have small bubbles rise on the sides of the pot) for 1 hour or longer until the meat is super-tender.
Serve steamy hot with ciabatta or a simple French baguette.
Monday, November 15, 2010
Get Your Gobble On
I have been avoiding talk about the bird. I have to start by saying that I subcontract the cooking of the turkey out to Ted. He doesn't mind being elbow deep in poultry. I do. And, Ted loves to have a job at Thanksgiving, and I'm down with that. Ted is a master turkey cooker. After a few missteps early in his turkey cooking career, he now pretty much has it down to a science. He's a brine guy. He has a whole system which involves a large cooler and a garbage bag if he's cooking for a crowd. If it's a smaller group, Ted uses my giant stock pot and most of the basement refrigerator. It's quite a process. And you know how men are. They can make changing a lightbulb a whole process. Ted, like most men, loves a process. Need I say more?
But back to the bird. I always go the fresh turkey route. I have no idea if it's actually better than the frozen one you get at the grocery store, but it seems more festive to get the fresh one. In any case, I order it from my man Mark the Butcher (10/26/10) and pick it up a day or two before the big event.
Then Ted gets to work. He mixes his magic brine and lets Mr. Turkey luxuriate overnight in the salt and herbs. What emerges on Thanksgiving morning is a plump bird, ready for the oven. Ted then works his Ted magic with the butter and the herbs and into the oven the turkey goes. To quote Ina, "How Easy is That"? (Well, actually it's pretty easy for me because I don't have to do anything besides complain about the huge mess Ted makes while prepping the turkey.)
This is where Ted has had problems in the past. The roasting. More than once he was absolutely sure that the turkey was cooked to perfection. Upon carving, it was revealed that perhaps a little longer in the oven would have been the way to go. But, after I threatened divorce, Ted now has the timing down. I have also finally agreed to just let Ted do his thing and not ask 1,000 times if he's sure the turkey is actually cooked. The turkey comes out a beautiful golden shade and cooked just right.
I think the brining is the key to the turkey. Give it a try. I'd send Ted over to help out but maybe your husbands will enjoy the "process". Then you can just stand back and complain about the mess.
Ted's (looks more complicated than it is) Turkey Recipe
(Note: Ted is a lawyer and you will see what I mean when you read this)
Step by Step Instructions:
This recipe assumes a 12-14 lb turkey. If you need or want more meat, you can cook a bigger turkey and adjust the ingredients and time appropriately or, if you have a lot of oven space, you can make two turkeys in this size range. Generally smaller turkeys cook better.
1. Remove the neck and giblets from the turkey (reserving if using for gravy). Rinse the turkey well and then put it in a container with 2 cups salt and enough cold water to cover fully, normally 4 to 8 quarts. (As noted above, I normally use a stockpot for this process, although any container including a sealable bag will work.) Feel free to be creative here—I frequently replace some or all of the water with apple cider. You can add herbs and spices as well, turkey appropriate ones such as thyme, sage, black pepper, garlic. Let it soak overnight.
2. Preheat oven to 400 degrees.
3. Remove the turkey from the brine. Rinse well inside and out (you do not want to leave any excess salt deposits), and then pat dry with a towel. I do not stuff the turkey with stuffing. Instead, I fill the turkey cavities with one peeled and quartered onion, 2 celery ribs cut into 2 inch pieces, one quartered lemon, and several thyme sprigs. (This may not all fit—squeeze in as much as you can and do not forget the smaller cavity in the back.)
4. Soften a stick of butter. Blend butter thoroughly with finely minced garlic (2 cloves), lemon zest from one lemon (you can use the lemon that is going into the turkey), and 1 tsp black pepper. Again, feel free to add other herbs and spices as you desire. Smooth butter paste over outside of turkey skin, gently to avoid tearing the skin.
5. Cover a v-shaped roasting rack with aluminum foil. Poke holes in foil. Put rack in a roasting pan. Place turkey breast side down in the rack. (If you plan on deglazing the roasting pan for gravy, add to the roasting pan any leftover ingredients that did not fit in the cavity and enough chicken stock to fully cover the bottom of the pan.) Roast for 45 minutes. Take turkey out of oven (closing oven door to keep temperature up) and turn breast side up. Clean potholders can be a good tool for this purpose. (Add some more chicken stock to the bottom of the pan at this point.) Return to oven.
6. Roast until instant thermometer reads 160-165 degrees in thickest part of breast and 170-175 degrees in thickest part of thigh. Measure both sides to make sure. I’d love to indicate how long this will take, but it has been unpredictable in my experience. Allow two hours but start checking every 15 minutes or so after an hour.
7. Remove from oven. Cover loosely and let rest for at least 30 minutes before carving.
Subscribe to:
Posts (Atom)