01 09 10

search you little tarte

Tuesday, June 26, 2012

She Might Just Get What She Wished For


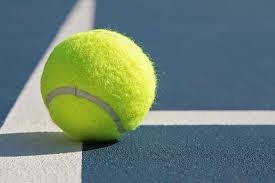
This is the summer of Kate's tennis.  Actually every summer is the summer of Kate's tennis.  For that matter, every winter, spring, and fall have been devoted to Kate's tennis.  But this summer is unique in that it's the last summer before college that she'll be playing junior tennis.

I have mixed feelings about this.  I have spent the last six years schlepping from one end of the USTA Middle States section to the other.  I have been to Scranton, the Jersey Shore (in the winter), Clarks Summit, Zullinger, Allentown, Quakertown, and every town in between.  I have seen parts of Pennsylvania, West Virginia, Delaware, and New Jersey that really, no one needs to see.

In between I've been to St. Louis twice (once in the heat of the summer).  I've been to California (which wasn't so bad since that's where I'm from), and next week I'm off to Albuquerque.  There may be trips to Indiana this summer and to Georgia.  I've been everywhere you don't want to go in the season you want to avoid.

Yes, Kate and I have covered the globe, sort of.

And tomorrow we are hitting the road for Princeton, New Jersey.  Kate will be wielding her tennis racquet for the tennis coaches of the colleges she is most interested in attending.  She is playing in a college showcase, which will be attended by dozens of tennis coaches from the best D1 and D3 tennis programs in the country.

It's kind of a tennis moment of truth.

She's fine.  Me, not so much.

You see, I may talk a big game but this is all getting a little too real for me.  All the years of watching her play.  All the lessons and all the tournaments.  All the wins and all the loses.  Ted and I have been there for all of it.  All the years of wondering whether she'll be a good enough player to play college tennis (and yes! she is), have finally come to an end.  We are there and I am a little sad.

I am happy for Kate.  She's going to get to go to a wonderful college and get a wonderful education.  And she's going to get to play tennis for that school.  It's all ahead of her.

Ted and I will be done traveling to junior tennis tournaments.  We will lose track of all the kids and parents we've gotten to know so well over the years.  We will be done.  Occasionally we'll get to go and watch her play a college match.  I wonder if I'll still feel as nervous as I do when I watch her play now.

This is all good news.  We raise our kids to commit to things that are important to them.  We raise our kids to work hard at school so that they have choices.  We raise our kids to be good people.  We raise our kids so that, when the time comes, they can walk away from us with confidence.

Kate is ready.  She's ready to go now.  I'm glad that she has a little more time at home because I'm not quite sure that I'm as ready ads she is.

You Little Tarte will return next week.  Until then, order in.


Monday, June 25, 2012

Wind Up to July Fourth


There's something funny about July Fourth.  For some reason, even though it's technically at the beginning of the summer, I always feel like once it's passed, the summer is half over.  Of course, this isn't at all the case, but it feels that way to me.  Just saying.

The Fourth of July the quintessential summer holiday.  Everything about it just screams summer.  SUMMER!

But the Fourth does require planning.  That's why, this week, I'm going to post a couple of fireworks worthy recipes, guaranteed to generate the same kind of excitement sparklers do.


This recipe for Green panzanella salad is a real crowd pleaser.  You can make it in advance because the longer it sits, the tastier it becomes.  This recipe also makes enough salad to serve a small army, which is a plus on a holiday like the Fourth of July.


Recipe:  Greek Panzanella Salad
(Ina Garten, 2009))

Ingredients:


Good olive oil
1 small French bread or boule, cut into 1-inch cubes (6 cups)
Kosher salt
1 hothouse cucumber, unpeeled, seeded, and sliced 1/4-inch thick
1 red bell pepper, large diced
1 yellow bell pepper, large diced
1 pint cherry or grape tomatoes, halved
1/2 red onion, sliced in half rounds
1/2 pound feta cheese, cut in 1/2-inch cubes
1/2 cup calamata olives, pitted

For the vinaigrette:

2 cloves garlic, minced
1 teaspoon dried oregano
1/2 teaspoon Dijon mustard
1/4 cup good red wine vinegar
1 teaspoon salt
1/2 teaspoon freshly ground black pepper
1/2 cup good olive oil

Directions:


Heat 3 tablespoons olive oil in a large saute pan. Add the bread cubes and sprinkle with salt; cook over low to medium heat, tossing frequently, for 5 to 10 minutes, until nicely browned. Add more olive oil as needed.

Place the cucumber, red pepper, yellow pepper, tomatoes and red onion in a large bowl.

For the vinaigrette, whisk together the garlic, oregano, mustard, vinegar, 1 teaspoon salt and the pepper in a small bowl. While still whisking, add the olive oil and make an emulsion. Pour the vinaigrette over the vegetables. Add the feta, olives and bread cubes and mix together lightly. Set aside for 30 minutes for the flavors to blend. Serve at room temperature.


Thursday, June 21, 2012

Playing Around With Perfection


One of my very first posts included a recipe for what I believe to be the best chocolate chip cookies ever.  Now, I realize that there are a zillion  chocolate chip cookie recipes out there.  I also realize that everyone has their own particular style of cookie that they like.

But it doesn't matter.  The Cooks Illustrated recipe for Chewy Chocolate Chip Cookies is sheer perfection. They're a little crunchy around the edges and gooey and chewy as you work your way towards the center.  A little something for every chocolate chip cookie lover out there.

So, imagine my surprise when I came across a slightly tweaked version of the best cookie ever on one of my favorite blogs, Smitten Kitchen.  The slight alteration to the original recipe came in the form of an increase in the amount of vanilla.  More vanilla? Funny, I never thought of that even though I have fancy homemade vanilla sitting right in my pantry.  Pretty snazzy and very appealing.


So, despite my misgiving because I really didn't see any reason to play around with the original recipe, I gave the Smitten Kitchen version a whirl.  I was a little bit curious.  What can I say?

Well, I've got to tell you.  The extra vanilla gave the cookies a punch of flavor that made them even better.  Is it possible?  Even better than perfect?

Yup. They are.  These cookies are even better.  Who knew that a tablespoon of vanilla (use the good stuff) could make all the difference in the world.


Recipe:  Crispy, Chewy Chocolate Chip Cookies
Adapted from AllRecipes, Smitten Kitchen, and Cooks Illustrated)

Ingredients:

2 cups all-purpose flour
1/2 teaspoon baking soda
1/2 teaspoon salt
3/4 cup unsalted butter, melted
1 cup packed brown sugar
1/2 cup white sugar
1 tablespoon vanilla extract
1 egg
1 egg yolk
2 cups semisweet chocolate chips

1. Preheat the oven to 325°F (165°C). Grease cookie sheets or line with parchment paper.

2. Sift together the flour, baking soda and salt; set aside. In a medium bowl, cream together the melted butter, brown sugar and white sugar until well blended.

3. Beat in the vanilla, egg, and egg yolk until light and creamy. Mix in the sifted ingredients until just blended.

4. Stir in the chocolate chips by hand using a wooden spoon. Drop cookie dough 1/4 cup at a time (for giant cookies) or a tablespoon at a time (for smaller cookies) onto the prepared cookie sheets. Cookies should be about 3 inches apart.

5. Bake larger cookies for 15 to 17 minutes, or 10 to 12 minutes for smaller ones (check your cookies before they’re done; depending on your scoop size, your baking time will vary) in the preheated oven, or until the edges are lightly toasted. Cool on baking sheets for a few minutes before transferring to wire racks to cool completely.
 

Wednesday, June 20, 2012

I'm Baaack

I don't know how it happened.  I've been writing the blog five days a week for almost two years.  It's as much a part of my daily routine as tripping over Kate's tennis bag, which has a permanent parking place in the foyer, is.  Every morning, after I clean up the house and stick a load or two of laundry in the machine, I sit down at the You Little Tarte Nerve Center (my desk) and put down whatever is on my mind.

And it's always the same.  I usually start on the blog right around 9:00 a.m. with  Pebbles, my much loved English Bulldog, snoozing behind me (see video below).  Make sure the sound on your computer is turned up.  You won't want to miss the audio.


What happened yesterday?  I cleaned up the house.  I did the laundry.  Pebbles napped.

I have no idea.

I just forgot to do the blog.

How is that possible?  I never forget anything.  Just ask Ted.  I'm like an elephant who never forgets.  (This is not to say that I am the size of an elephant, although if I don't lay off the ice cream I may have more in common with an elephant than I would like to admit.)

But, not to worry, I'm back.  And I'm back with a really nice summer recipe for Roasted Salmon with Green Herbs.

I've been looking at this recipe for years but never got around to making it.  I have no idea why.  It's light.  It's easy.  It's salmon, the chicken of the sea.  (We have discussed how salmon, like chicken, is a multi-purpose food.)  In any case, I finally got off my duff and made it and it was quite yummy.

So, I may have forgotten all of you yesterday, but I think I've more than made up for it with this recipe.

Don't forget to give it a try.


Roasted Salmon with Green Herbs
2010, Barefoot Contessa How Easy is That?, All Rights Reserved

Prep Time:10 minInactive Prep Time:25 minCook Time:12 min
Level:
Easy
Serves:
6 servings
Ingredients
1 (2- to 2 1/2-pound) skinless salmon fillet
Kosher salt and freshly ground black pepper
1/4 cup good olive oil
2 tablespoons freshly squeezed lemon juice
1/2 cup minced scallions, white and green parts (4 scallions)
1/2 cup minced fresh dill
1/2 cup minced fresh parsley
1/4 cup dry white wine
Lemon wedges, for serving
Directions
Preheat the oven to 425 degrees.

Place the salmon fillet in a glass, ceramic, or stainless-steel roasting dish and season it generously with salt and pepper. Whisk together the olive oil and lemon juice and drizzle the mixture evenly over the salmon. Let it stand at room temperature for 15 minutes.

In a small bowl, stir together the scallions, dill, and parsley. Scatter the herb mixture over the salmon fillet, turning it so that both sides are generously coated with the green herbs. Pour the wine around the fish fillet.

Roast the salmon for 10 to 12 minutes, until almost cooked in the center at the thickest part. The center will be firm with just a line of uncooked salmon in the very center. (I peek by inserting the tip of a small knife.) Cover the dish tightly with aluminum foil and allow to rest for 10 minutes. Cut the salmon crosswise into serving pieces and serve hot with lemon wedges.


Monday, June 18, 2012

Stand In

Although Ted has been busy tending to his tomatoes, it's still a little early in the summer tomato season. But that doesn't mean that I'm not ready to rock some tomato dishes.  The tomatoes are just going to need a little, shall we say, assistance.

This recipe for roasted tomatoes with pesto is delicious even with the somewhat bland early summer tomatoes we are currently finding in the grocery store.  Roasting the tomatoes brings out the tomato flavor and the pesto offers a garlicy counterpart that kicks the whole thing up a notch.

So, while the tomatoes in my garden may not yet be ready for their close up, this recipe is a really nice stand in.


Recipe:  Tomatoes Roasted with Pesto
(Barefoot Contessa How Easy Is That?, 2010)

*  Note:  You can be really lazy and buy pesto at the supermarket instead of making it yourself.  Just saying...

Ingredients:


2 to 2 1/2 pounds large red tomatoes
3 tablespoons good olive oil
2 teaspoons dried oregano
Kosher salt
1/2 teaspoon freshly ground black pepper
1/2 cup pesto, store-bought or homemade (recipe follows)
1/2 cup freshly grated Parmesan cheese

Directions:


Preheat the oven to 425 degrees.

Core the tomatoes and then slice them across (not through the stem) in 1/2 inch-thick slices. Arrange the slices in a single layer on a sheet pan. Drizzle the tomatoes with the olive oil and sprinkle with the oregano, 1 1/2 teaspoons salt, and the pepper.

Bake the tomatoes for 10 minutes. Remove them from the oven, spread each slice with pesto, and sprinkle with the Parmesan cheese. Return the tomatoes to the oven and continue baking for 7 to 10 minutes, until the Parmesan is melted and begins to brown. Using a flat metal spatula, put the tomatoes on a serving platter, sprinkle with extra salt, and serve hot, warm, or at room temperature.

For the Pesto:

Ingredients:

1/4 cup walnuts
1/4 cup pine nuts
3 tablespoons diced garlic (9 cloves)
5 cups fresh basil leaves, packed
1 teaspoon kosher salt
1 teaspoon freshly ground black pepper
11/2 cups good olive oil
1 cup freshly grated Parmesan cheese

Directions:

Place the walnuts, pine nuts, and garlic in the bowl of a food processor fitted with the steel blade. Process for 30 seconds. Add the basil, salt, and pepper. With the processor running, slowly pour the olive oil into the bowl through the feed tube and process until the pesto is pureed. Add the Parmesan and puree for a minute. Use immediately or store the pesto in the refrigerator or freezer with a thin film of olive oil on top. Makes 4 cups.

Sunday, June 17, 2012

Puff Daddy


Today is Father's Day and that means breakfast.  It's not that I don't usually make breakfast.  It's just that since it's a holiday (kind of), I figure that I should go to a little more trouble than slapping some All Bran on the table and calling it a day.

Charlie has a theory regarding holidays that aren't his birthday.  He calls them fake holidays.  Included in this list is any event for which he is expected to come up with a gift, such as other people's birthdays, the aforementioned Father's (and just to be fair, Mother's) Day,  and anniversaries.  He makes a small exception for Christmas and Hanukkah, but that's mostly because he's home and I can badger him.

This is an area where Charlie clearly needs some work.

But I digress.  In honor of Father's Day, for which both kids eventually got Ted something, I decided to make the Father of All Pancakes, the Dutch Baby, or as we call it in our house, the puffy pancake.

This is a breakfast that makes a statement.  The thing is deliciously puffy, filled with air but with a custardy base.  Served with berries, it's a real statement.  And the best part is that it's easy and easy is always the main ingredient around here.

So, in honor of Ted (and all dads out there), I did it up right.  Too bad I forgot to make the coffee.

Recipe:  Puffy Pancake


Ingredients:


2 teaspoon grated lemon zest
3 large eggs
2/3 cup whole milk
2/3 cup all-purpose flour
1/4 teaspoon pure vanilla extract
1/8 teaspoon salt
1/2 stick unsalted butter, cut into pieces

Equipment: a 10-inch cast-iron skillet

Directions:

Put skillet on middle rack of oven and preheat oven to 450°F.

Beat eggs with an electric mixer at high speed until pale and frothy, then beat in milk, flour, vanilla,  lemon zest, and salt and continue to beat until smooth, about 1 minute more.  The batter will be thin.

When the oven is fully preheated, remove the skillet from the oven and add butter to hot skillet and melt, swirling to coat. Add batter and immediately return skillet to oven. Bake until puffed and golden-brown, 18 to 25 minutes.

Serve immediately, topped with fresh berries or powdered sugar.


Thursday, June 14, 2012

Off and Running

We are off to St. Louis on Friday morning to visit Wash U.  Having now been to two different tennis tournaments in St. Louis in the past year, and having never managed to take a tour or attend an information session, we are now making a special trip so Kate can check things out.

I'll be back with a wrap up (I'm sure you're all waiting breathlessly for that) along with lots of new and delicious recipes.

See you Monday!

Wednesday, June 13, 2012

Topsiders


I am not usually about comfort when it comes to shoes.  I go for the eye appeal, comfort be damned.  Hey, I'm a woman and shoes are so much easier to buy than say, pants.  A size 7 is a size 7.  I never have to feel bad about myself if I have to go up a half size.  It doesn't mean I'm fat.  It just means that the shoes run a little small.

But every once in a while, I buy a pair of shoes that are comfortable and cute.  Such is the case with these Sperry Topsiders.


I'm not much for boat shoes.  I mean, I'm not boating here in Pittsburgh.  I'm going to the grocery store so I hardly need to be concerned about slipping on the deck.  But these are seriously cute, aren't they?
My kids love Sperry's.  Especially Charlie.  He has every version of the classic that's ever been made.  I know this because he has dozens of worn out shoes piled up in his closet.  He refuses to get rid of these stinky old shoes because "they're just getting good."

Another thing about me (and most women, I think) is that I get rid of shoes when they look worn out and I also immediately dispose of anything that's stinky.  Charlie is a guy and guys don't feel the same way about these issues as their mothers.

The point of all this is that today my little tootsies were comfortable.  And because my feet were happy, I felt inspired to stand at the counter for what seemed like forever cutting the stems off of the most gorgeous little tiny strawberries I got at the farm stand.  And with those little gems, I made this delicious strawberry rhubarb crisp.


All courtesy of Sperry.


Recipe:  Strawberry Rhubarb Crisp
(Barefoot Contessa: How Easy is That?, 2010 by Ina Garten)

Ingredients:


4 cups fresh rhubarb, 1-inch diced (4 to 5 stalks)
4 cups fresh strawberries, hulled and halved, if large
1 1/4 cups granulated sugar
1 1/2 teaspoons grated orange zest
1 tablespoon cornstarch
1/2 cup freshly squeezed orange juice
1 cup all-purpose flour
1/2 cup light brown sugar, lightly packed
1/2 teaspoon kosher salt
1 cup quick-cooking (not instant) oatmeal, such as McCann's
12 tablespoons (1 1/2 sticks) cold unsalted butter, diced
Vanilla ice cream, for serving

Directions:

Preheat the oven to 350 degrees F.

For the fruit, toss the rhubarb, strawberries, 3/4 cup of the granulated sugar and the orange zest together in a large bowl. In a measuring cup, dissolve the cornstarch in the orange juice and then mix it into the fruit. Pour the mixture into an 8-by-11-inch baking dish and place it on a sheet pan lined with parchment paper.

For the topping, in the bowl of an electric mixer fitted with the paddle attachment, combine the flour, the remaining 1/2 cup granulated sugar, the brown sugar, salt and oatmeal. With the mixer on low speed, add the butter and mix until the dry ingredients are moist and the mixture is in crumbles. Sprinkle the topping over the fruit, covering it completely, and bake for 1 hour, until the fruit is bubbling and the topping is golden brown. Serve warm with ice cream.

Tuesday, June 12, 2012

Spinning My Wheels


We are in a car crisis.  Over the weekend, Kate and I drove to Philadelphia for a tennis tournament and the memory on my navigation system in my car just disappeared.  That's right.  The entire memory went poof! and I was left with just the the address for our hotel and the address for the venue.  That's it. Nothing else.  Nada.

I am a person who relies heavily on their navigation system.  I am not sure I could get to the grocery store, a place I go almost daily, without it and here I was in Philadelphia with no navigator memory.  This was not a good thing.

Needless to say, I was on the phone post haste with the car service place to arrange for service.

And then yesterday Kate called to tell me that the car she and Charlie share was "doing funny things".  Funny things? My baby is driving in a car that's doing funny things?  I think not.

So, I arranged for that car to be serviced today as well.

The net result of all of this is that I spent the entire day today in my loner car.  

It all started yesterday afternoon when I dropped the kid's car off for service.  Then first thing this morning, I had to drop my car off for service and pick up said loaner car (which by the way is why I have a Mercedes.  They give you a loaner.  No one given loaners anymore, so this factor alone is why I love my Mercedes.)  Then I came home and drove Charlie to work because as I said, the kid's car is in for service.  Then I dashed to the grocery store.

I got home just in time to put the groceries away and drive Kate to tennis.  Then back home so I could whip together a dinner for a couple of Charlie's friends who were passing through Pittsburgh.  Then off to pick Charlie up at work.  And then back out to pick Kate up at tennis.  Then finally back to get my car.

It's a good thing they don't have a per mile charge on the loaner car.

I still haven't collected the kid's car.  It won't be ready until tomorrow.

The net result of all this is that dinner was a challenge.  But I'm happy to report that in all the madness, I did get to give this recipe for Scalloped Tomatoes a try.  It was delicious and a welcome treat after a day spent spinning my wheels.

Recipe:  Scalloped Tomatoes
(Ina Garten)

Ingredients:

Good olive oil
2 cups (1/2-inch diced) bread from a French boule, crusts removed
16 plum tomatoes, cut 1/2-inch dice (about 2 1/2 pounds)
1 tablespoon minced garlic (3 cloves)
2 tablespoons sugar
2 teaspoons kosher salt
1 teaspoon freshly ground black pepper
1/2 cup julienned basil leaves, lightly packed
1 cup freshly grated Parmesan cheese

Directions:

Preheat the oven to 350 degrees F.

Heat 3 tablespoons of olive oil in a large (12 inch) saute pan over medium heat. Add the bread cubes and stir to coat with the oil. Cook over medium to medium-high heat for 5 minutes, stirring often, until the cubes are evenly browned.

Meanwhile, combine the tomatoes, garlic, sugar, salt, and pepper in a large bowl. When the bread cubes are done, add the tomato mixture and continue to cook, stirring often, for 5 minutes. Off the heat, stir in the basil.

Pour the tomato mixture into a shallow (6 to 8 cup) baking dish. Sprinkle evenly with the Parmesan cheese and drizzle with 2 tablespoons of olive oil. Bake for 35 to 40 minutes until the top is browned and the tomatoes are bubbly. Serve hot or warm.


Monday, June 11, 2012

It's A Celebration


Well, it finally happened.  Kate had a big win -- the win we've been sure she was capable of but just hadn't quite been able to produce.  That is, until now.  And the timing couldn't have been better.  This is her last summer before the college coaches (hopefully) find her irresistible.

Tennis is a tough sport.  First of all, you're out on that big court looking straight into the eyes of your opponent.  Second of all, it's about 95% mental once you have the skills down.  So as you can imagine, there are good days, not so good days, great days, and truly awful days, all depending on how you're feeling.

Saturday was a great day.  After another "almost win" on Friday night, Kate came out punching and ready to shed her "almost" title.  She was finally ready to close the deal.  And she did, against a much higher ranked player.  It took over two hours, during which time I nearly had a heart attack, but she won.

So, who is the person she is most excited to share her victory with?  Frank, her beloved tennis (and life) coach.  And what better way to celebrate than with -- cookies.


Yes, Kate was on her way today with cookies.  And not just any cookies.  These cookies are my very own take on a deliciously special recipe.  They have all kinds of yummy things in them and most of all, they're perfect for a celebration.

Recipe:  Oatmeal Chocolate Chip & Coconut Cookies
(Adapted from The Back In the Day Bakery Cookbook)

Ingredients:

1 1/4 cups all purpose flour
1/2 tsp baking soda
1/4 tsp fine sea salt
1/2 tsp ground cinnamon
1/4 tsp ground allspice
1/4 tsp ground cloves
2 sticks of butter, at room temperature
1 cup cane sugar
1/2 cup packed brown sugar
2 eggs, at room temperature
1 tsp vanilla extract
2 1/4 cups old-fashioned rolled oats
1/2 cup shredded coconut, toasted
1/2 cup semi sweet chocolate chips

Directions:

Position a rack in the lower third of the oven and preheat it to 350′ F.  Line two baking sheets with parchment paper.

Whisk together the flour, baking soda, salt, cinnamon, allspice, and cloves in a bowl and set aside.

In the bowl of a stand mixer fitted with the paddle attachment (or using a wooden spoon, a bowl, and some elbow grease; or in a large mixing bowl, using a handheld mixer), cream together the butter, and both sugars on medium speed until light and fluffy.  This takes about 3 to 5 minutes with a stand mixer.  Stop the mixer every now and then to scrape down the sides.

Add the eggs and vanilla and mix until light and fluffy (it will kind of look like a thick cake batter), about 1 to 2 minutes.  Stop the mixer every now and then again to scrape down the sides.

Turn the speed down to low and add the dry ingredients in thirds, beating until just combined, about 1 to 2 minutes.  Stop the mixer every now and then to scrape down the sides.

Mix in the oats until just combined, then add the flour mixture in thirds until just combined (no more than 2 minutes).  Sprinkle in the chocolate chips and coconut and mix until just combined.  Take out bowl from the stand mixer and mix it by hand a couple of times to ensure all of the ingredients have been mixed together.

7t this point you can chill the dough for 30 minutes, or using a cookie scoop or a 1/4 cup measuring cup, scoop out dough and place on the parchment lined baking sheets leaving 1-inch between the cookies to allow for spreading.  Lightly tap each cookie with the palm of your hand to flatten a bit.  You could also sprinkle on some cane sugar on the tops at this point.

Bake the cookies, one sheet at a time, for 12-15 minutes, rotating the pan halfway through the baking time to ensure that they bake evenly.  The finished cookie should be golden brown most of the way through.  Let the cookies cool on the baking sheet for about 5 minutes, then transfer them to a wire rack to cool completely (or feel free to eat them at that point  )

The cookies can be stored in a airtight container for up to 3 days at room temperature.  You can also freeze some of the dough in portioned out balls and bake them at another time if you don’t think you’ll get through 24 cookies in 3 days.


Thursday, June 7, 2012

Crowd Control


Having both of my kids at home this summer is a little like living in a giant time warp.  All the time.  Having everyone around for the summer means that I need to adapt to a new and strange schedule.  This includes having food available for breakfast well past lunch because said teenagers think they've woken up in the middle of the night if they roll out of bed much before 11:00 a.m.

It also means that I need to accept that the bathroom is never actually cleaned up for the day.  It's constantly in use from the numerous showers said teenagers seem to need at varying times every day.  Ditto the kitchen.  That's pretty much a revolving door that never actually stops swinging.

Now don't get me wrong.  There is no way that I'm standing vigil in the kitchen, waiting to tempt my kids with a menu of breakfast specialties.  But what I can offer up is something.  Anything.  The great thing about teenagers is that they'll pretty much eat anything that isn't nailed down.

This is all good news for the blog and for my hips and thighs.  It means that I can try out all kinds of recipes and know that it'll all get eaten up promptly.  It's good news for all of you because I was starting to think I was going to have to recycle blog posts into a sort of Best Of You Little Tarte series just to keep things going.

Not so, at least not yet.  For now, I am scanning the cookbooks and trying new takes on old favorites and new takes on soon to be favorites.


Today's recipe is a very quick but, oh so delicious, take on classic blueberry muffins.  This is blueberry season and we should all take advantage of them in as many ways as possible.  And besides, don't we all have hungry kids to feed?


Recipe:  Blueberry Muffins
(Adapted from: The Back in the Day Bakery Cookbook, By Cheryl & Griffith Day)

Ingredients:
2 cups all purpose flour
1 cups granulated sugar
1 tablespoon baking powder
1/2 teaspoon fine sea salt
1/4 teaspoon ground cardamom
1/4 cup canola oil
4 tablespoons unsalted butter, melted
1/2 teaspoon pure vanilla extract
2 eggs
3/4 whole milk
1 cup fresh (or frozen) blueberries
1/4 cup coarse sanding sugar for sprinkling

Directions:

Position rack in the lower third of the oven and preheat the oven to 350°F.  Lightly spray 12 large muffin cups with vegetable oil spray or line them with paper muffin cups.

In a large mixing bowl, whisk together flour, sugar, baking powder, salt, and cardamom, until combined.

In a separate bowl, whisk together the oil, butter, vanilla, eggs, and milk.  Make a well in the center of the dry ingredients, pour in the liquid ingredients, and mix until combined (do not overmix).  Gently fold in the blueberries, using a few strokes as possible.  (I usually like to coat my blueberries with flour beforehand so they do not sink all at the bottom of the batter).

Scoop the batter into the muffin cups, filling them 2/3 full.  Sprinkle the tops with sanding sugar.

Bake for 25-30 minutes, until the muffins are golden brown.    The tops should be firm to the touch and toothpick insert should come out clean.  Remove from the oven and let cool for 10 minutes.

he muffins can be stored in an airtight container for up to 2 days.


Wednesday, June 6, 2012

Batter Up


I'm not usually one for fried food.  I'm just too old for it.  If I eat even one french fry,  the next morning I've gained two pounds.  Fried foods are no one's friend after about the age of 50.

But despite all the calories, I do love all things fried.  As a result, I pick and choose what I'm going to splurge on.  As delicious as a funnel cake might look, that's just too much of a splurge.  So I choose an occasional fried goodie that's well, good for me.  Or at least as good as something cooked in oil can be.

Ready for the hot oil.

The green garlic.
This recipe for Egg Battered Fried Flounder is surprisingly light and springy.  The addition of the green garlic elevates this fried fish to a whole new level.  The pungency f the garlic contrasts really nicely with the crispness of the flounder.

So while this isn't an indulgence I would allow myself very often, it's definitely worth the calories when green garlic is as abundant as it is at this time of the year.  And besides, everyone deserves a splurge sometimes.


Recipe:  Egg Batter Pan-Fried Flounder With Green Garlic
(New York Times, May 23, 2012)

Ingredients:

1 and 1/2 pounds boneless flounder or sole fillets, preferably 4 6-ounce pieces
Salt and pepper
2 large eggs
1/2 cup milk
1/2 cup all-purpose flour for dredging
Mild olive oil or vegetable oil for frying
4 tablespoons unsalted butter
1/3 cup finely chopped green garlic, both white part and tender green stalks
Juice of 1/2 lemon
3 tablespoons chopped flat-leaf parsley
Lemon wedges.

Directions:

Season the fish fillets with salt and pepper. Make the egg batter by whisking together the eggs and milk in a shallow bowl, along with a pinch of salt.

Put the flour on a plate. Coat each fillet lightly on both sides, then submerge the fish in the egg batter. (This can be done up to 30 minutes ahead.)

Pour about 1/4 inch oil in a wide skillet over medium-high heat. When the oil looks wavy, lift the fish from the egg batter one piece at a time, allowing excess batter to drip off. (Discard remaining batter.) Carefully lay each fillet in the pan and let fry gently until golden, about 2 minutes per side. Remove and blot briefly on paper towels, then transfer to a warmed serving platter.

Pour off any remaining oil and return the pan to the heat. Melt the butter in the pan and add the green garlic, and a little salt and pepper. Let cook without browning for about 1 minute, then add the lemon juice.

Spoon the green garlic butter over the fish. Sprinkle with parsley, garnish with lemon wedges and serve immediately.

Tuesday, June 5, 2012

Another Nice Little Cake (With Substitutions)


Last week I proclaimed this The Summer of the Simple Cake and in an effort to show a little follow through (and because I was in the mood for another simple summer cake), I whipped up this Rhubarb Snacking Cake today.

It doesn't get easier than this cake.  The ingredients are all things you'll have on hand, except for the rhubarb, but you can just pick that up at the grocery store when you pop in for something else.  You could even use strawberries in place of the rhubarb if you were so incline, although then we would have to call it a Strawberry Snacking Cake.  Otherwise, this should be a breeze in the ingredient department.

Last week I posted the recipe for Raspberry Buttermilk Cake.   I assumed that everyone had buttermilk on hand.  I was wrong.  My friend Deborah reminded me that not everyone has buttermilk just laying around.  They don't?  Well, I am going to assume that everyone has sour cream hanging out in the refrigerator.  But if you don't, not to worry.   You can easily substitute in Greek yogurt, which is a staple (along with buttermilk and sour cream) in my refrigerator.  It would work beautifully.


Give this a try.  It's a breeze to make, it looks lovely, and you can substitute.  What could be better?

Recipe:  Rhubarb Snacking Cake
(Smitten Kitchen)

For the Cake:

1 1/4 pound (565 grams) rhubarb, trimmed and cut into 1/2-inch lengths on the diagonal
1 1/3 cup (265 grams) granulated sugar, divided
1 tablespoon lemon juice (psst, skip ahead and zest it for the cake before you cut it)
1/2 cup (1 stick, 4 ounces or 115 grams) unsalted butter, softened
1/2 teaspoon finely grated lemon zest
2 large eggs
1 1/3 cups (165 grams) all-purpose flour
1 teaspoon baking powder
3/4 teaspoon table salt
1/4 teaspoon ground ginger
1/3 cup (80 grams) sour cream

For the Crumb:

1 cup (125 grams) all-purpose flour
1/4 cup (50 grams) light brown sugar
1/8 teaspoon table salt
1/4 teaspoon ground cinnamon
4 tablespoons (1/2 stick, 2 ounces, or 55 grams) unsalted butter, melted

Make the cake: Preheat your oven to 350°F.

Coat the bottom and sides of a 9×13-inch baking pan with butter or a nonstick cooking spray, then line the bottom with parchment paper, extending the lengths up two sides. (It will look like a sling).

Stir together rhubarb, lemon juice and 2/3 cup sugar and set aside. Beat butter, remaining sugar and lemon zest with an electric mixer until light and fluffy. Add eggs, one at at time, scraping down the sides after each addition.

Whisk together flour, baking powder, 3/4 teaspoon table salt and ground ginger together in a small bowl. Add one-third of this mixture to the batter, mixing until just combined. Continue, adding half the sour cream, the second third of the flour mixture, the remaining sour cream, and then the remaining flour mixture, mixing between each addition until just combined.

Dollop batter over prepared pan, then use a spatula — offset, if you have one, makes this easiest — to spread the cake into an even, thin layer. Pour the rhubarb mixture over the cake, spreading it into an even layer (most pieces should fit in a tight, single layer).

Stir together the crumb mixture, first whisking the flour, brown sugar, table salt and cinnamon together, then stirring in the melted butter with a spoon or fork. Scatter evenly over rhubarb layer. Bake cake in preheated oven for 50 to 60 minutes. The cake is done when a tester comes out free of the wet cake batter below. It will be golden on top. Cool completely in the pan on a rack.

Cut the two exposed sides of the cake free of the pan, if needed, then use the parchment “sling” to remove the cake from the pan. Cut into 2-inch squares and go ahead and eat the first one standing up. (If it’s written into the recipe, it’s not “sneaking” a piece but, in fact, following orders, right?) Share the rest with friends. Cake keeps at room temperature for a few days, but I didn’t mind it at all from the fridge, where I kept it covered tightly.

Monday, June 4, 2012

Cool and Crunchy


I got to do something over the weekend that I never get to do.  I spent the weekend in New York and it did not include a tennis bag, a case of Gatorade, or my daughter.  Or my husband.  Or my son.

Yes, it's true.  I had a weekend in New York all on my own.  I went for my cousin Andi's baby shower and got to spend lots of time with my cousins Phil and Gloria, who are great fun.  Gloria and I shopped.  And we ate.  What else do you need to do when in New York?  Then we went to the baby shower, which was beautiful.  All the cousins were there, which I am sure was a little scary for Andi's friends.

My cousin Susan did all the cooking for the shower and let me tell you, there are high priced caterers who wouldn't have put on such an impressive show.  She even made a baby carriage out of a watermelon.  I was impressed.

There were lots of delicious salads, several of which I am going to get the recipes for so I can pass them along to all of you.  Honestly, Susan could go into business throwing showers.

Since I don't have any of Susan's recipes to share with you just yet, I thought I might pass along my version of a radish, cucumber, and tomato salad I had for an appetizer on Saturday night.  It was very fresh tasting and had a really appealing crunch.  Mine came out a little different than the one I had over the weekend, but it's a perfect summer salad that will only get more and more delicious as the produce improves.

Look at that.  I'm always on the job.  I may have taken the weekend off but I was thinking of all of you.  What can I say?


Recipe:  Radish, Cucumber and Tomato Salad 


Ingredients:


1 large heirloom tomato, cut in quarters and sliced
2 bunches red radishes, sliced thin
1 English cucumber, seeded and sliced medium

2 tablespoons fresh lemon juice
2 tablespoons fresh lime juice
1/4 cup olive oil
1 clove garlic, grated
Freshly ground black pepper
Kosher salt

Directions:


Toss prepared vegetables together in a large bowl.

In a separate bowl, combine the lemon juice, lime juice, garlic, salt and pepper.  Slowly add the olive oil.  Whisk together with the other ingredients until combined.

Pour over prepared vegetables.  Let sit for 15 minutes for flavors to combine.