search you little tarte
Tuesday, February 18, 2014
Riff-Raf
As those of you who are You Little Tarte regulars know, I am not a big Asian food fan. Sure, I'll occasionally humor Ted and go out for Chinese or sushi, but for the most part I let that be something he does with Charlie. Ditto the Asian cooking. Just not my thing.
But surprisingly, I do like dumplings. Not enough to ever attempt making them at home, but I do enjoy a good dumpling every now and again.
Anyone who cooks dinner every night knows how boring it can sometimes be. I mean there are only so many things you can do with chicken before you start to get a little bored. This is why I am diligent about reading the NYT Dining section everything Wednesday. More often than not, dinner comes from those pages.
Back to the dumplings. Apparently Melissa Clark isn't all that enthusiastic about making dumplings either. But she does like them, and being far more adventurous than I am, she offered up this riff on pork dumplings deconstructed.
There's a fair amount of chopping and measuring in this recipe, but it's not nearly as labor intensive as actually making dumplings would be. And when I served it for dinner Ted was so happy. "Could Nadine finally be embracing my love of Asian food?" Maybe not, but dinner sure was good.
Recipe: Spicy Ginger Pork Noodles With Bok Choy
(Melissa Clark, A Good Appetite, 2//5/2014)
Ingredients:
12 ounces baby bok choy (3 or 4 small heads)
1 ounce ginger root (1 fat 2-inch-thick knob)
Kosher salt
8 ounces rice noodles, not too thin
2 tablespoons peanut or safflower oil
1 pound lean ground pork
1/4 cup plus 1 1/2 tablespoons soy sauce
2 tablespoons rice wine vinegar
1/2 cup thinly sliced scallions
3 garlic cloves, finely chopped
1 fresh Thai or habanero chile, seeded if desired, thinly sliced
2 tablespoons toasted sesame seeds
1 1/2 teaspoons sesame oil, more for drizzling
Cilantro or torn basil, for serving
Black vinegar, for serving
Directions:
Trim bok choy and separate dark green tops from white stems; leave tops whole and thinly slice stems. Peel ginger and finely chop half of it. Slice remaining ginger into thin matchsticks.
Bring a large pot of salted water to a boil. Add noodles and cook according to package instructions. Drain and run under cool water; drain again.
Heat 1 tablespoon peanut oil in a large skillet over medium-high heat. Add pork and cook, breaking up with a fork, until golden and cooked through, about 10 minutes. Season with salt, 1 1/2 tablespoons soy sauce and 1/2 tablespoon rice wine vinegar. Use a slotted spoon to transfer meat to a bowl.
Add remaining 1 tablespoon oil to skillet. Stir in half the scallions, the finely chopped ginger, the garlic and the chile. Cook until fragrant, about 1 minute. Add bok choy stems and a pinch of salt. Cook until bok choy is almost tender, about 2 minutes. Toss in leaves and return pork to skillet.
Toss noodles, remaining 1/4 cup soy sauce and 1 1/2 tablespoons rice vinegar into the pan. Cook until just warmed through.
Transfer to a large bowl and toss with remaining scallions, sesame seeds, sesame oil and herbs. In a small bowl, combine ginger matchsticks with just enough black vinegar to cover. Serve ginger mixture alongside noodles as a garnish.
YIELD 4 servings
Monday, February 17, 2014
The Best Birthday Present Ever
These days birthdays aren't all that exciting. Every passing year is jus that: another passing year. Don't get me wrong. I'm not complaining. It's just that I find it hard to believe that I just turned 54. 54! Back when I was young, say 35, 54 seemed very old. Now, having arrived at the ripe old age of 54, I'm surprised (and quite thrilled) by how young I feel.
I can remember being around 12, and laying on the bed in my childhood bedroom (which featured orange plaid wallpaper on just one wall, as an accent). I remember thinking that being 16 would make me really mature. In retrospect, all that happened when I turned 16 was that the State of California presented me with a driver's license. The San Fernando Valley was never quite the same after that.
So I guess it's all a matter of perspective.
Totally by coincidence, we went up to New York to visit Charlie over my birthday weekend. I would love to say that we did this to celebrate my birthday, but mostly we went because it was a better weekend for Charlie than any of the other weekends in February. I'll take it. What could have been better now that we're all alone in our way too big for two people house, than to go and see our son, our first born, in New York? As far as I'm concerned, any weekend that we can go and see him is a celebration.
But the fact is, now that both of my kids arel out of the house, spending the weekend with either of them (or better yet, with both of them), and having our family reunited, even if just for a day or two, is a cause for celebration. And, since it was my birthday, this happy little coincidence made this the best present Ted could have given me.
(Note: This did not let Ted off the hook for a nice little something tied up with a bow.)
I can remember being around 12, and laying on the bed in my childhood bedroom (which featured orange plaid wallpaper on just one wall, as an accent). I remember thinking that being 16 would make me really mature. In retrospect, all that happened when I turned 16 was that the State of California presented me with a driver's license. The San Fernando Valley was never quite the same after that.
So I guess it's all a matter of perspective.
Totally by coincidence, we went up to New York to visit Charlie over my birthday weekend. I would love to say that we did this to celebrate my birthday, but mostly we went because it was a better weekend for Charlie than any of the other weekends in February. I'll take it. What could have been better now that we're all alone in our way too big for two people house, than to go and see our son, our first born, in New York? As far as I'm concerned, any weekend that we can go and see him is a celebration.
But the fact is, now that both of my kids arel out of the house, spending the weekend with either of them (or better yet, with both of them), and having our family reunited, even if just for a day or two, is a cause for celebration. And, since it was my birthday, this happy little coincidence made this the best present Ted could have given me.
(Note: This did not let Ted off the hook for a nice little something tied up with a bow.)
Tuesday, February 4, 2014
Measurements Count
Lest you think everything I make is perfect, let me tell you about these blueberry muffins.
Let me just backtrack a bit. I've made blueberry muffins maybe 10,000 times and they've always worked. I think I may have even made this exact recipe in the past, and it's always worked. Blueberry muffins are the workhorse of muffins. You can do just about anything to them and they work. They're forgiving that way.
So, over the weekend, I decided that some nice little muffins would be a good accompaniment to the omelet I was making for the two of us. I always say "why have toast when you can have a muffin?" I checked the frig for possible fruit additions and found that I had about a pint of somewhat less than inspired looking blueberries. (It is February, after all.) Anyway, I set to work.
I didn't want to make the 16 muffins that my standard Ina Garten recipe produced, so I thought "why not make half?"
Well, I'll tell you why not to make half. Or at least why not to make half the way I made half. To say that my measurements were a little sketchy would be a vast understatement. I actually googled how to measure half an egg (because the full recipe called for 3 eggs), but mostly I eyeballed it. Same with the berries.
Here's a basic truth. In fact, if you learn nothing else ever from reading my blog, learn this. You can't eyeball it in baking. You actually have to have exact measurements in baking, because exact measurements matter. Baking is chemistry, albeit really tasty chemistry, and being exact counts and really affects the outcome.
So, having only somewhat followed the recipe, I ended up with what can only be described as a blueberry mess. The muffins were a little flat, and that would have been okay, but when I peeled the paper muffin liner away, half the muffin stuck to it. I clearly went overboard with too many blueberries. The end result was a little mound of blueberry glop stuck to the muffin paper.
Moral of the story: If you're going to make half, make sure to accurately measure out half of the ingredients. Because eyeballing just won't do the trick.
Monday, February 3, 2014
I've Got Sunshine On A Cloudy Day
Saturday was, by February standards, a lovely day. It was in the 40's, dry, and almost sunny. Given how cold and snowy it's been, it practically felt like summer. Needless to say, the traffic was awful because everyone was so happy to be able to get out of the house without dressing for the polar vortex. It practically felt like sandal weather. It's funny how your perspective changes after a couple of weeks during which the temperature haven't risen above freezing. Temps in the 40's feel positively springlike.
But, heaven forbid we have two nice days in a row. Sunday was cloudy, rainy, and bone chilling. Today it's snowing. Saturday I thought I might actually be able to see the end of winter on the horizon. Today it feels as though it might last forever.
So imagine my glee when yesterday morning I saw Giada make this sunshiny couscous dish on her Food Network show! It's light, but substantial enough to be considered dinner. It features lots of lemon, which makes everything taste a whole lot more cheerful and bright.
As an added bonus, I had all the ingredients on hand. At least I could just observe the ugly day from my window, instead of feeling it when I went outside.
Recipe: Pearl Couscous with Chicken and Peas
(Giana De Laurentiis)
Ingredients:
2 tablespoons extra-virgin olive oil
1 1/3 cups (about 7 ounces) pearl (Israeli) couscous
2 1/2 cups low-sodium chicken broth
Zest of 2 large lemons
1/4 cup fresh lemon juice (from 1 large lemon)
2 teaspoon kosher salt
1/4 teaspoon freshly ground black pepper
1/2 cup freshly grated Parmesan
4 green onions, chopped
1 cup frozen peas, thawed
1 rotisserie chicken breast, chopped to yield 1 cup of meat
Directions:
In a large saucepan, heat the oil over medium-high heat. Add the couscous and cook until lightly toasted, 2 to 3 minutes. Add the broth, lemon zest, lemon juice, salt and pepper. Bring to a boil. Reduce the heat to medium-low and simmer uncovered until the couscous is tender but still firm to the bite, about 8 minutes.
Stir in the cheese, green onions, peas and chicken. Spoon into bowls and serve.
Thursday, January 30, 2014
A Fine Line Between Love and Hate
| Super Bowl Ready |
My point is that I'm not really sure how I feel about Martha Stewart. So, me being me, I made a list to evaluate. (Please note that this list took about 20 seconds to compile.)
A Few Good Things About Martha:
She's a strong, successful woman, (albeit a convicted felon which is decidedly not a good thing).
She has lots of good ideas to enrich what I suspect she thinks are our somewhat mundane lives.
She's very organized.
She can decorate a whole jail cell for any holiday using just a hot glue gun and origami paper.
and A Few Things I Don't Really Like About Martha:
She calls aromatics like rosemary and thyme "herbs", as in "This is my friend Herb Greenberg". Everyone knows that "Herbs" are people, and "erbs" are food.
She has a lot of great ideas but they always seems to require a trip to the lumber yard, a jigsaw, tubes of hot glue, and a welders mask.
She gets very angry at Matt Lauer and Savannah Guthrie on the Today Show when they don't follow her directions to the letter. I mean, come on. It's a three minute segment, and Martha may be able to whip up platters of Super Bowl Snacks in the allotted time, but she also has a team of low paid semi-professionals on standby who make it look effortless.
While Martha's ideas are certainly impressive, her recipes sometimes fall short.
Such is the case with this recipe for Chocolately Pretzel and Peanut Cookie Bars. Really good idea, but the execution.... not so much.
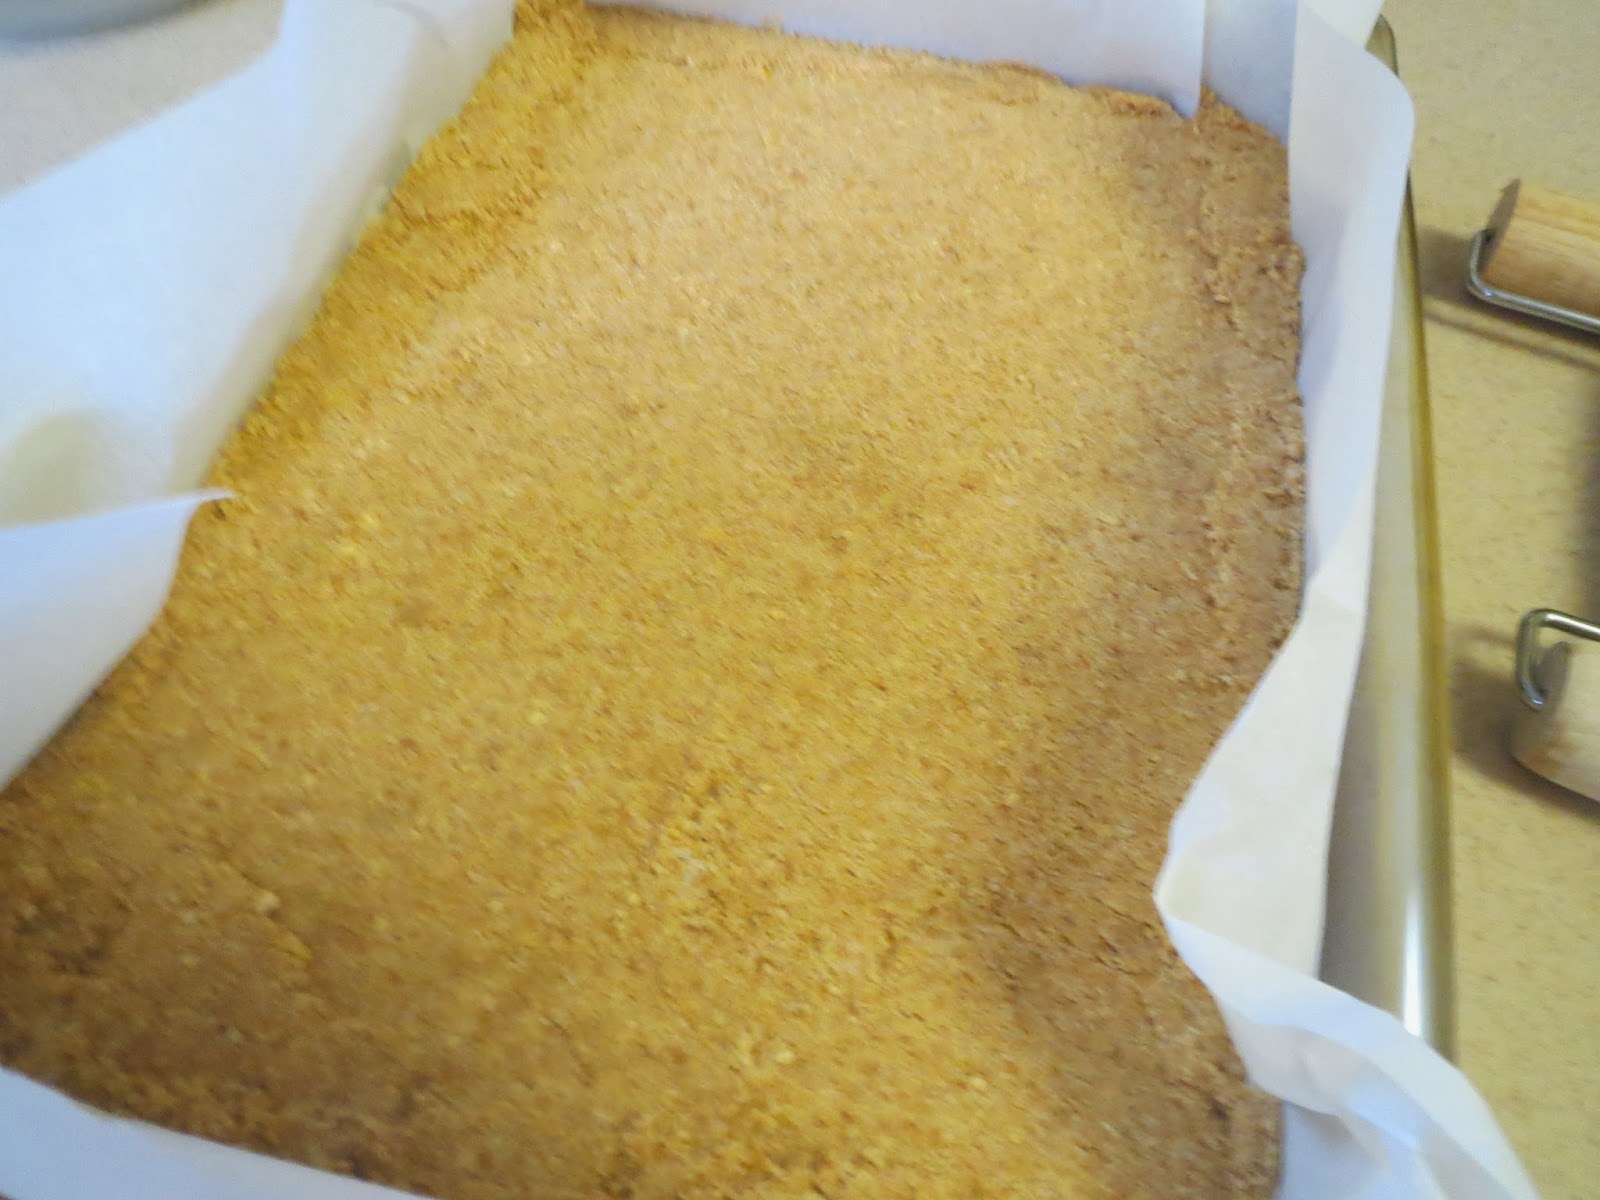
Martha's original recipe calls for a crust made of ground up pretzels, butter and sugar. The resulting cookie bar was sticky and didn't hold together well. After sampling the results to the tune of half the pan, I tried again. This time I substituted in a nice, thick graham cracker crust which provided a solid base for all the pretzely goodness that was to follow. I also scattered on a little additional graham cracker crumb to "tie the whole thing together". The resulting bar was not only delicious but easy to cut and eat. (And pack. I sent them off to Kate at college where I am sure they were met with a great amount of enthusiasm. These are college students, after all. Stale sandwich cookies from Costco would be met with great enthusiasm.)
Maybe Martha was just better at making these bars using her recipe than I was. Who knows? All I do know is that the idea was good, Martha's execution so-so, and my adaptation, positively yummy.
Chocolatey Pretzel and Peanut Cookie Bars
(Adapted from Martha Stewart Living, January/February, 2014)
Ingredients::
12 tablespoons unsalted butter, melted, plus more for pan
31/4 cups graham cracker crumbs, divided
2/3 cup granulated sugar
2 cups salted mini pretzel twists
1 can (14 ounces) sweetened condensed milk
1 1/3 cups lightly salted cocktail peanuts
6 ounces bittersweet chocolate, preferably 61 percent cacao, coarsely chopped (about 1 cup)
Directions:
Preheat oven to 350 degrees. Butter a 9-by-13-inch baking pan and line with parchment, leaving a 1-inch overhang on long sides. Butter parchment.
Place 3 cups graham cracker crumbs in a large bowl and stir in sugar and butter until well combined. Transfer to pan, spreading evenly, and pack down flat with the bottom of a measuring cup or small roller.. Drizzle condensed milk evenly over crust. Sprinkle evenly with peanuts, chocolate, remaining graham cracker crumbs, and pretzels, gently pressing them into milk.
Bake until chocolate melts and condensed milk bubbles and becomes golden, 20 to 22 minutes. Cool completely in pan on a wire rack, then refrigerate until chocolate is set, about 30 minutes. Run a paring knife between bars and short sides of pan. Using parchment overhangs, transfer to a cutting board. Cut into 20 squares.
Wednesday, January 29, 2014
Someone Has To Go First
You really have to admire the first person who tried eating an artichoke. Artichokes are not a friendly looking food. In fact, I'm not sure artichokes really even look like food. But maybe to the caveman, or whoever first thought "maybe we can eat this", it was worth the risk.
Artichokes just don't look edible. The idea of dealing with those prickly leaves, and all that furry looking stuff around the heart well, it just doesn't scream "Eat Me!" to me.
But alas, someone did originally try artichokes. Whoever that was discovered they were quite tasty, or at least he discovered that you could actually eat one without dying. Kudos go out to that guy, but moreover, to the person who decided that dipping the leaves in melted butter would be a nice way to enjoy them. (Clearly a woman was responsible for that for sure.)
I also want to give a shout out to the person who first froze artichoke hearts. This is a cook (or maybe a scientist) after my own heart. Frozen artichoke hearts (which, btw, are actually called for in this recipe) make this, and many other recipes, a complete snap. In this recipe, you could substitute in canned artichoke hearts which would also work well. I suppose you could also go the purist route, and makes this recipe with fresh hearts, but why?
In any case, you should make this recipe. It's relatively quick and really nice for a weeknight dinner. And as you're enjoying your chicken, pour yourself a nice glass of wine, and toast the person who first thought "this could be good".
Recipe: Roast Chicken with Mushrooms and Artichoke Hearts
(Food 52.com)
Ingredients:
4 chicken breast halves, skin on, boned if you like
3 tablespoons olive oil
2 large shallots, chopped fine
8 ounces mushrooms, sliced (about 2 cups)
2 tablespoons all purpose flour
2 cups chicken stock or broth (Use your best chicken stock -- you won't be sorry.)
1 1/2 cup frozen artichoke hearts (about 10), quartered, defrosted, and drained
1 tablespoon Worcestershire sauce
1 tablespoon fresh lemon juice
1 teaspoon chopped fresh rosemary
Salt and freshly ground black pepper to taste
1 tablespoon butter (optional)
Directions:
Season chicken with salt and pepper on both sides. (If you can, do this early in the day and refrigerate them, covered loosely. This will help the skin crisp up. But it's totally optional.) When you get home, take the breasts out of the refrigerator.
Heat oven to 375.
Heat olive oil in a large skillet over medium heat. Add the chicken breasts skin side down. Cook 2-3 minutes until skin is golden brown. If you have boneless chicken breasts, brown all sides. Remove chicken breasts to oven-proof dish, and place in oven. Roast breasts for 15 (for boneless) to 30 minutes, or until the internal temperature reaches 165 degrees.
While chicken is roasting, sauté chopped shallots and mushrooms with a pinch of salt in oil and pan drippings (you may need to add a little more oil) until shallots are soft and mushrooms have begun to brown slightly and give off their liquid. Stir in flour and cook over medium-low heat until nutty and brown, stirring frequently, about 3-5 minutes. Pour in chicken stock, and raise heat, until sauce begins to simmer and starts to reduce somewhat. Reduce heat to low and stir in artichoke hearts, Worcestershire sauce, lemon juice and rosemary. Stir together and cook over low heat until sauce thickens and is blended together and fragrant. Taste and add salt and black pepper as desired. You can turn the heat off and cover it till the chicken has finished roasting.
Just before serving, swirl in a tablespoon of butter if desired. When the chicken has reached an internal temperature of 165, remove it from the oven and let it rest for a few minutes. Serve each piece on a bed of sauce, making sure that each serving contains artichoke hearts and mushrooms.
Monday, January 27, 2014
Pittsburgh Food
I must admit that, before I lived in Pittsburgh, I had never eaten a pierogi. In fact, I had never actually given pierogis a moment's thought. But then I moved to the 'burgh where pierogis are so popular that they're the Pittsburgh Pirates' mascots.
Let me introduce you to Cheese Chester, Jalapeño Hanna, Saurkraut Saul, and Oliver Onion.
Needless to say, the Pirates' Pierogis are much loved in these parts. For a while, Kate was collecting Pierogi bauble heads. Thankfully, she finally got all four and they are now happily residing amongst all the other crap in her bedroom that she just had to have but will probably never look at again.
But I digress. Pierogis (the ones you can actually eat) are very popular here in Pittsburgh. In fact, you can purchase them from old ladies who make them in church basements. You can buy them fresh. You can buy them frozen. You can order them in restaurants, and at PNC Park. Pierogis are like the national food of Pittsburgh.
Having never really given much thought to pierogis, I obviously had never made them. But then something happened. Food 52.com featured a recipe for said pierogis and I felt that it was my civic duty to give them a try.
I am going to start by saying that making pierogis was perhaps the most labor intensive thing I have ever done, and that pretty much includes going through actual labor. You have to make the dough. Then the dough is refrigerated. You have to make the filling. Then the dough has to be rolled, cut, and filled (times 50). Then the final product is either sautéed or boiled. Then, and only then, are they ready to eat.
Here's the thing. These pierogis were actually quite tasty. Were they as good as the frozen ones? I like to think they were better. Were they as good as the ones made by the old women in church basements? Probably not. They're the professionals. I'm just a neophyte, but maybe if I make pierogis 500 more times, mine will be just as good. Until then, I have about 40 in the freezer waiting to be sautéed or boiled.
Recipe: Potato, Mushroom, & Caramelized Onion Pierogi
(Food 52.com)
Ingredients:
For the Pierogi Dough
2 cups full fat plain or Greek yogurt
1 egg, lightly beaten
1 teaspoon salt
2 1/4 cups flour + more for kneading
Directions:
Beat the yogurt, the egg and the salt together with an electric beater on low until smooth and creamy. Slowly add the flour, beating until smooth. The dough will be very sticky.
Scrape the dough out of the bowl onto a well-floured work surface and knead in enough flour until the dough is smooth and workable (can be rolled out and cut). It will be tacky but not so sticky that it runs all over the work surface and sticks to your hands in a major way.
Wrap the dough in plastic wrap and put it in the refrigerator for 2 hours to firm up.
For the Potato, Mushroom & Caramelized Onion Pierogi Filling:
2 yellow onions, chopped
1 pound white mushrooms, trimmed and finely diced
3/4 pounds potatoes for mashing
4 - 6 tablespoons unsalted butter
Salt and freshly ground black pepper
Sour cream or Full-fat or Greek yogurt for serving
Directions:
Chop the onions. Melt 2 tablespoons butter in a large skillet and sauté the onions until caramelized a deep brown, caramelized but not burned. Remove from the skillet and set aside.
In the same skillet, melt another 2 tablespoons of butter and add the chopped mushrooms. Salt and pepper the mushrooms and sauté until they are tender and all the liquid exuded by the mushrooms has evaporated, 5 minutes. Remove from the heat.
While you are cooking the onions and mushrooms, peel and quarter the potato(es) and place in a small pot. Cover with cold water, bring to a boil, then lower heat and simmer until soft and mashable, 15 to 20 minutes. Drain and place in a large mixing bowl.
If you want the filling a bit richer, melt the extra 2 tablespoons of butter and add to the potatoes. Mash and whip the potatoes until smooth and fluffy. Fold in the cooked mushrooms and the caramelized onions until well blended. Salt and pepper again to taste.
Take the dough out of the fridge and work with half at a time. The other half keep in the fridge.
Keeping both your work surface and the surface of the dough well floured, gently roll out the dough to a thickness of about 1/8 inch (1/2 cm), gently lifting it up to flour underneath and turn. Keeping your hands floured also helps.
Using a 3-inch (7 ½ cm) round cookie cutter (they can be made larger if you like) carefully cut out circles, trying not to deform the circles of dough too much, although this dough is easy to work with and “correctable”. I lifted up the circles, 2 or 3 at a time, and made sure they were on a floured section of the table before trying to fill and fold. With floured fingertips, I tapped each circle a bit to stretch out the circle. Place a mounded teaspoon of filling just off of the center of each round of dough.
Now, gently pull the wider half over the mound of filling and place the side edge-to-edge with the side with the dough. With the edges matching/meeting, just press with the side of your floured index finger, pulling the dough and pressing to seal. The edge should be a bit less than a finger’s-width. This will also keep the edge from being too thick. Be very careful not to rip the dough covering the filling.
As you form the pieorgi, 1, 2 or at the most 3 at a time, place them on a floured or lined and floured plate or baking sheet until you are ready to cook.
Bring a pot of water to a boil. Once it is boiling, lower a bit to a healthy simmer and drop in the pieorgi just 6 or 7 at a time (they shouldn’t crowd or overlap in the pan). Allow to cook for 6 to 7 minutes. They should float to the top and, when lifted out with a slotted spoon, should look puffy. Cook the rest in batches. Place on towels to drain.
To fry, simply heat olive oil or a mixture of butter and olive oil in a skillet and fry the pierogi for a few minutes per side, in batches, again, not overcrowding. They should be golden on each side.
Serve hot with extra yogurt for dipping.
Subscribe to:
Posts (Atom)