01 09 10

search you little tarte

Monday, November 11, 2013

A Little Love From Home

The care package:  Ready to go, complete with a postcard note.
Kate loves being away at college.  She loves living in the dorms.  She loves going to her classes (most of the time), and she loves all her new friends.  She even loves eating in Commons.  So far as I can tell, the only thing she misses is our dog Pebbles and my cooking.  Hey, I'll take what I get.

The other day we were talking and she mentioned how much she missed her favorite muffins.   All I needed was that little bit of encouragement.  Before long, I was hard at work in the kitchen whipping up a care package to feed Kate plus anyone she happened to pass on her way back to her dorm room.

I included all her homemade favorites:  Frank's Favorite Chocolate Chip Cookies, Banana Bread, and "Crack" Muffins.  There were enough baked goods to sink a ship, or in this case, to fill a large Priority Mail box.

I even threw in a pound of Kate's favorite rugulah from Corky & Lenny's.  I had picked up a pound when I was last in Cleveland thinking that I would have them waiting for her when she returned at Thanksgiving.   I even included some of her favorite sour gummy worms.  (Yuck!)

Anyway, I shipped off a big box of goodies.  Two days later, the box arrived to great reviews from Kate and all her friends.

Just a little something from home.

Recipe:  Frank's Chewy Chocolate Chip Cookies
(adapted from Cooks Illustrated)

Ingredients:

2 1/8 cups all purpose flour
1/2 tsp. kosher salt
1/2 tsp. baking soda
12 tbl. unsalted butter, melted and cooled
1 cup light or dark brown sugar
1/2 cup granulated sugar
1 large egg plus one egg yolk
2 tsp. vanilla extract
2 cups chips (chocolate, Mini M & M's -- whatever you like)
3/4 cup toasted walnuts (optional)

Directions:

Preheat the oven to 325. Line a couple of cookie sheets with parchment paper. Mix the flour, baking soda, and salt together in a bowl and set aside.

Mix the melted butter and the sugars until blended. (I do this by hand.) Mix in the egg, yolk, and vanilla. Add the dry ingredients and mix until just combined. Stir in the chips and nuts, if using.

Using a small scoop, (about 1 1/2 inches) scoop the dough on to the prepared cookie sheets. I usually put 9 cookies on each sheet.

Bake, reversing the cookie sheets' positions halfway through the baking, until the cookies are golden brown around the edges, about 15-18 minutes. Cook on the cookie sheets for a few minutes and then transfer to wire racks.

Makes about 2 dozen cookies

Recipe:  Banana Mocha Muffins aka "Crack" Muffins
(Baking for Friends, Kathleen King, 2012)

Ingredients:

2 1/2 C unbleached all-purpose flour
1 tsp. baking powder
1/2 tsp. baking soda
1/2 tsp. salt
1 Tbsp. instant coffee (or 1 1/2 tsp. instant espresso powder)
1 Tbsp. boiling water
1 1/3 C mashed fully ripe bananas (about 3 bananas)
1 1/4 C sugar
2 sticks salted butter, at room temperature
1 egg
1 C semisweet chocolate chips

Directions:

Preheat oven to 350 degrees (I did 350 degrees); grease a muffin tin tray.

Cream together the sugar and butter until fluffy.  Add the egg, mix again then set aside.   In another bowl add the coffee to the hot water; stir to dissolve.  Stir the mashed bananas into the coffee.  Add to the butter/sugar mixture and stir until incorporated; set aside.

Whisk the flour, baking powder, baking soda and salt together.  By hand, slowly mix the dry ingredients into the wet.  Fold in the chocolate chips.  Divide the batter evenly into the prepared muffin tin tray.

Bake for 25-30 minutes.  Allow to cool in pan for 10 minutes, remove from pan then cool completely on a wire rack.

Recipe:  Banana Bread
(M.S. Milliken & S. Feniger)

Ingredients:

1 cup granulated sugar
8 tablespoons (1 stick) unsalted butter, room temperature
2 large eggs
3 ripe bananas
1 tablespoon milk
1 teaspoon ground cinnamon
2 cups all-purpose flour
1 teaspoon baking powder
1 teaspoon baking soda
1 teaspoon salt

Directions:

Preheat the oven to 325 degrees F. Butter a 9 x 5 x 3 inch loaf pan.

Cream the sugar and butter in a large mixing bowl until light and fluffy. Add the eggs one at a time, beating well after each addition.

In a small bowl, mash the bananas with a fork. Mix in the milk and cinnamon. In another bowl, mix together the flour, baking powder, baking soda and salt.

Add the banana mixture to the creamed mixture and stir until combined. Add dry ingredients, mixing just until flour disappears.

Pour batter into prepared pan and bake 1 hour to 1 hour 10 minutes, until a toothpick inserted in the center comes out clean. Set aside to cool on a rack for 15 minutes. Remove bread from pan, invert onto rack and cool completely before slicing.




Sunday, November 10, 2013

The High and Low of Cooking


I fancy myself a cooking purist, but sometimes real life gets in the way.

Such is the case with chicken stock.  The stuff in the box is fine, but homemade chicken stock is so much better.  And it's not that hard to make.  What's difficult is finding the time to wait around for a couple of hours while the stock is simmering away on the stove.  And that's why I resort to boxed stock so often.  In a perfect world, I would only use homemade chicken stock in my cooking, but there's that nasty real world again.

My go-to chicken stock recipe is this one from Fine Cooking Magazine.  It produces an incredibly rich chicken broth, but it also has a fairly hefty hands on cooking time.  Delicious, but not a project for a busy day.

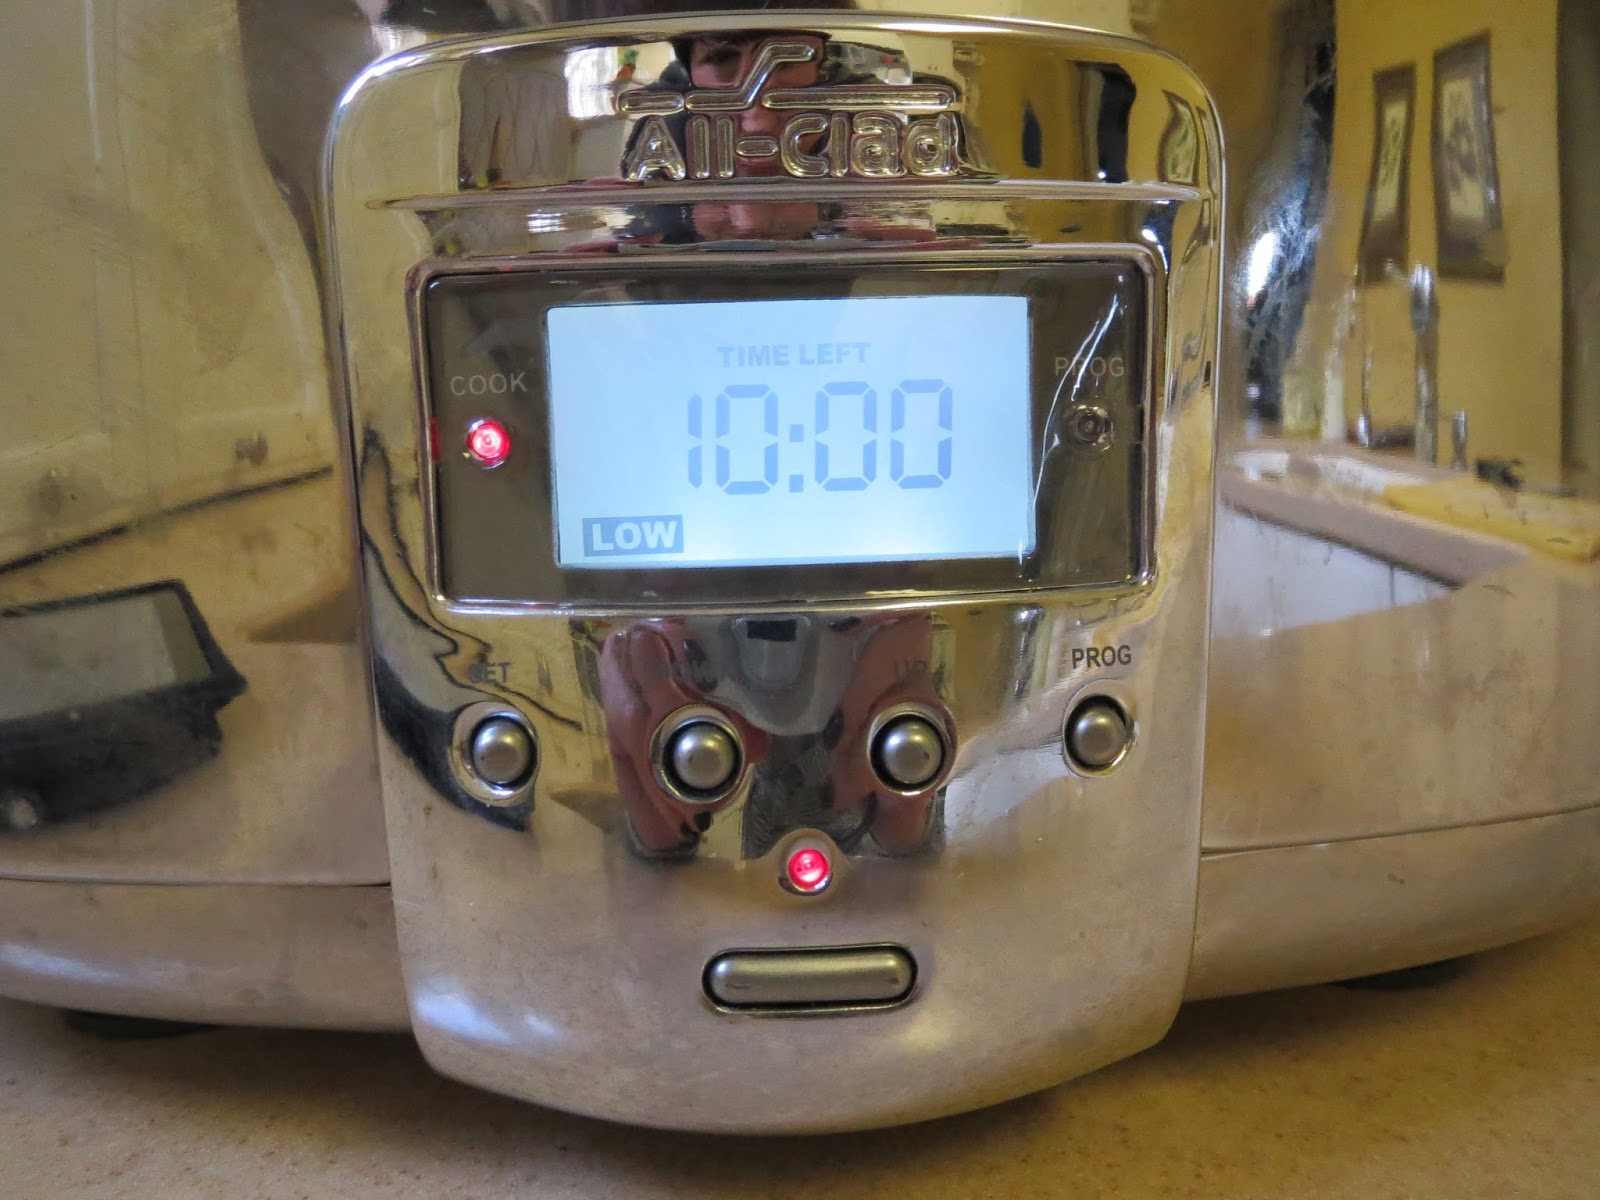
But in a moment of total kismet,  I came across this recipe for a rich chicken stock made entirely in the slow cooker.  Yes, the stock has to cook away for 8-10 hours on low.  But that's it.  It has just four simple ingredients (plus water, which isn't really an ingredient at all) and virtually no prep, unless you considering dicing an onion and smashing a garlic clove prep, which I do not.  It's barely a recipe at all.  And the prep is so quick that you can make a couple of quarts to squirrel away in the freezer for use at the holidays... and beyond. This chicken stock is the ultimate in low-effort-high-reward cooking, which I love, love, love.


Recipe:  Perfect, Uncluttered Chicken Stock
Smitten Kitchen / Barely adapted from Cook’s Illustrated

You Little Tarte's Note:  You might feel like you want to add more "stuff" to the slow cooker, like carrots and celery.  Wait and add that stuff later if you're going to serve this as chicken noodle soup, etc.  This is a perfect multi-purpose stock just as it is.  Trust me.

Yield: 3 quarts

3 pounds uncooked chicken wings
3 quarts water
1 large onion, chopped
1 garlic clove, smashed
1 teaspoon table salt, or more to taste*

Place all ingredients in a slow-cooker. Cook on LOW for 8 to 10 hours or HIGH for 4 to 5.  (I urge you to go the low for 8-10 hours route.)

Strain out chicken parts, onion and garlic. The stock is now ready to use, or, you might prefer to do as we do, and put it in the fridge to chill until any fat solidifies on the top. (Though, there is really very little here, and some might prefer to leave it.) Once defatted, you can now use it or freeze it until needed.

It's me again...

This time I froze the stock in 1 quart containers, but you can also store it flat by pouring 1 quart of the cooled stock into a gallon sized freezer bag.  I've done this in the past and it works great.  


Tuesday, November 5, 2013

Maximum Crunch


As I'm writing this entry, I'm enjoying a bowl of soggy Grape Nuts and a banana.  No, I didn't forget to eat my cereal while it was still crunchy.  I like my Grape Nuts (and all cereal)  soggy.  I pour on the milk and then let it sit for five or ten minutes -- marinating.  The cereal still has a just little, but not too much, crunch.  Cereal perfection.

Soggy cereal was almost the end of my relationship with Ted.  You see, Ted is a crunchy cereal guy.  I'm pretty sure that Ted would eat the cereal dry and follow it up with a glass of milk if it didn't look weird.  He likes 100% crunch-ability.

I do not.

But I digress.  Back before we were married, I once poured the milk on Ted's cereal before he was seated with his spoon poised to eat.  Honestly, I was just trying to be nice.  It's not like I had ever poured the milk on his cereal before (or since, for that matter).  I guess I just thought it would be a nice thing to do.  Obviously I was mistaken.

You would have thought I had suggested eating wallpaper paste for breakfast.  Well, in Ted's the-cereal-has-to-be-crunchy mind, I had in fact served him wallpaper paste for breakfast.  Needless to say, I have never again even removed the milk from the refrigerator lest the milk and his cereal comingle prematurely.

So, having established that cereal is a somewhat problematic breakfast food in my house, I'm passing along a recipe for the most delicious pumpkin waffles.  Ted made them for us on Sunday morning.  True to my soggy is better mentality, I let the syrup soak into the waffle before I ate it.  Ted, on the other hand, barely let the syrup touch the waffle before cutting into it, therefore insuring maximum crunch-ability.


Recipe:  Sugar-and-Spice Pumpkin Waffles 
Williams-Sonoma Breakfast Comforts cookbook

Ingredients:

2 cups all-purpose flour
1/3 cup sugar
2 tsp baking powder
1/2 tsp ground cinnamon
1/2 tsp ground ginger
1/2 tsp fine sea salt
5 Tbsp unsalted butter, cut into tablespoons, chilled
1 & 1/2 cups whole milk
1/2 cup canned pumpkin puree
2 large eggs

Directions:

In a food processor fitted with the metal blade, pulse the flour, sugar, baking powder, cinnamon, ginger, and salt together until combined.  Add the 5 tablespoons butter and pulse about 10 times, until the mixture looks like coarse bread crumbs with small pea-size pieces of butter.  Transfer to a large bowl.  (Or, alternatively, in a large bowl,  sift together the flour, sugar, baking powder, cinnamon, ginger and salt.  Using a pastry blender or 2 knives, cut the butter into the flour mixture just until the mixture looks like coarse bread crumbs with some small pea-size pieces of butter.)

In a medium bowl, whisk together the milk, pumpkin puree, and eggs.  Add to the flour mixture and whisk just until combined, but still a little lumpy.

If your waffle iron is not nonstick, lightly oil the grid.  Ladle some of the batter over the grid, close the lid, and cook until the waffle is golden brown, about 4 minutes.  Repeat with the remaining batter.

Thursday, October 31, 2013

Throwback Thursday

A long time ago, in a galaxy far, far away, I posted this blog and recipe for Halloween Bark.  Actually, it was 2010, but time sure flies when you're having fun.  I had forgotten about it until Deborah reminded me of this recipe and implored me to post it again.

So, in honor of Halloween and Throwback Thursday (how convenient), here goes...

Ready for Its Close Up


Food, like women, benefits from having a stylist.  As we all know, Jennifer Aniston doesn't wake up looking red carpet ready.  (Okay, so maybe the body is red carpet ready, but I'm sure she has puffy eyes first thing in the morning.  After all, she is over 40.)  Anyway, food, like Ms. Aniston, sometimes needs a little help to look its best.

Enter the stylist.  The food stylist can make burnt toast look sexy.

It is not often that I make something that is photo ready.  As hard as I try to "style" the food on the plate, it usually falls short.  So it was just amazing to me that the Halloween Peanut Butter and Toffee Candy Bark featured in this month's Bon Appetit came out ready for its close up.

First of all, it was so easy to make.  Melted chocolate and chopped candy.  All the good stuff.  Reese's Peanut Butter Cups, Heath Bars,  Butterfingers, Reese's Pieces, Peanut M & M's.  Need I say more?  (It's a good thing I made this at 8:00 in the morning.  It just didn't seem right to have a Reese's for breakfast, though I considered it.)  Melt, spread, sprinkle, press.  Done.  So easy.

And, the end result was as stunning as this year's Dior over the knee boots.  (Mind you, I do not have over the knee boots legs but my friend Deborah does.   She bought them and they're traffic stopping.)   This bark is that good.  In fact, that picture at the top. It's my bark.  It came out so great that Kate is breaking with the tradition of bringing Frank (see my post dated October 12, 2010) some of her Halloween candy after the holiday and bringing him this instead.  High praise from my daughter.  Hopefully Frank will admire the beauty of the bark and then the beauty of her forehand.

You can make this bark with any candy you like.  Maybe wait until Sunday (if you can wait that long) and see what the kids bring home from trick or treating!

Halloween Peanut Butter and Toffee Candy Bark
(Bon Appetit, October, 2010)

Ingredients:

1 pound bittersweet chocolate
3 2.1-ounce Butterfinger candy bars, cut into irregular 1-inch pieces
3 1.4-ounce Skor or Heath toffee candy bars, cut into irregular 3/4 inch pieces
8 peanut butter cups, each cut into 8 wedges
1/4 cup honey roasted peanuts
3 ounces high quality white chocolate
Reese's Pieces and/or yellow and orange peanut M & M's

Line a baking sheet with foil.  Melt bittersweet chocolate in heavy medium saucepan over low heat until melted and warm (not hot) to touch.  Pour chocolate onto foil: spread to 1/4 inch thickness (about 12x10 inch rectangle).  Sprinkle with Butterfinger candy, toffee, peanut butter cups, and nuts, making sure all pieces touch the melted chocolate.

Put white chocolate in heavy small saucepan.  Stir constantly over very low heat until chocolate is melted and warm (not hot) to touch.  Remove from heat.  Dip spoon into chocolate: wave from side to side over bark, creating zigzag lines.  Scatter Reese's Pieces and M&M's over, making sure candy touches melted chocolate.

Chill bark until firm, 30 minutes.  Slide foil with candy onto work surface: peel off foil.  Cut bark into irregular pieces.


Wednesday, October 30, 2013

Scare House


Some people love Christmas, and some people love Thanksgiving.  Ted loves Halloween.

Every year, Ted goes all out in decorating our house for Halloween.  He's spent the last 10 years collecting some of the most ghoulish decorations you've ever seen.  There's the rat eating the packaged brains.  And there's the life-size skeleton which hangs out of the window on the third floor of our house - swaying in the fall breeze.  Yup, we're the scary house on our block.


We've become kind of famous on our block.  Every year after our decorations go up, I can look out my front window to see a mommy out there with her little preschooler in a super hero costume inspecting all the scary decorations in broad daylight.  I guess mommy figures that if she can show her kid that it's all make believe, then he'll have the courage to come trick or treating at our house when it's dark.  It's actually pretty cute.

I have to admit, that in the light of day, the decorations aren't all that scary.  In fact, to me they look a little, shall we say, plastic.   But add a little dusk, and the house does look spooky, especially with that damn skeleton swaying back and forth.  It's all about the ambiance.


Kate hates Ted's Halloween decorations.  She thinks they're embarrassing.  "Honestly, dad. It's not like we have little kids living here..."  Maybe not, but Ted is is not one to let a little detail like that slow him down.

I love Halloween, but for a completely different reasons.  I love Halloween because of the candy.  I still remember the excitement of getting that haul of candy, and the thrill of finding a full size candy bar in my plastic jack-o-lantern.  It was the highlight of every Halloween.  I always said that when I grew up, I was going to be that house that gave out the big candy bars.  No fun size for me.  It's for this reason that we give out full size candy bars every year.  I wanted to pay it forward.

So, while we may be known in the neighborhood for having the scary house,  I'm happy to be known for something else too.  I'm happy to be the house that, years from now, kids remember because we gave out the full size candy bars.

Have a ghoulish Halloween.


Tuesday, October 29, 2013

Autumn Leaves


The best part about moving east is that now I have four seasons.  Back in California, we all got excited if the temperature dipped below 60.  Out came the turtlenecks and the boots.  After all, we had to stay warm.

It's funny how your perspective changes.  Now that I've lived in a cold climate for ten plus years, it takes far more than a 60 degree day for the boots to come out.  In fact, I often surprise my California friends by reporting that even on cold winter days (and by cold, I mean days around freezing), I don't wear anything more than a heavy sweater if I'm not going to be outside for long.  Cold isn't quite as cold as it used to be.

My absolute favorite time of the year is fall.  I love watching the trees change and feeling the crunch of the fallen leaves under my shoes.  I love those first few crisp days, when the sky is still blue but the air has a decidedly cooler feel.

I like how the food tastes like fall too.  I love the crispness of the apples and the smell of cinnamon.  The pumpkins and apples mimic the fall foliage and everything has a comforting rustic taste to it.  I find myself making loaf after loaf of pumpkin bread, along with apple everything: apple sauce, apple cake, apple pie, and baked apples.

So, when I come across a recipe that combines apples and pumpkin I feel obligated to try it.  And that's obligated in a good way.

This recipe comes from one of my favorite baking books: Kathleen King's Baking for Friends.  Not only do the recipes all work (which is not always a given...), they are all delicious.  In fact, there's not a recipe I've made from Baking for Friends that hasn't been really yummy.  I should also note that Ina Garten is one of the friends for whom Kathleen King bakes.  And if you're baking for Ina, it better be good.


Whip this cake up, pour yourself a nice cup of tea and settle in.  You'll taste autumn in every bite.

Recipe:  Pumpkin Apple Cake
Kathleen King, Baking for Friends

Ingredients:


Softened butter and all-purpose flour for the pan
2 cups unbleached all-purpose flour
1/2 cup wheat germ
1 teaspoon baking powder
3/4 teaspoon baking soda
1/2 teaspoon salt
1/2 teaspoon ground cinnamon
1/4 teaspoon freshly grated nutmeg
1/4 teaspoon ground cloves
1/4 teaspoon ground ginger
8 tablespoons (1 stick) salted butter, room temperature
3/4 cup granulated sugar
1/2 cup dark brown sugar, firmly packed
2 large eggs, room temperature
1 teaspoon vanilla extract
1 cup solid-pack pumpkin
2 Granny Smith apples, peeled, cored and cut into 1/2-inch dice (2 cups)
1/2 cup coarsely chopped walnuts
Confectioners' sugar for dusting

Directions:

Position the oven rack in the center of the oven and preheat the oven to 350 degrees F. Lightly butter and flour a 9 inch fluted or plain tube pan and tap out the excess flour.

In a medium bowl, whisk together the flour, wheat germ, baking powder, baking soda, salt, cinnamon, nutmeg, cloves, and ginger. In a large bowl, beat the butter with an electric mixer set on high speed until creamy, about 1 minute. Gradually beat in the granulated and brown sugars and beat until light and fluffy, about 2 minutes. One at a time, beat in the eggs, followed by the vanilla, scraping down the sides of the bowl as needed. Add the pumpkin and beat until combined. Add the apples and walnuts. With the mixer set on low speed, min in the flour mixture in thirds, scraping down the bowl as needed. Spread the batter in the prepared pan.

Bake until the cake is golden brown and a long bamboo skewer inserted in the center of the cake comes out clean, about 1 hour. Let cool in the pan on a wire cooling rack for 15 minutes. Invert the cake onto the wire rack and unmold. Turn right side up and cool completely.

To serve, sift confectioners' sugar over the top and cut into wedges


Monday, October 28, 2013

Date Night

I took this picture of dates when we were at the Woodrow Wilson Market in Paris.
I'm making an effort to at least look as though I'm into this cooking for two thing.  Back when it was just two of us, before kids, before private school, carpools, sports, and enrichment classes, I never cooked.  We went out or we just made it work.  Mostly I think we went out.  I never really cooked for just the two of us.  We were young.  We were energetic.  We had a ton of disposable income.

It wasn't until I was retired from my paying career that I actually learned to cook.  There was no cooking honeymoon period.  I went from zero to a family of four and no nanny in the time it took me to say "I quit" to my bosses at Wells Fargo Bank.

Now, after years of cooking for a family and assorted dinner guests, I find myself in unfamiliar territory: cooking for two without ending up with a freezer full of leftover that most likely we'll never eat.  As Ted has become fond of saying, "It's just you and me, babe".

I'm back to the drawing board.  I don't want to end up with vats of coq au vin, but I also don't want to succumb to the two little chicken breasts mentality.

The really nice thing about pork tenderloin is that they are small.  One small  tenderloin is just the right size for a meal, with just a couple of slices left over for lunch.  The date and cilantro relish in this recipe really dresses up a very simple roasted tenderloin and makes it feel more gourmet than it is.

After all, it's just the two of us, babe.


Recipe:  Pork Tenderloin with Date and Cilantro Relish
Bon Appétit Magazine, November, 2013

Ingredients:

3 tablespoons olive oil, divided
1 pork tenderloin (about 1½ lb.)
Kosher salt and freshly ground black pepper
⅔ cup Medjool dates (about 4 oz.), cut into small pieces
2 tablespoons fresh orange juice
3 tablespoons chopped fresh cilantro plus leaves for serving

Directions:

Preheat oven to 425°.

Heat 1 Tbsp. oil in a large ovenproof skillet over medium-high heat. Season pork with salt and pepper and cook, turning, until browned on all sides, 6–8 minutes. Transfer skillet to oven and cook pork until an instant-read thermometer inserted in thickest part registers 140°, 10–15 minutes. Transfer pork to a cutting board and let rest at least 5 minutes before slicing; set aside pan drippings.

Toss dates, orange juice, reserved pan drippings, 3 Tbsp. chopped cilantro, and remaining 2 Tbsp. oil in a small bowl; season with salt and pepper. Spoon relish over pork and top with cilantro leaves.