Every once in a while I scratch my head and wonder why something so obvious never occurred to me. It's not that I'm overflowing with great ideas all the time (or even occasionally), but some ideas, once someone comes up with them, seem so obvious.
Such is the case with today's recipe for pumpkin cornbread. I love cornbread and I love all things pumpkin. Pumpkin cornbread... It seems like a foregone conclusion.
I have to be honest. The idea of pumpkin cornbread just never occurred to me. Ever. Honey cornbread, jalapeno and cheddar cornbread, yes. But pumpkin cornbread... never. And now that I've found it I'm never going to let it go.
What I really like about this cornbread recipe is that it's both sweet and savory. It has some nice cinnamon and nutmeg hints, but the overall taste is more rustic than your standard, run of the mill cornbread. It has a very nice crumb and I suspect it would also be a lovely plain cornbread substitution to a Thanksgiving cornbread stuffing recipe. (Note to self: try this.) This cornbread is yummy at breakfast too, with a little salted butter and a dollop of jam. If you were really feeling autumnal, apple butter would be delicious.
While I wasn't creative enough to come up with pumpkin cornbread myself, I'm glad the Tasty Kitchen Blog did.
Recipe: Pumpkin Cornbread
(Sugarcrafter / Tasty Kitchen Blog)
*Note: This cornbread would be nice made as muffins. Line or grease a muffin tin and fill each cute 2/3 full. Bake at 350 for 15-18 minutes, or until the muffins are golden brown and spring back when tested.
Ingredients:
1 cup Flour
1 Tablespoon Baking Powder
1 teaspoon Kosher Salt
½ Tablespoons Ground Cinnamon
¼ teaspoons Ground Nutmeg
½ cups Brown Sugar
1 cup Cornmeal
2 whole Eggs
1 cup Pumpkin Puree
¼ cups Olive Oil
1 Tablespoon Molasses
Directions:
Preheat the oven to 400 degrees F and grease an 8×8″ baking dish.
In a medium bowl, whisk together the flour, baking powder, salt, spices, brown sugar, and cornmeal.
In a small bowl, lightly beat the eggs, and then stir in the pumpkin, oil, and molasses. Stir the wet ingredients into the dry ingredients just until combined, and then pour the batter into the pan, smoothing out the top as much as possible.
Bake 30 minutes or until a knife inserted in the center comes out clean. Serve warm.
search you little tarte
Thursday, October 25, 2012
Sunday, October 21, 2012
Around Dorie Greenspan's French Table
My father in law has been visiting and I have used that as a good reason to break out Around My French Table by Dorie Greenspan.Now, many of you may remember Dorie from her best known cookbook, (or at least the one I knew the most about), Baking with Julia. But let me tell you, there's so much more to Dorie than baking, or Julia Child, for that matter.
This is an absolutely fabulous cookbook. In fact, it's so good that I'm going to urge you all to go out and buy it -- now. I've already made several recipes from this cookbook and one has been better than the next. What better endorsement do you need?
I am so thrilled with Around My French Table that I have joined an online cooking club called French Fridays with Dorie. Every Friday (or as many as I can get my act together to do it), I will be blogging about a recipe from Around My French Table. There are lots of other participants, all of whom will be blogging about the same recipe as I am.
Sounds fun, don't you think?
There's a catch. I can't give you the recipes. You have to go out and buy the book (or search the internet) to get the recipes. I know it sounds mean, but I like this because I think we should all own cookbooks. There's just nothing quite like paging through a cookbook to come up with the perfect menu. Now, I am as guilty as the next chef, of checking with my good friend Google when I am in need of a quick recipe. But I have to tell you that most of the time I use cookbooks. I love cookbooks -- maybe more than I love shoes-- and we need to support the publishing industry by occasionally going out and buying a real live book. (Or downloading one, if you're into that sort of thing).
I'm going dangle a little carrot now. To get you excited about acquiring Around My French Table, I'm going to give you a recipe from the book. After making this, you'll have no choice but to buy the book so you'll be able to cook along me or join French Fridays with Dorie yourself.
This recipe for Salmon with Basil Tapanade was a big hit with my father-in-law. Along with the salmon, I served Helene's All While Salad (page 108), Lemon Barley Pilaf (page 383), and green beans, which need no recipe at all.
Recipe: Salmon With Basil Tapenade
(Reprinted from The Wall Street Journal, Adapted from Around My French Table by Dorie Greenspan)
Ingredients & Directions:
Heat oven to 450 degrees.
Mince 4 tablespoons basil and set aside; zest and juice 1 lemon and set aside.
In a small bowl, stir together 4 tablespoons black olive tapenade, 2 tablespoons minced basil, ½ the lemon juice and ½ the lemon zest; season with pepper. Spoon all but 1 generous tablespoon tapenade mixture into small Ziploc bag; seal and snip off a small corner to use as a piping bag. Reserve remaining tapenade for later use.
Lay 4 salmon fillets (center cut, skin on) on a clean workspace. Working with one fillet at a time, cut two slits, each about 1-inch wide, near the plump middle of the salmon. Holding the filled Ziploc bag, squeeze a bit of tapenade into each slit. Season fillets lightly with salt and pepper.
Heat 2 tablespoons olive oil in a large ovenproof skillet over high heat, then slip the fillets into pan, flesh side down. Cook for 2 minutes, turn, cook for 2 more minutes, then slide the skillet into the oven. Roast for 4-6 minutes, or until fillets give just slightly in the center. Remove from heat, cover skillet with foil and let fish rest 5 minutes.
To make sauce, stir 3-4 tablespoons olive oil into reserved tablespoon tapenade mixture. Add remaining lemon zest and remaining 2 tablespoons minced basil and season with salt and pepper to taste. Drizzle sauce over each fillet and serve immediately.
Tuesday, October 16, 2012
Color Coded
It's a good thing because, as with shoes, we all like a little variety.
I'm sure I've told you about my mother's chicken soup. But just to refresh your memory, my mother made a chicken soup that was akin to dish water. The chicken kind of tip toed its way through the hot water leaving more of an "essence" of chicken than an actual chicken taste. Back then, I'm sure I thought it was quite delicious, but I now know that color equals flavor.
The color lesson was not an easy one to learn. I never thought much about the browning step in recipes. I did it because I'm basically a direction oriented person, but it was a cursory browning at best. In fact, it wasn't until I became an avid watcher of The Food Network that I realized why it was important to sear and brown. Color equals flavor. I'm a slow learner.
Unfortunately for me, I never applied the browning lesson to chicken soup until the other day. Yes, the other day. One of my favorite blogs, Smitten Kitchen, had a recipe for chicken soup that called for browning the onions and the chicken pieces before adding the water. Who would have thunk it?
Well, apparently Smitten Kitchen, because there it was: brown the onions and then brown the chicken.
Wow.
What resulted was the richest, most flavorful chicken soup I have ever made or tasted, for that matter. The recipe calls for very few ingredients and really relies on the chicken, yes the chicken, for it's flavor. Diced carrots, parsnips, and celery are added at the end and simmered in the soup, along with egg noodles or any other starch you like.
This is an award winner.
As I said: color equals flavor.
Recipe: Chicken Noodle Soup
(Smitten Kitchen)
Serves 4
Ingredients:
1 tablespoon vegetable oil
1 large onion, chopped
3-pound chicken, in parts or 3 pounds chicken pieces of your choice
8 cups water
1 bay leaf
2 teaspoons table salt
Freshly ground black pepper
1 large carrot, diced (1/3-inch)
1 medium parsnip, diced (1/3-inch) (optional)
1 large celery stalk, diced (1/3-inch)
3 ounces dried egg noodles, I prefer wide ones
1 tablespoon chopped fresh dill or flat-leaf parsley
Directions:
Prepare broth: In a large (5-quart) heavy pot over medium-high heat, heat the vegetable oil. Add the onion and saute it for 3 to 4 minutes, until beginning to take on color at edges. Add the chicken pieces (if too crowded, can do this in two batches), making little wells in the onions so that the parts can touch the bottom of the pan directly. Cook chicken parts until lightly browned, about 10 minutes.
Add water, bay leaf, table salt and some freshly ground black pepper and bring the mixture to a boil. Reduce the heat to a simmer and skim any (sorry for lack of better term) scum that appears at the surface of the pot. Simmer pot gently, partially covered, for 20 minutes.
Transfer chicken parts to a plate to cool a bit before handling. Set a fine-mesh strainer over a bowl (ideally, with a spout) and pour soup through it.
If your pot looks grimy and you’re fanatical about having a clear soup, you can give it a quick wash before returning the broth to the pot. You can remove a bit of fat at this point, if it looks necessary. Bring the broth back to a simmer.
You may be tempted at this point to taste it and add more salt. I know this because I do it every single time, adding another teaspoon, and every. single. time. I regret this as it is too salty in the end. So, proceed with any re-seasoning with caution.
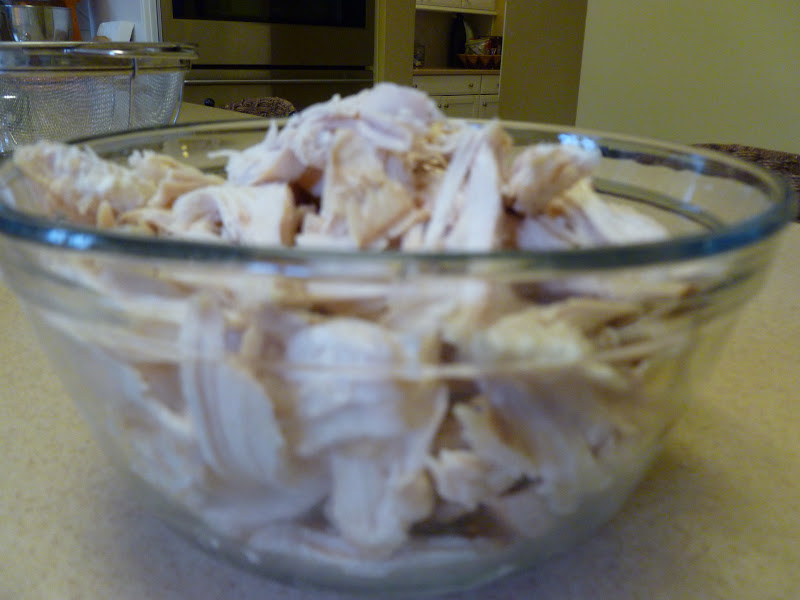
To finish and serve: Add diced vegetables and simmer them until they’re firm-tender, about 5 minutes. Add dried noodles and cook them according to package directions, usually 6 to 9 minutes. While these simmer, remove the skin and chop the flesh from a couple pieces of chicken, only what you’re going to use. You won’t need all of it in the soup. I usually use the breasts first because they’re my least favorite and benefit the most from the extra moisture of the soup. The remaining parts can be slipped into an airtight bag in the fridge (I recommend leaving the skin on for retained moisture until needed) and used for chicken salad or the like over the next few days.
Once noodles have cooked, add chicken pieces just until they have rewarmed through (30 seconds) and ladle into serving bowls. Garnish with dill or parsley, dig in and let it fix everything that went wrong with your day.
Do ahead: If planning ahead, the point where you strain your chicken broth is a great place to pause. Refrigerate the chicken broth until the next day. Before heating it and finishing the recipe, you can easily remove any solidified fat from the surface for a virtually fat-free soup. Then, you can cook the vegetables and noodles to order, adding the chicken only so that it can rewarm (and not overcook!). If making the broth more than a day in advance, you might as well freeze it. I recommend freezer bags with as much air as possible pressed out. Freezing the bags flat will make it easier to stack and store with other frozen soups, and the bag will only require a short soak in warm water to defrost.
Sunday, October 14, 2012
Chicken Little
I also know that making a chicken pot pie is, shall we say, a process. There's the cooking of the chicken, the making of bechamel, the chopping and sauteing of the veggies and finally, the making of the pastry top. Chicken pot pies are not something you can just throw together willy nilly.
I've tried lots of different recipes for this classic pot pie. For a long time I was a devotee of Ina Garten's chicken pot pie. Oh, I've tried others, but hers was the best. The trick is that it can't be too fancy. This is comfort food so it should be delicious without being challenging. Roughly translated, there should be no fancy schmancy ingredients or techniques.
The other day I was paging through my Martha Stewart American Food cookbook. Now, Martha isn't always my cup of tea. First of all, I have a long standing beef with her pronunciation of the word "herb". Martha says herb, as in "his name is Herb." Most other people say "erb", dropping the "h" sound. Long term feuds have been based on less.
Wait! I've gotten myself off track.
We can all have our own feelings about Martha, but one thing is for sure. Martha knows her comfort food. And Martha knows when to stick with the classics and when to fool around.
Chicken pot pie is a classic and thus should not be fooled with. Martha's recipe is straight forward and easy, albeit labor intensive, to make. The bechamel is creamy and the pastry top, my favorite part, is flaky. Over all, it's a really good chicken pot pie with a truly superior pastry top.
I think I'm still a fan of Ina's rendition of this delicious class, but Martha's is worth giving a try. After all, like with chicken soup, there's more than one perfect recipe.
Recipe: Chicken Pot Pies
(Martha's American Food, by Martha Stewart)
Ingredients:
2 bay leaves
2 sprigs fresh thyme, plus 2 tablespoons, chopped
2 sprigs flat leaf parsley, plus 2 tablespoons chopped leaves
1 whole chicken (3 to 4 pounds) cut into 8 pieces
1 parsnip, cut into 1 inch pieces
3 ribs celery, 1 cut into 1-inch pieces, the rest cut into 1/2 inch dice
1 medium onion, sliced
1/4 teaspoon black peppercorns
5 tablespoons unsalted butters
6 to 8 cups chicken stock or water
6 ounces frozen pearl onions
5 tablespoons unsalted butter
2 carrots. sliced into 1 inch rounds
8 ounces cremini mushrooms, trimmed and cut into quarters
5 tablespoons unsalted butter
1/4 cup all purpose flour, plus more for dusting
1/2 cup frozen green peas
1 recipe for Basic Pie Dough (see below)
1 large egg, for egg wash
Directions:
Using kitchen twine, tie together the bay leaves and parsley and thyme sprigs for a bouquet garni. Place chicken in a large stockpot (it should be just large enough to hold the chicken with 3 inches of room on top). Add bouquet garni, parsnip, 1-inch celery pieces, onion, peppercorns, and enough stock or water to just cover the chicken. Bring to a boil over high heat, skimming foam from the surface as necessary; reduce heat and simmer until chicken is just cooked through (juices should run clear when meat is pierced), about 20 minutes. Use tongs to remove each part as soon as it's finished cooking. Once the chicken is cool enough to handle, pull off and discard the skin, separate the meat from the bones, and tear it into bite-size pieces. You will need about 2 cups meat; save any remaining for another use. Strain liquid from pot through a fine sieve, pressing on solids; reserve 2 1/2 cups strained broth and discard solids.
Melt butter in a large saucepan over medium-high heat, then add carrots, diced celery, and the mushrooms. Cook until the vegetables start to soften, stirring occasionally, 2 to 3 minutes. Add flour and chopped thyme to make a roux; cook, stirring constantly, 1 minute. Stir in reserved broth and season with salt. Bring to a boil; reduce heat and simmer 8 minutes. Add reserved chicken along with the pearl onions and peas. Return to a boil, then reduce heat and simmer until vegetables are tender and peas are bright green, about 2 minutes. Remove from heat and stir in chopped parsley. Season with salt and pepper. Let cool completely.
Set out 8 overproof dishes. On a lightly floured surface, roll out pie dough until it is about 1/8 inch thick. Invert one of the dishes onto the dough and lightly a mark a circle about 1 inch larger than the dish. Repeat to mark seven more circles, then use a pastry wheel or knife to cut out each one. Make vents by cutting several slits into each one with a paring knife. Ladle filling into each dish. Drape dough over filled dishes, crimping edges to seal as desired. Place on a parchment lined baking sheet and chill until dough is firm, about 20 minutes. Preheat oven to 350.
Using a pastry brush, lightly coat dough with egg wash and bake, rotating halfway through, until crust is golden and juices are bubbling in center, about 1 hour.
Recipe: Basic Pie Dough
(Martha Stewart)
Ingredients:
3 cups all-purpose flour, (spooned and leveled)
1 teaspoon salt
1 teaspoon sugar
1 cup (2 sticks) plus 2 tablespoons, unsalted butter, cut into pieces
1/4 to 1/2 cup ice water
Directions:
In a food processor, combine flour, salt, and sugar; pulse to combine. Add butter; pulse until mixture resembles coarse meal, with just a few pea-size pieces of butter remaining.
Sprinkle with 1/4 cup ice water. Pulse until dough is crumbly but holds together when squeezed with fingers (if necessary, add up to 1/4 cup more water, 1 tablespoon at a time).
Transfer half of dough (still crumbly) onto a piece of plastic wrap. Form dough into a disk 3/4 inch thick; wrap tightly in plastic. Refrigerate until firm, at least 1 hour (and up to 3 days). Repeat with remaining dough. (Disks can be frozen, tightly wrapped, up to 3 months. Thaw before using.)
Wednesday, October 10, 2012
Bananarama
I have got to stop buying bananas at Costco. There's just no way we're going to eat our way through a dozen bananas before they start developing those dark freckles that say "you should have paid more attention to me when I was young and firm." But unlike all of us over 50 gals, bananas don't get better with age. We do.
Did I just compare myself, and my entire demographic, with old bananas?
Moving on.
But here's the thing. My husband would beg to differ, but at heart, I am a thrifty gal. I hate throwing food out. In fact, half my time in the kitchen is spent figuring out what to do with old zucchini and other past their prime ingredients. Bananas are always on the list of old food and as such, I am always in the market for another banana recipe.
My friend Deborah and I were discussing banana bread the other day. She must buy her bananas at Costco too, because she had far too many banana bread recipes in her arsenal. Some we love and some not so much. But we are both always on the lookout.
Lo and behold, what should appear in my email on that very day, but this recipe for Crackly Banana Bread from Smitten Kitchen. As an added bonus, I actually had millet in the house. Millet? I can't even remember why I bought millet in the first place, but I must have had a sense that it would come in handy at some point.
I toasted the millet before I threw it into the batter because I think everything tastes better toasted. I used whole wheat flour, as recommended, but think this quick bread would be delicious with a little rye flour thrown in. Next time I have bananas hanging around, I'm going to give the rye variation a try.
It'll probably be next week.
Recipe: Crackly Banana Bread
(Smitten Kitchen, 2012)
* Note: I toasted the millet in a dry pan over medium heat.
Ingredients:
3 large ripe-to-over-ripe bananas
1 large egg
1/3 cup (80 ml) virgin coconut oil, warmed until it liquefies, or olive oil
1/3 cup (65 grams) light brown sugar
1/4 to 1/3 cup (60 to 80 ml) maple syrup (less for less sweetness, of course)
1 teaspoon (5 ml) vanilla extract
1 teaspoon (5 grams) baking soda
1/4 teaspoon table salt
1 teaspoon ground cinnamon
1/4 teaspoon freshly grated nutmeg
Pinch of ground cloves
Salt
1 1/2 cups (180 grams) white whole-wheat flour (or flour mixture of your choice, see Note up top)
1/4 cup (50 grams) uncooked millet
Directions:
Preheat your oven to 350°F and butter a 9×5-inch loaf pan. In the bottom of a large bowl, mash bananas with a potato masher or the back of a wooden spoon until virtually smooth but a few tiny lumps remain. Whisk in egg, then oil, brown sugar, syrup and vanilla extract. Sprinkle baking soda, salt, cinnamon, nutmeg and cloves over mixture and stir until combined. Stir in flour until just combined, then millet.
Pour mixture into prepared pan and bake until a tester comes out clean, about 40 to 50 minutes. Cool loaf in pan on rack.
Thursday, October 4, 2012
Learning to Read
This recipe falls into the category of "What the Hell Was I Thinking?"
When, oh when, will I learn that before I get myself all excited about a recipe, it pays to take the time to actually read the recipe from start to finish? That's how you find out (1) how complicated it is, and (2) how many thousands of ingredients it calls for.
You would think, with all the thousands of meals I've cooked, that I would know this by now.
But alas, I did not read this recipe thoroughly, nor did I review the ingredient list. I skimmed it, just enough to determine that I needed to pick up cilantro, scallions, and some Israeli couscous when I went to the grocery store. I figured that with my well stocked spice drawer, I would have everything else I needed.
This was, in fact, true. I did have all the spices -- all 10 of them -- including the saffron. Who the hell has saffron just languishing in the spice drawer. Me.
So I got started on my North African Meatballs. First I made the saffron sauce, which was pretty easy and only required a little dicing and measuring. Then I moved on to the meatballs, which required more dicing, some soaking, and a lot more measuring. Then I rolled the little meatballs. Then I dusted them with flour. Then I fried then in olive oil. Then I simmered the meatballs in the saffron sauce. And only then did I made the Israeli couscous to serve along side which, btw, required no dicing, just soaking.
Need I say more?
But here's the good news. These North African Meatballs were to die for. Yes, you heard me right. These North African Meatballs were worth all the dicing, measuring, rolling, frying, and simmering.
I just wish I'd known what I was in for before I started.
I really must learn to read the instructions.
Recipe: North African Meatballs (Boulettes)
(New York Times, Try Curling Up With a Good Meatball, David Tanis, September 19, 2012)
Prep Time: 1 hour 15 minutes (or more... if you're slow)
For the Tomato Saffron Sauce:
Ingredients:
2 tablespoons olive oil
1 and 1/2 cups finely diced onion
3 garlic cloves, minced
2 tablespoons tomato paste
1 inch piece cinnamon stick
Large pinch saffron, crumbled
Salt and pepper
3 cups chicken broth, vegetable broth or water
For the Meatballs
Ingredients:
1 and 1/2 cups cubed day-old firm white bread
1 cup milk
1 pound ground beef or lamb
1 large egg, beaten
1 teaspoon salt
1/4 teaspoon black pepper
4 garlic cloves, minced
1/8 teaspoon grated nutmeg
1 teaspoon ground ginger
1 teaspoon turmeric
2 teaspoons paprika
1/4 teaspoon cayenne
1/4 teaspoon ground cloves
1/4 teaspoon ground coriander
1/2 teaspoon ground cumin
3 tablespoons chopped parsley
3 tablespoons chopped cilantro
3 tablespoons finely chopped scallion
All-purpose flour, for dusting
Olive oil or vegetable oil
For the Couscous (Optional but worth the effort)
Ingredients:
1 cup giant couscous, m’hamsa, or medium couscous
2 tablespoons butter
1/2 cup golden raisins, soaked in hot water to soften, then drained
Salt
1/4 teaspoon ground cinnamon.
Directions:
Make the sauce: Heat oil over medium-high heat in a wide, heavy bottomed saucepan. Add onion and cook without browning until softened, about 5 minutes. Add garlic, tomato paste, cinnamon and saffron, and stir well to incorporate. Season generously with salt and pepper, and allow to sizzle for 1 minute more. Add broth and simmer gently for 5 minutes. May be made several hours in advance, up to a day.
Make the meatballs: Put bread cubes and milk in a small bowl. Leave bread to soak until softened, about 5 minutes, then squeeze dry.
In a mixing bowl, put squeezed-out bread, ground meat and egg. Add salt, pepper, garlic, nutmeg, ginger, turmeric, paprika, cayenne, cloves, coriander and cumin. Mix well with hands to distribute seasoning. Add 2 tablespoons each of parsley, cilantro and scallion, and knead for a minute. May be prepared several hours in advance, up to a day.
With hands, roll mixture into small round balls about the size of a quarter. Dust balls lightly with flour. Heat a few tablespoons of oil, or a quarter-inch depth, over medium-high heat and fry meatballs until barely browned, about 2 minutes per side. Drain and blot on paper towel. Simmer meatballs in saffron-tomato sauce, covered, over medium heat for about 20 minutes, until tender.
Meanwhile, make the couscous, if desired: Cook according to package directions, fluff gently and stir in butter and raisins. Season with salt and cinnamon, and toss well.
Garnish meatballs with remaining parsley, cilantro and scallion. Serve with couscous and roasted tomatoes if desired.
Serves 6. Makes about 36 meatballs, depending on the size.
When, oh when, will I learn that before I get myself all excited about a recipe, it pays to take the time to actually read the recipe from start to finish? That's how you find out (1) how complicated it is, and (2) how many thousands of ingredients it calls for.
You would think, with all the thousands of meals I've cooked, that I would know this by now.
But alas, I did not read this recipe thoroughly, nor did I review the ingredient list. I skimmed it, just enough to determine that I needed to pick up cilantro, scallions, and some Israeli couscous when I went to the grocery store. I figured that with my well stocked spice drawer, I would have everything else I needed.
This was, in fact, true. I did have all the spices -- all 10 of them -- including the saffron. Who the hell has saffron just languishing in the spice drawer. Me.
So I got started on my North African Meatballs. First I made the saffron sauce, which was pretty easy and only required a little dicing and measuring. Then I moved on to the meatballs, which required more dicing, some soaking, and a lot more measuring. Then I rolled the little meatballs. Then I dusted them with flour. Then I fried then in olive oil. Then I simmered the meatballs in the saffron sauce. And only then did I made the Israeli couscous to serve along side which, btw, required no dicing, just soaking.
| Saffron |
| Time to Saute... |
| Rolling |
| Dusting |
| Frying |
| and finally... |
| Simmering |
Need I say more?
But here's the good news. These North African Meatballs were to die for. Yes, you heard me right. These North African Meatballs were worth all the dicing, measuring, rolling, frying, and simmering.
I just wish I'd known what I was in for before I started.
I really must learn to read the instructions.
Recipe: North African Meatballs (Boulettes)
(New York Times, Try Curling Up With a Good Meatball, David Tanis, September 19, 2012)
For the Tomato Saffron Sauce:
Ingredients:
2 tablespoons olive oil
1 and 1/2 cups finely diced onion
3 garlic cloves, minced
2 tablespoons tomato paste
1 inch piece cinnamon stick
Large pinch saffron, crumbled
Salt and pepper
3 cups chicken broth, vegetable broth or water
For the Meatballs
Ingredients:
1 and 1/2 cups cubed day-old firm white bread
1 cup milk
1 pound ground beef or lamb
1 large egg, beaten
1 teaspoon salt
1/4 teaspoon black pepper
4 garlic cloves, minced
1/8 teaspoon grated nutmeg
1 teaspoon ground ginger
1 teaspoon turmeric
2 teaspoons paprika
1/4 teaspoon cayenne
1/4 teaspoon ground cloves
1/4 teaspoon ground coriander
1/2 teaspoon ground cumin
3 tablespoons chopped parsley
3 tablespoons chopped cilantro
3 tablespoons finely chopped scallion
All-purpose flour, for dusting
Olive oil or vegetable oil
For the Couscous (Optional but worth the effort)
Ingredients:
1 cup giant couscous, m’hamsa, or medium couscous
2 tablespoons butter
1/2 cup golden raisins, soaked in hot water to soften, then drained
Salt
1/4 teaspoon ground cinnamon.
Directions:
Make the sauce: Heat oil over medium-high heat in a wide, heavy bottomed saucepan. Add onion and cook without browning until softened, about 5 minutes. Add garlic, tomato paste, cinnamon and saffron, and stir well to incorporate. Season generously with salt and pepper, and allow to sizzle for 1 minute more. Add broth and simmer gently for 5 minutes. May be made several hours in advance, up to a day.
Make the meatballs: Put bread cubes and milk in a small bowl. Leave bread to soak until softened, about 5 minutes, then squeeze dry.
In a mixing bowl, put squeezed-out bread, ground meat and egg. Add salt, pepper, garlic, nutmeg, ginger, turmeric, paprika, cayenne, cloves, coriander and cumin. Mix well with hands to distribute seasoning. Add 2 tablespoons each of parsley, cilantro and scallion, and knead for a minute. May be prepared several hours in advance, up to a day.
With hands, roll mixture into small round balls about the size of a quarter. Dust balls lightly with flour. Heat a few tablespoons of oil, or a quarter-inch depth, over medium-high heat and fry meatballs until barely browned, about 2 minutes per side. Drain and blot on paper towel. Simmer meatballs in saffron-tomato sauce, covered, over medium heat for about 20 minutes, until tender.
Meanwhile, make the couscous, if desired: Cook according to package directions, fluff gently and stir in butter and raisins. Season with salt and cinnamon, and toss well.
Garnish meatballs with remaining parsley, cilantro and scallion. Serve with couscous and roasted tomatoes if desired.
Serves 6. Makes about 36 meatballs, depending on the size.
Sunday, September 30, 2012
Reading Material
I don't read The Wall Street Journal regularly. First of all, during the week we don't get it at home because Ted reads it at the office. Second of all, I can get my daily dose of business news from The New York Times, which we do get at home.
A couple of years ago, the WSJ must have been running some kind of a special. Ted subscribed to the Saturday edition, which is now delivered directly to my doorstep along with my NYT. At the time, I'm sure I probably said something like "whatever you want Ted", and didn't pay much attention at all. Silly me, because at the time I had no idea how much I was going to grow to love the "Off Duty" section.
Besides covering fashion (yay!), travel(!), home design(!), and gadgets (none of which any mere mortal can afford), there are always articles about food and restaurants and recipes. Yes, there are recipes. In the Wall Street Journal. And they always sound delicious. And these recipes are usually simple enough that mere mortals (who may not be able to afford a $200,000 wrist watch), can make them at home.
I'm smitten.
This particular recipe for Roasted Chicken with Clementines and Arak was quick, easy, and delicious enough to serve even your most discerning Wall Street Journal reading guest.
Recipe: Roasted Chicken With Clementines & Arak
Adapted from "Jerusalem: A Cookbook" by Yotam Ottolenghi and Sami Tamimi, to be published by Ten Speed Press, a division of Random House, Inc.
Wall Street Journal, September 15-16, 2012
An invention of the authors, this simple chicken dish reflects Jerusalem in the use of arak, a popular anise-flavored liquor, and fennel and citrus, which evoke the region's Mediterranean climate.
Ingredients:
6 tablespoons arak (or ouzo or Pernod)
4 tablespoons olive oil
3 tablespoons freshly squeezed orange juice
3 tablespoons freshly squeezed lemon juice
2 tablespoons grainy mustard
3 tablespoons light brown sugar
1½ teaspoons kosher salt
Freshly ground black pepper
2 medium fennel bulbs, cut lengthwise and then into quarters
1 2-pound organic or free-range chicken, divided into 8 pieces
4 clementines, unpeeled, sliced thin
1 tablespoon fresh thyme leaves
2 teaspoons fennel seeds, lightly crushed Parsley, to garnish
Directions:
In a large mixing bowl, whisk together arak, oil, orange and lemon juices, mustard, brown sugar and salt. Season with pepper, to taste. Add fennel, chicken, clementine slices, thyme and crushed fennel seeds. Turn several times to coat. If time allows, marinate chicken for a few hours or preferably overnight.
Preheat oven to 425 degrees.
Transfer all ingredients, including marinade, to a large roasting pan. Chicken should be skin-side up. Roast until chicken is browned and cooked through, 35-45 minutes. Remove
from the oven.
Lift chicken, fennel and clementines from pan and arrange on a serving plate. Cover and keep warm.
Pour cooking liquid into a small saucepan. Place over medium-high heat, bring to a boil, then simmer until sauce is reduced and you are left with about 1/3 cup. You can degrease by using a spoon to remove some of the fat from the top of the sauce.
Pour the heated sauce over chicken. Garnish with parsley and serve.
Subscribe to:
Posts (Atom)