01 09 10

search you little tarte

Monday, February 28, 2011

Tuna Noodle Casserole: Updated

I have a very simple litmus test when deciding whether to buy a cookbook.  I flip through and if I randomly open the book to three or more recipes that look like something I want to make, I buy it.  You would be surprised how few cookbooks actually make the cut.  But Mark Peel's New Classic Family Dinners was a surefire winner from the word go.  In fact, for the moment I think it may have replaced all other cookbooks as my favorite "everything looks so good" cookbook.  That's high praise because I have a lot of favorite cookbooks.

Last Friday I went down to Penn Mac in the Strip District.  My mission was to buy some hard to find pasta shapes and a couple of cans of Italian tuna packed in olive oil.  Of course, it would be lunacy to think that I could get out of there with just those few items.  I also came up with a couple of cans of San Marzano tomatoes, some cheese, olives, and mozzarella.  It was snowing, and I was parked two blocks away.  I showed restraint.

My new BFF, Mark Peel, has a recipe for tuna noodle casserole that is well beyond the Bumble Bee and Cream of Mushroom concoction that my mother used to make.  In fact, this rendition takes tuna noodle casserole far beyond that 1960's classic.  With its Italian tuna packed in olive oil and bechamel sauce infused with shallots and dried red pepper, this is tuna noodle for sophisticates.

This recipe requires a bit of time but the only really tricky part is preparing the bechamel sauce.  It has to be cooked very slowly and then strained.   The fresh breadcrumbs add a really nice crunch to the top, and they are so much more interesting that potato chips.  The use of the oil from the tuna as the fat in the breadcrumbs really ties the whole thing together nicely.

This was the best tuna noodle casserole I have ever eaten.  Ted agreed.  Kate agreed that it was very good but didn't really see a problem with the "classic."  But she's 15.  Who knows, maybe this new version will grow to be a classic too.

Recipe:  Campanile Tuna Noodle Casserole
(New Classic Family Dinners, 2009)

Ingredients:

Bechamel:
3 tablespoons unsalted butter
3 tablespoons all-purpose flour
1/4 cup minced onion or shallot
1 small dried red chile, whole
Kosher salt
2 1/2 cups whole milk

Casserole:
1/2 pound elbow macaroni
2 tablespoons olive oil from the tuna
2 6-ounce cans imported tuna packed in olive oil
4 ounces Gruyere cheese, grated (1 tightly packed cup)
3 tablespoons minced flat leaf parsley
1 1/2 cups (2 ounces) fresh bread crumbs
1 1/2 ounces Parmesan cheese freshly grated (1/2 tightly packed cup)

Make the bechamel:
In a medium saucepan over medium heat, melt the butter and add the flour.  Stir together with a wooden spoon until the roux is just barely golden, about 5 minutes.  Add the onion or shallot, chile, and bay leaf and continue to cook, stirring until the onion softens slightly.  Add 1/2 teaspoon salt.

Change from the wooden spoon to a whisk and whisk in the milk all at once.  Bring slowly to a simmer. Whisk continuously until the sauce thickens.  Use a heatproof spatula to scrape the bottom of the pan so the sauce doesn't stick and burn.  Reduce the heat and simmer gently for about 15 minutes more.

Remove from the heat and strain immediately, while hot, through a medium strainer into a bowl.  Taste and adjust the seasonings.

Assemble the casserole:
Preheat the oven to 375.  Butter a 2-quart baking dish.  Bring a large pot of water to a boil and add a generous tablespoon of salt.  Add the pasta and cook for a minute less than usual.  It should be cooked through but a little more chewy than you would ordinarily like.  Remove a ladleful of the pasta water and set aside in a bowl.  Drain the pasta and toss with 1 tablespoon of the olive oil from the tuna in a large bowl.

Crumble the tuna into the bowl with the pasta and toss together.  Gently fold in the bechamel, the grated Gruyere, and 2 tablespoons of the parsley.  If the sauce seems to coat the pasta too thickly, add a little of the pasta water.  Spoon the mixture into the baking dish.  Mix together the bread crumbs, Parmesan, the remaining tablespoon of the parsley, and the remaining tablespoon of olive oil from the tuna.

Cover the casserole with foil and bake in the preheated oven for 30 minutes.  Remove the foil and continue to bake for another 15 minutes, until the top has browned and the casserole is hot and bubbling.  Serve hot.

Sunday, February 27, 2011

It's Girl Scout Cookie Time

We all have memories of our childhood that make us feel happy.  Things that when we think of them we recall a warmth and contentment that's sometimes difficult to find in adulthood.  For me, one of those memories is linked very closely to Girl Scout Cookies.

Back when I was growing up, it seemed like every girl was a Girl Scout.  The schools all had troops, and scouting was as much a part of elementary school and junior high as youth soccer is today.  It's sad because scouting doesn't seem nearly as popular today as it was back then.

We all worked to earn badges and went on camp outs.  Anyone who knew my mother would agree that camp grounds were not her natural habitat but there she was, making hobo stew and s'mores.  In fact, anyone who knows me knows that my idea of camping is staying at a Hilton, but I loved the camp outs.  I still have my mess kit.

One of my favorite things about Girl Scouts was the annual cookie sale.  I loved the cookies.  But more than loving the cookies, I loved spending the time with my grandpa Mike.  It's that time we spent together selling cookies that brings back some of my best memories.

My grandpa Mike was a dashing man who made his career in pharmaceutical sales.  He was a successful man and lived a very nice life with my grandma Mary.  Despite his success, he always said that he wished he could have been a bum.  I guess it all seemed very romantic to him, not having to go to a job every day and not having to worry about lots of possessions.  And, because I worshipped him, I too thought that life on the streets was romantic.

Every year, my grandparents helped my sisters and I sell our cookies.  The goal was always to sell the most in our troop and to earn the coveted badge.  My grandmother always took my sisters to the car wash, which she called the "auto laundry," and I went with my grandfather.

We would load the trunk of my grandfather's giant black Buick Electra full of cases of cookies, and we would drive down to the heart of skid row in Los Angeles.  And then we would walk up and down the streets and talk to the men and hand out the boxes of cookies.  We would then walk through Westlake Park and hand out more cookies.  In my childhood, my grandfather and I probably gave away thousands of boxes of cookies.  And then every year my grandfather wrote a check to the Girl Scouts for the entire amount.

My grandfather taught me about giving.  He taught me not to be afraid of people, no matter what their circumstances.  He always said that it was often bad luck that landed these people on the streets.  Sometimes they told us their stories, but more often they just showed quiet gratitude for the cookies.  Even thinking of these experiences today, I still feel warm all over.

So, here I am, an adult and I still have a soft spot for the Girl Scouts and their cookies.  Every year I buy far more cookies than we need because I am unable to pass up a group of girls stationed at the entrance of the grocery store or anywhere else.  I still owe a debt of gratitude to my grandpa and the Girl Scouts for teaching me about giving.

Thursday, February 24, 2011

Let's Hear it for the Braise

Yes, it's still winter.  And yes, it's still cold.  And yes, that means it's still braising weather.

But, here's the thing.  I've had enough braised beef and chicken to last me lifetime.  In fact, as delicious as coq au vin is, the thought of it is, well, uninspiring at this moment.  But I do love braised meats, and they are definitely not summertime food.   I feel like I have to sneak in a couple of more meals before the  temperature rises.

As I mentioned yesterday, I just bought Mark Peel's cookbook New Classic Family Dinners, and so far it's shaping up to be a real winner.  I always know I'm going to love a cookbook when I can page through and get excited about making a bunch of different recipes.  That's the case with this book.  I am actually looking forward to dinner for weeks to come because I can try out some of these recipes.

As I was perusing Peel's cookbook, I came across a recipe for braised sausages and sauerkraut.  This is food guaranteed to make Ted happy.  He loves all that German pub food.  Maybe it's because he likes German beer so much.  For years he has been anxious to go to Munich just so he can sit in beer gardens and drink beer and eat sausages.  He is getting his wish this fall when Charlie will be studying abroad in Berlin.  Needless to say, Ted is already planning a trip.

But back to the sausage.  This recipe sounded seriously good so I dashed out to pick up some kraut and some sausage.  Now, if you're not a pork person, never fear.  I think this recipe would be equally delicious with chicken or turkey sausage.  So, read on.

Like all braised recipes, this one takes a bit of time.  The sauerkraut has to braise for about an hour and the sausages for about a half hour.  But it's time well spent.  Steam some potatoes, which are the perfect side dish, and crack open a beer.  Just make sure it's German.

Recipe:  Sausages Braised in Beer with Sauerkraut
(New Classic Family Dinners, 2009)

Ingredients:

Sauerkraut:

1 quart sauerkraut, drained
1 medium onion, cut in half, then sliced crosswise
1 tart apple, peeled, quartered, cored, then thinly sliced crosswise
2 cups dry white wine
6 lightly crushed juniper berries, 2 whole cloves, and 1/2 teaspoon fennel seeds, tied in a piece of cheesecloth

Sausages:

1 tablespoon canola oil
1/2 cup roughly chopped onion
1`/2 teaspoon kosher salt
2 whole cloves
7 juniper berries, lightly crushed
1/2 teaspoon fennel seeds
1/2 cup dark beer
1/2 cup chicken stock
1 1/2 pounds sausage

Whole grain mustard and steamed potatoes, for serving

Combine all the sauerkraut ingredients in a medium saucepan.  Place over medium heat and bring to a simmer.  Cover, reduce heat, and simmer gently for 1 hour, until the apple is very soft and the liquid in the pot has evaporated.

In another saucepan, heat the oil over medium heat and add the onion and the salt.  Cook gently until tender, about 5 minutes, add the cloves, juniper berries, and fennel seeds.  Cook, stirring for a few more minutes.  Add the beer and the chicken stock and bring to a simmer.

Pierce the sauces in several places with the tip of a knife and add the the simmering beer mixture.  Bring back to a simmer, cover, reduce the heat, and simmer gently until the sausages are cooked, about 30 minutes for large sausages.

Distribute the sauerkraut among 4 bowls.  Top with a serving of sausages and drizzle on juice from the pan.  Serve with whole grain mustard and steamed potatoes on the side.

Wednesday, February 23, 2011

Lost and Found

As I have mentioned in the past, my basement freezer is like a black hole.  Things go in and they are never seen again.  Maybe that makes it more like the Bermuda Triangle.  I'm not sure.  The point is that I very carefully put leftovers in containers or Food Saver bags, pop them in the freezer, and they are never seen again.

Every once in a while I get brave.   I don my winter coat and snow shoveling gloves and venture down into the basement for a freezer clean out and reorganization.  It is just amazing what I unearth as I peel away the layers of what I thought were things we were going to eat again.

I have the digress here to say that we are not really a leftover eating family.  I try to make just what we are going to eat at one meal, but occasionally we end up left with not quite another meal's worth.  Anyway, because it's often only enough for one or two people, sometimes I'll eat it for lunch the next day.  But, otherwise, it's into the freezer with it.

So, back to the freezer.   I found a quart container of bolognese sauce, and I felt like I had hit pay dirt.  I could actually do something with this, after I thawed it out of the brick of red sauce it had become.  Now all I needed was some bolognese inspiration.

As you may know, Border's Books is in bankruptcy.  Although I think this is sad, the fact that they are closing their store right near my house presented a great opportunity.  I had stopped in on Monday and picked up a bunch of cookbooks for 20% off of their usual discount.  Among those books was Mark Peel's New Classic Family Dinners.  There were oodles of recipes that sounded great, but one especially nice one was the recipe for stuffed shells with, you guessed it, bolognese sauce!  Bingo!

I made the shells, and they have to rate as some of the best I have ever tasted.  Peel included a recipe for bolognese, which I didn't try.  Instead I used mine, made from Ina's Weeknight Bolognese (blog dated 11/8/10).  I think this recipe would even be good with marinara, if you happened to have some of that laying around.

So it was a win-win for me.  I  got to use up the Bolognese sauce, and I found a great new recipe for stuffed shells.

Recipe:  Stuffed Shells with Bolognese Sauce
(New Classic Family Dinners, 2009)

Ingredients:

1/2 pound jumbo shells
1 tablespoon olive oil
1 cup fresh ricotta cheese
2 garlic cloves, minced
1 tablespoon flat leaf parsley, minced
1 teaspoon fresh thyme leaves
1/2 cup heavy cream
Kosher salt
6 ounces fresh mozzarella cheese, cut in very small dice
3 ounces Gruyere cheese, cut in very small dice
1 2/3 cups Bolognese sauce
1/2 cup freshly grated Parmesan cheese

Bring a large pot of water to a boil.  Add 1 tablespoon of salt and add the shells.  Cook 10-12 minutes, until just al dente.  Drain and toss gently with 1 tablespoon olive oil.  Set aside.

In a medium bowl, stir together the ricotta, garlic, parsley, thyme, cream, and 1/2 teaspoon of salt.  Taste and adjust the seasonings.

In another bowl, toss together the mozzarella and the Gruyere.

Preheat the oven to 400.  Oil a 2-quart baking dish with 1 teaspoon of olive oil.  Fill the shells with approximately 1 teaspoon of the ricotta mixture, a heaped teaspoon of the Bolognese sauce, and a generous pinch of the cheese mixture.  Place the shells in the baking dish as you fill them, packing them in tightly.

Cover the dish tightly with oiled foil and place in the preheated oven.  Bake 30 minutes.  Remove the foil and sprinkle on the Parmesan.  Return to the oven and bake for an additional 10-15 minutes, until the top is lightly browned and the mixture is bubbling.  Allow to sit for a few minutes before serving.


(Adapted from Mark Peel, New Classic Family Dinners, 2009)

Ingredients:

Tuesday, February 22, 2011

Pancake Day

For someone who was born in Los Angeles where there is no weather to speak of,  since moving to Pittsburgh Kate has completely embraced weather cancellations and delays at school.  In fact, I think she is obsessed with the whole idea.  I was dismayed to find out last night that not only does she receive text updates regarding school delays and cancellations for her own school, but she receives them for the public school district we live in and for several other private schools.  She says that knowing what the other schools are doing helps predict a trend that should include her school.  This is troubling to me on so many levels.

Last night we had eight inches of snow.  Kate was obsessed with whether schools were going to delay or close today.  The really remarkable thing about this was that her school did not have school today because of teacher in service.  Kate was still obsessed.  It seems that her friend Spencer had Thursday, Friday, and Monday off for President's weekend.  Kate had Friday, Monday, and Tuesday off.  Schools did close today and Spencer parlayed her five day weekend into six.  Kate was very happy for Spencer but annoyed that she hadn't had Thursday off too.  As I said, troubling on so many levels.

What's Kate going to do when she gets to college and then has a job where there are no snow days?

The point of all this, besides amusing all of you (remember I live with her), is that when there's a delay or no school, Kate thinks it's Pancake Day.  On regular school mornings, she is so slow that she only has time to grab something on her way out the door.  This is why there are about a thousand crumbs in my car.  (The "everything" bagel is a particular problem.)  But on those special mornings when there's no rush, there's nothing she likes more than pancakes.

So because today is a snow day for some kids and a teacher in service day for Kate, it's also Pancake Day in my house.

Recipe: Buttermilk Pancakes
(Fine Cooking Magazine)

Ingredients:

3 tablespoons unsalted butter
2 cups all-purpose flour
1/4 cup granulated sugar
2 1/2 teaspoons baking powder
1/2 teaspoon baking soda
1/2 teaspoon kosher salt
2 cups buttermilk
2 large eggs
Vegetable oil for the griddle

Melt the butter in a small bowl in the microwave.  Set aside and let cool briefly.

In a large bowl, whisk the flour, sugar, baking powder, baking soda, and salt.  In a medium bowl, whisk the buttermilk and eggs.  Pour the wet ingredients into the dry ingredients.  Whisk gently until the dry ingredients are almost incorporated.  Stop before the batter is evenly moistened.  Add the cooled melted butter and mix until the batter is evenly moistened but still lumpy.  Let the batter rest while you heat the griddle.

Heat a griddle over medium heat.  Lightly oil the griddle.  Working in batches, pour 1/4 cup of the batter onto the griddle for each pancake, spacing them about 1 inch apart.  Let cook, undisturbed,  until bubbles rise to the surface and the edges appear dry, about 1 to 2 minutes.  Flip and cook the second side, about 1 minute.  Repeat with the remaining batter.  Serve hot.

Monday, February 21, 2011

Born to be Wild (Mushrooms)

I really love a steak dinner, either at home or in a restaurant.  I am especially fond of the traditional side dishes, most particularly the sauteed wild mushrooms.  I also like the potatoes, but today I'm focusing on our fungi friend, the mushroom.

Although the mushrooms are one of my favorite dishes, I never really gave any thought to how to make them myself.  I figured that I could just throw a little butter in a saute pan and cooked the heck out of them until they wilted in submission.  How foolish I was.  There is a right way to saute mushrooms and it makes a real difference.

The key to really delicious sauteed mushrooms is that you can't crowd the pan.  The mushrooms should have plenty of room to brown.  When stirring them, you should do so gently and not haphazardly whip them around the pan with a wooden spoon. Finesse is the key to success.    Who knew?

The truth is that if you are patient, the mushrooms will be delicious, whether or not you add a lot of other flavorings to them.  I like to use a combination of different kinds of wild mushrooms because then you have a lot of different textures, which is nice.  (I love that wild mushrooms aren't wild at all.  They're cultivated but it does sound kind of sophisticated to refer to them as "wild".)   Add  some garlic and Italian parsley and you have a really nice side.  I also like Ina Garten's recipe for sauteed mushrooms.  It's got a little more going on but is  still very easy to make.

So, the next time you make a steak, treat yourself to some sauteed mushrooms.  Just remember not to crowd the pan!

Recipe:  Sauteed Wild Mushrooms
(Barefoot in Paris, 2004)

Ingredients:

2 pounds mixed wild mushrooms, brushed clean, stems removed, and sliced thickly
1/2 cup olive oil
1 cup chopped shallots
4 tablespoons unsalted butter
2 teaspoons kosher salt
1/2 teaspoon freshly ground black pepper
2 tablespoons chopped garlic
1 cup chopped flat least parsley

Heat the olive oil in a large saute pan.  Add the shallots and cook over low heat for 5 minutes, or until the shallots are translucent.  Add the butter, mushrooms, salt, and pepper and cook over medium heat for about 8 minutes, until they are tender and begin to release their juices, stirring often.  Stir in the garlic and cook for two more minutes.  Toss in the parsley, sprinkle with salt and serve warm.

Sunday, February 20, 2011

Happy Birthday George and Abe

Tomorrow is President's Day.   I'm taking the day off, along with the banks, the schools, and most everyone else.  I spent the weekend at a tennis tournament with Kate and I have to be honest with you.  I haven't given cooking any thought.  At least I haven't given food enough thought to write about it.  So, I'm taking the holiday off.

So, I'll be back on Tuesday.  In the meantime, feel free to email me if there is anything you've been thinking of making and don't have a recipe for.  You can also email me if there's anything in particular that you would like me to write about.  Or, you can always email me just to say hi.  I love audience participation.

Enjoy your day off.  I know I will.

Thursday, February 17, 2011

Finally, A New Use for Stale Bread

We all do it.  The bread looks so appealing so we pick up a loaf.  The problem is that, at least in my house, there's often more bread than there is interest, and I end up having to throw some of it away.  If it's a plain bread, I can make a bread pudding, either for dessert or for breakfast.  Sometimes I grind it up into fresh breadcrumbs.  But what to do with those savory leftovers?

Mark Bittman has come up with an idea.  How about savory bread pudding?  He was on the Today Show yesterday morning just as I was debating about what to serve with my roast chicken.  What a great idea!  And, even better, I had all the ingredients in the house, including a stale loaf of bread.  Mark made his savory pudding with a rustic loaf but I had olive so I just went with the flow.

It's easy enough to make a bread pudding. It took just minutes to mix up and about 45 minutes to bake in a water bath.  It was gooey and cheesy and all those things that aren't necessarily good for your body but are good for your soul.  Really yummy.

Now that I have the basics of the savory bread pudding down, I plan to experiment.  Stay tuned.

Savory Bread Pudding
(Adapted from Mark Bittman)

*  Note:  Mark Bittman used dried tomatoes but I only had sun dried tomatoes in oil.  I drained them and then chopped them up.  He also used only mozzarella cheese.  I had an Italian cheese blend so that's what I used.

Ingredients:

3 cups milk
4 tablespoons unsalted butter, plus more for greasing pan
1 cup sun dried tomatoes in oil, drained and chopped coarsly
Salt and freshly ground black pepper
8 thick slices of good day old bread, crusts removed if very thick
3 eggs
2 cups grated Italian cheese blend
1/4 cup fresh basil
1/2 cup pitted and coarsely chopped black olives
Boiling water as needed

Heat the oven to 350.  Warm the milk, butter, tomatoes, and a good sprinkling of salt and pepper in a small saucepan over low heat just until the butter melts.  Meanwhile, butter an 8-inch square baking dish and cut or tear the bread into bite-sized pieces -- not too small.

When the milk mixture has heated, put the bread cubes into the pot and let it sit for a few minutes, occasionally submerging any pieces of bread that rise to the top.  Beat the eggs briefly in a large bowl.  Add the bread and milk mixture, the cheese, basil, and olives and stir to combine.  Season with salt and pepper.  Pour the whole mixture into the baking dish.  Set the baking dish in a larger baking dish and pour boiling water into the pan to within an inch of the top of the dish.

Bake for 45 to 60 minutes or until a think knife inserted in the center comes out clean or nearly so; the center should be a little wobbly.  Run under the broiler for about 30 seconds if you want it browned a bit.  Serve hot.

Wednesday, February 16, 2011

No One Right Way

I have been a cooking machine lately.  If nothing else, as a result of this blog, my family is eating like kings.  Every night is a major dinner production number around here, and I think they're settling into a comfortable routine.  Hum.  Is this what I really want?  Maybe I'm setting the bar too high.  Kate is off to college in a couple of years, and, believe me, there will be no Coq au Vin for dinner in the college dining room.

On the upside, all this cooking is fun and the results are tangible.  Everyone looks forward to dinner, and there's not a lot of complaining about having the same thing over and over.   Charlie comes home from college and actually chooses to have dinner with us and then go out with his friends.  While he never complains about the food in the Carleton College dining room, he has noted that there are certain things that he has learned to stay away from.

But I digress.  I have recently figured out how the delayed start on my oven works.  This has happened just as I am out shopping for new ovens.  Figures, doesn't it?  Anyway, this delayed start feature has opened up a whole new world for me.  I can make something that has to cook for more than 45 minutes because I can set to timer to start cooking while we are still at tennis.  Wow.  Doesn't sound like a big deal, I know.  But it is.

Anyway, tonight I'm pulling back with all the gourmet stuff and roasting a chicken.  I love roast chicken because it's so simple and satisfying.  And I can get it started in plenty of time so that it will be fully cooked and also have time to sit after it comes out of the oven before we sit down for dinner.

Another great thing about roast chicken is that there is no right way to make it.  As long as it's cooked, it's pretty good whether you rub it with olive oil or put a compound butter under the skin.  It's almost foolproof.  For me, the simpler the preparation, the better.  Lemon, onions, and garlic are my preferred way to go.  I like to roast it on a pretty high temperature so the skin gets nice and crispy.  At the end, I deglaze the pan with some chicken stock and make a light pan gravy.

Lest my family think I'm slouching, I did make a pretty spectacular side dish to go with my chicken.   I'm going to save that for tomorrow.  I want to keep you coming back!

Recipe:  Roast Chicken
(Adapted from Ina Garten)

Ingredients:

1 4 to 5 pound roasting chicken
Kosher salt and freshly ground black pepper
2 lemons
1 whole head of garlic, cut in half crosswise
Olive oil
2 onions, peeled and thickly sliced
1/2 cup white wine
1/2 cup chicken stock
1 tablespoon all purpose flour

Preheat the oven to 425.

Remove and discard the chicken giblets.  Pat the outside dry.  Liberally salt and pepper the inside of the chicken.  Cut the lemons in quarters and place 2 quarters in the cavity along with the garlic.  Brush the chicken with olive oil and sprinkle liberally with salt and pepper.  Tie the legs together with kitchen twine and tuck the wing tips under the body of the chicken.  Place the chicken in a 11 x 14 inch roasting pan.   Place the reserved lemons and the sliced onions in a large bowl and toss with 2 tablespoons of olive oil, 1 teaspoon of salt, and 1/2 teaspoon of pepper.  Pour the mixture around the chicken.

Roast the chicken for about 1 hour and 15 minutes, until the juices run clear.  Remove the chicken to a platter, leaving the lemons and onions in the pan.  Tent the chicken with aluminum foil, and allow it to rest for 10 minutes while you prepare the sauce.

Place the pan on top of the stove over medium high heat.  Add the wine and deglaze the pan.  Add the stock and sprinkle on the flour, stirring constantly for a minute, until the sauce thickens.  Add any juices that collect on the platter under the chicken.  Carve the chicken and spoon the sauce and the onions over it.

Tuesday, February 15, 2011

Taking a Chance

On Friday I went to see my friend Mark the Butcher.  I was planning to make stuffed cabbage for dinner and I needed some ground beef.  I also was going to pick up a few things for the week.  I had a list.  As Mark was butterflying my chicken breasts I saw something I had never attempted making before: osso buco.  I was intrigued.

I had no idea how to prepare  veal shanks, but isn't this why I have an iPhone?  A quick Google search revealed that it really isn't that hard and that all you need is time.  Well, time and a couple of pretty basic ingredients like carrots, celery, and onions, all of which I had in the house.  I figured that since it was Friday and Kate didn't have tennis, I had time to burn, sort of.  I took a leap of faith and had Mark tie a couple up with twine and I was on my way home to experiment.

Why did I never make osso buco before?  It was so easy and they're just my kind of food.  They're braised low and slow and they come out of the oven meltingly tender and delicious.  With the veal shanks, I served some creamy polenta, and it was a perfect dinner.  I even made an apple tart for dessert.   Honestly, it was restaurant quality, almost, and all it really took was some time and a leap of faith.

Recipe:  Osso Buco
(Adapted from Giada DeLaurentiis)

Ingredients:

6 1 to 1 1/2 inch thick slices veal shank
2 1/2 teaspoons salt, plus more to taste
1 1/2 teaspoons freshly ground black pepper, plus more to taste
1/3 cup all purpose flour, for dredging
1/4 cup vegetable oil
1 small onion, finely chopped
1 small carrot, finely chopped
1 celery stalk, finely chopped
1 tablespoon tomato paste
1 cup dry white wine
About 4 cups low-sodium chick boroh
1 large spring fresh rosemary
1 large spring fresh thyme
1 bay leaf
2 whole cloves
1 tablespoon chopped fresh flat leaf parsley

Preheat the oven to 375.  Pat the veal dry with paper towels.  Secure the meat to the bone with kitchen twine.  Season veal with 1 1/2 teaspoons each of salt and pepper.  Dredge the veal in the flour to coat the cut sides lightly.

In a heavy roasting pan large enough to fit the veal in a single layer, heat the oil over a medium flame until hot.  Add the veal and cook until brown on both sides, about 8 minutes per side.  Transfer the veal to a plate and reserve.

In the same pan, add the onion, carrot, and celery.  Season with 1 teaspoon of the salt.  Saute until the onion is tender, about 6 minutes.  Stir in the tomato paste and saute for 1 minute.  Stir in the wine and simmer until the liquid is reduced by half, about 2 minutes.  Return the veal to the pan.  Add enough chicken broth to come two thirds of the way up the sides of the veal.  Add the herb sprigs, bay leaf, and cloves to the broth mixture.  Bring the liquid to a boil over medium high heat.  Remove the pan from the heat.  Cover the pan with foil and transfer to the oven.  Braise, until the veal is fork tender, turning veal every 30 minutes, about 1 1/2 hours total.

Carefully remove the cooked veal from the pan and transfer to a cutting board.  Cut off the twine and discard.  Tent the veal to keep warm.

Place a large sieve over a large bowl.  Carefully pour the cooking liquid and vegetables into the sieve, pressing on the solids to release as much of the liquid as possible.  Discard the solids and return the sauce to the pan.  Gently place the veal back into the strained sauce.  Bring just to a simmer and season with more salt and pepper, to taste.  Place one veal shank on each plate and garnish with parsley.

Monday, February 14, 2011

What's Your Test?

After my post yesterday on Penne alla Puttanesca, my friend and reader Wende emailed me.  Wende said that Puttanesca is the dish by which she judges Italian restaurants.  She said that if the restaurant passes the Puttanesca test and can balance the flavors just right, she will be back.  If not, that visit was her one and only to that restaurant.

This got me to thinking.  We all have our own litmus test for whether we return to a restaurant or not.  For me, it's the bread.  I think the bread that a restaurant serves sets the tone for the whole meal.  If it's an Italian restaurant then the bread basket offerings should be Italian.  If it's French, then the bread should be French. The styrofoam baguette doesn't cut it with me.  The bread has to enhance the whole dining experience.  If not, I'm not too enthusiastic about going back.  It's all in the details.

My friend Mona says that her litmus test has more to do with service.  For her, the game changer is if the wait staff clears one diner's plate while their partner is still eating.  I have to say, I agree.  No one wants to feel like they're eating alone!

So, what's your litmus test for a restaurant?  What do you look for when you're eating out and what turns you off?  In the comments section below, let me know.  Or email me by clicking on the contact me button.  Whatever.  I want to know.  I'll share your comments with our readers if you don't mind.  This could be fun.

Restaurants beware!

Sunday, February 13, 2011

Revisiting a Classic

I've been eating Penne alla Puttanesca in restaurants for years.  I've also been making what I thought was Penne alla Puttanesca at home for just as long.  The interesting thing about my homemade version is that I never used a recipe.  I just made a basic marinara sauce and threw in some olives and some capers and called it Puttanesca.  Let me tell you something.   I found out today, olives and capers do not a Puttanesca make.

Ted was in Washington, D.C. visiting his parents over the weekend and I needed to have a dinner I could just whip up when he got home.  I didn't want to start with something too complicated.   It was Sunday night after all, and I wasn't into the whole dinner production.  Pasta seemed like the perfect idea.

A few months ago I got Mario Batali's Molto Gusto cookbook.  There's a whole section featuring all those pasta dishes that seem so simple to make.  And they are.  You just have to know how to do it the right way to get the really delicious results that made those dishes so popular.  Time for a lesson in how to make Penne alla Puttanesca.

I have to admit, I did take a little shortcut.  Mario calls for soaking the capers in water overnight.  Since I didn't decide to make this dish until an hour before I did it, I cut the soaking time way down.  I love the saltiness of the capers anyway and I don't think it adversely effected the outcome.  Otherwise, I followed the recipe and the outcome was molto bene!

Recipe: Penne alla Puttanesca
(Molto Gusto, 2010)

*Note:  I only soaked the capers for about an hour and I used pitted Kalamata olives instead of the Gaeta olives.

Ingredients:

8 to 10 salt-packed anchovy fillets
Kosher salt
6 tablespoons extra virgin olive oil
1/2 red onion, cut into 1/4-inch dice
4 garlic cloves, thinly sliced
1 1/2 cups Pomi strained tomatoes, simmered until reduced by half
1 1/2 to 2 teaspoons hot red pepper flakes
1 pound penne
2 tablespoons salt packed capers, rinsed and soaked overnight in cold water (change the water frequently) (*see note)
1/3 cup pitted Gaeta olives, coarsely chopped (* see note)
1/3 cup coarsely chopped fresh Italian parsley
Freshly grated Parmigiano Reggiano for serving

Put the anchovies in a small bowl and set it in the sink under a stream of cold running water for about 2 minutes.  Drain the anchovies, pat dry, and coarsely chop them.

Bring 6 quarts if water to a boil in a large pot and add 2 tablespoons kosher salt.

Meanwhile, combine the oil, red onion, garlic, and anchovies and cook over medium heat, stirring, until the onion is lightly browned and the anchovies have broken down, about 5 minutes.  Add the tomato sauce and red pepper flakes and cook, stirring, until fragrant, about 3 minutes.  Remove from the heat.

Drop the pasta into the boiling water and cook until just al dente.  Drain, reserving 3/4 cup of the pasta water.

Add the pasta and the reserved pasta water to the tomato mixture and stir and toss over medium heat until the pasta is well coated.  Stir in the capers, olives, and parsley and serve immediately, with grated Parmigiano on the side.

Thursday, February 10, 2011

Beyond the Deli

When I was growing up, my sister Jill and I always ordered rice pudding for dessert when we went to Fromin's Deli.  Fromin's was our "go-to" deli and our family ate there often.  Anyone from the San Fernando Valley knows Fromins.  It's practically a Jewish landmark.  (And by the way, yes, I'm a valley girl.)  But moving on, rice pudding was always the perfect ending to a deli meal.  Well, rice pudding and a black and white cookie, but we'll save my exploration of the cookie for another time.  Jill and I just loved the pudding and often had to eat defensively to keep our mother from having a wandering spoon.  (Anyone who remembers my mother will no doubt remember the wandering spoon.)

I rarely make rice pudding these days.  It's fattening, or at least for it to be really delicious it should be really fattening, and it doesn't seem to be a big fan favorite around here.  Charlie is a big pudding fan, but he usually goes for the chocolate pudding, and he's away at school anyway.  Kate has never seemed all that excited about rice pudding either.  Ted, like me, probably doesn't need to eat a dessert made with heavy cream, so rice pudding remains something firmly entrenched in my childhood memories.

That is until I saw Ina make Rum Raisin Rice Pudding on her show the other day.  Come on, this sounded too decadent to pass up.  And it's made with half and half not cream, so it's practically a diet food.   I had to try it.

To say this rice pudding is rich would be an understatement.  It's positively sinful.  It takes Fromin's rice pudding and kicks it to the curb as a sad substitute for what rice pudding can be.  This rice pudding is "beyond".

You'll be cheating yourself if you don't try this recipe.  It's the perfect comfort dessert, and it's made with half and half not cream so it's technically "lower calorie".  That erases any potential food guilt, don't you think?  It certainly did for me.

Recipe:  Rum Raisin Rice Pudding
(Barefoot Contessa Family Style, 2002)

Ingredients:

3/4 cup raisins
2 tablespoons dark rum
3/4 cup white basmati rice
1/2 teaspoon kosher salt
5 cups half-and-half
1/2 cup sugar
1 extra large egg, beaten
1 1/2 teaspoons vanilla extract

In a small bowl, combine the raisins and the rum.  Set aside.

Combine the rice and the salt with 1 1/2 cups water in a medium heavy-bottomed stainless steel saucepan.  Bring it to a boil, stir once, and simmer, covered on the lowest heat for 8 to 9 minutes, until most of the water is absorbed.  (If your stove is very hot, pull the pan halfway off the burner.)

Stir in 4 cups of half-and-half and sugar and bring to a boil.  Simmer uncovered for 25 minutes, until the rice is very soft.  Stir often, particularly toward the end.  Slowly stir in the beaten egg and continue to cook for 1 minute.  Off the heat, add the remaining cup of half-and-half, the vanilla, and the raisins with any remaining rum.  Stir well.  Pour into a bowl, and place a piece of plastic wrap directly on top of the pudding to prevent a skin from forming.  Serve warm or chilled.

Wednesday, February 9, 2011

How Adult

Today is shaping up to be a better day.  The drama of my birthday is behind me (kind of), and I am set to go and pick my car up in a little while.  Things are looking up, but I still feel like a little something sweet would help.  Whoever said that sweets don't make you feel better never dug into a pint of Ben and Jerry's in the midst of an emotional crisis.

This morning my cravings were answered when I opened the Dining section of the New York Times and found Melissa Clarks's article on brownies made with olive oil.  This recipe was just too intriguing not to try.  I've made granola with olive oil and it was just delicious, so I thought this brownie recipe could be interesting as well.

If you don't know who Melissa Clark is I urge you to look her up.  She always has a great spin on tried and true recipes, coming up with combinations and enhancements that you never thought of before.  Hence the olive oil in the granola and the olive oil in these brownies.  If nothing else, clearly Melissa Clark is a woman who loves olive oil.

I'm an adventurous cook.  I'll try anything as long as it has a couple of ingredients I've heard of.  You just never know where the next big idea is going to come from.   And it's olive oil for heaven's sake.  What could be bad?

So back to the brownies.  I had everything I needed in the house so I whipped up a batch.  O.M.G. is all I can say.  They are so good.  They're definitely more sophisticated that your average brownie but that's what makes them so special.  They're not the kind of thing your average kid would go for, but not everything is for them anyway.  These are just for you.

Recipe: Olive Oil and Coconut Brownies
(Melissa Clark, NY Times, 2/9/11)

* Note:  In my oven, these brownies took about 40 minutes to bake at 350.

Ingredients:

3/4 cup olive oil, plus more to grease pan
1/3 cup cocoa powder
2 ounces unsweetened chocolate, finely chopped
2 large eggs
2 large egg yolks
1 teaspoon vanilla extract
2 1/2 cups granulated sugar
1 3/4 cups all purpose flour
3/4 teaspoon kosher salt
2 1/2 ounces bittersweet chocolate, coarsely chopped
2 cups shredded sweetened coconut
Fleur de sel, for sprinkling

Heat the oven to 350.  Lightly grease a 9-by-13-inch baking pan.

In a large bowl, whisk together the cocoa powder and 1/2 plus 2 tablespoons boiling water until smooth. Add the unsweetened chocolate and whisk until the chocolate has melted.  Whisk in the olive oil.  Add the eggs, egg yolks and vanilla.  Add the sugar, whisking until fully incorporated.  Using a spatula, fold in the flour and salt until just combined.  Fold in the bittersweet chocolate pieces.

Pour half the batter into the prepared pan and smooth with a spatula.  Sprinkle 1 cup of the coconut on top of the batter.  Pour in the remaining batter and smooth.  Top with remaining coconut.  Sprinkle with fleur de sel and bake until just set and firm to the touch, about 25 - 30 minutes (see note).  These brownies solidify as they cool, so inserting a toothpick to check for doneness will not work; it does not come out clean.  Transfer the pan to a wire rack and all to cool completely before cutting into 1-inch squares.

Tuesday, February 8, 2011

Put Another Candle on the Birthday Cake

I need to vent and because this is my blog I get to do that sometimes.  So, here goes.
Today is February 8th so it must be cold and crappy outside.  True, it is February in Pittsburgh so the weather is supposed to be unpleasant.  Nonetheless, I grew up in Southern California and the weather was usually fairly nice on February 8th so this Pittsburgh winter is still, even after eight years, an adjustment for me.  Unfortunately, the weather outside has often been a precursor to my birthday, which by the way, is February 8th. 

Here are just a few examples:

The kids and I moved here on my birthday.  Ted had already been here for a couple of months and he was anxious for us to join him. So without thinking about what winter in Pittsburgh really meant, we made the move.  Who moves across the country in the dead of winter  and on their birthday no less?  This was not good planning on my part.  The silver lining, if you can call it that, is that I'll always remember the exact date of our move to Pittsburgh.  Despite Kate's directions, Ted did not greet us with a birthday cake but he did give me a really nice Chanel handbag that year.  

Last year I turned 50.  I informed Ted that I wanted great fanfare and a really nice cake.  I also really wanted to deal with the big 5-0 someplace other than Pittsburgh, say Paris, like we did for his 50th.  Instead I got what turned out to be two feet of snow, a week of snow days for Kate, and no cake.  He did give me a really nice Bottega Veneta handbag though. 

This year it's below 20 degrees and snowing.   When I took Kate to school this morning, I hit a pothole, spun out and got a flat tire.  I wasn't wearing a heavy coat and I did not have my cell phone with me.  I thought I was only going to be gone 10 minutes and I didn't feel like schlepping back upstairs.   These  turned out to be two big mistakes.  Fortunately, there is a very nice little button in my car that connected me to the nice people at Mercedes and they directed me to drive my car directly to the dealership which was just a few miles away.  In the snow.  On very icy roads.  On a flat tire.  It was a very long couple of miles.  Anyway, my car is now enjoying a spa day at Mercedes and getting four new tires.  I am driving a loaner and schlepping Kate to tennis later, although I did have a lovely lunch with my friend Catherine.

I don't think I'll be getting a new handbag either.  A few weeks ago I got a new refrigerator and made the  mistake of saying that it could be my birthday present.  What the hell was I thinking and why did Ted take me up on this?  Men really don't understand women, do they?  A refrigerator is not a birthday present to a woman over 50.  A handbag is.  Or jewelry.  Or something else in the luxury goods category.  Not a refrigerator, even if it is a really nice one.  If I had known that this was going to be the "real" present I would have gone for the Viking.

I have given up on asking Ted to buy me a cake and am going out to take care of it myself.   Maybe I'll get cupcakes.  That sounds nice.  


Monday, February 7, 2011

Post Mortum

Well, the Super Bowl is over.  Our guys didn't win that.  And the Red Pack Tomato Bowl is over.  We didn't win that either.  Bummer.

So, it's back to business as usual around here.  I'm taking a week off from canned tomatoes, or at least from Red Pack tomatoes.  It's not that they're not delicious, because they are.  It's just that it was a lot of canned tomatoes in one week.  It's also a week of using up.  In my race to win the Tomato Bowl,  I ended up with a lot of left overs and things we never got around to eating.  For example, a week ago Thursday I made a brisket to have for dinner last Friday but we never ate it because we ended up going out.  Then I was going to serve it on Sunday night, and I got busy trying tomato recipes.  Last week was a frenzy of new recipes and the brisket (thankfully) ended up in the freezer.  Come hell or high water, we are eating that brisket tonight.

I'm also thinking that maybe we all deserve something sweet this week.  We deserve it, don't you think?  We didn't win the Super Bowl and we didn't win the Tomato Bowl.  I think that calls for a cookie.

Recipe:   You Little Tarte's Peanut Butter and Butterscotch Cookies

Ingredients:

1/2 cup granulated sugar
1/2 cup firmly packed brown sugar
1/2 cup creamy peanut butter
1 teaspoon vanilla extract
1 egg
1 1/4 cups all purpose flour
1 teaspoon baking soda
1/4 teaspoon kosher salt
12 ounces butterscotch chips
1/2 cup pecans, chopped and toasted

Preheat the oven to 375.

In the bowl of an electric mixer fitted with the paddle attachment, combine the sugars and the butter.   Beat until fluffy, about 5 minutes.   Add the peanut butter, vanilla, and egg and beat well to combine.  Add the flour, baking soda, and salt and beat to combine.  With a wooden spoon, mix in the butterscotch chips and the pecans.

With a small scoop,  place cookies on a parchment lined baking sheet, about 2 inches apart.  Flatten the balls slightly with a fork, making a crisscross pattern.  Bake for 10 - 12 minutes, until the edges are golden brown.  Remove cookies from sheet and place on wire racks to cool completely.

Sunday, February 6, 2011

Another Apple a Day

Back before there were Red Pack tomatoes, there were Meyer lemons.  But,  in between the lemons and the tomatoes, I made a stop at Soergels Farm and bought some apples.  True to form, I bought more than we could reasonably eat and now I am left with some that I need to use up.  Homemade applesauce here I come!

You don't know what really good applesauce tastes like until you make it yourself.  And it's so easy to do that there's really no excuse not to.  No matter how you like your applesauce, chunky, smooth, with or without sugar, most of the effort in making it comes from preparing the apples.

This recipe from Ina Garten takes applesauce to a whole new level.  It's very rich and delicious and really tastes like a treat.  While it's certainly not a low calorie example of applesauce, I have to admit that it's the absolute best I have ever tasted.  So, if you're in the mood for something truly decadent, go for it.  Just keep telling yourself that it is fruit after all.

Recipe:  Homemade Applesauce
(Barefoot Contessa Cookbook, 1999)

Ingredients:

Zest and juice of 2 oranges
Zest and juice of 1 lemon
3 pounds sweet red apples (6 to 8 apples)
3 pounds Granny Smith apples (6 to 8 apples)
1/2 cup light brown sugar, packed
4 tablespoons unsalted butter
2 teaspoons ground cinnamon
1/2 teaspoon ground allspice

Preheat oven to 350.

Place the zest and juice of the oranges and lemon in a large Dutch oven.  Peel, quarter, and core the apples and toss them in the juice.  Add the brown sugar, butter, cinnamon, and allspice and cover the pot.  Bake for 1 1/2 hours, or until all the apples are soft.  Mix with a whisk until smooth.  Serve warm or at room temperature.

Saturday, February 5, 2011

Retro Tomato Soup

My dad's favorite food was Campbell's Cream of Tomato soup.  He always seemed genuinely pleased when  that was on the menu at our house.  It was also one of the few things he could actually cook and he made it with milk so he thought it was pretty gourmet.  He could also make a peanut butter and jelly sandwich.  Besides that, I cannot remember him ever cooking.

But getting back to the soup.  I loved Campbell's Cream of Tomato soup as well.  I haven't had it in years but I must admit that I have a couple of cans in the pantry because my kids love it.  It must still be pretty good.  I think I need to try it again.

In more recent years I have started making my own tomato soup.  Usually I like to make it with roasted fresh tomatoes but these are unusual times.  It's the Tomato Bowl, which is ending on Sunday, so canned tomatoes have become my new best friend.  So, I thought to myself, why not try and make a rich tomato soup with canned tomatoes.

I culled a bunch of recipes together to see what others before me had done.  Giada used pancetta and mascarpone cheese, but does she ever make anything that doesn't have pancetta and mascarpone cheese in it?  Rachael Ray muddied the waters with too many chunky vegetables.  I was going for "retro" tomato soup.  Smooth and creamy, with just a little tang and perfect with a grilled cheese sandwich.  This called for some creativity on my part.

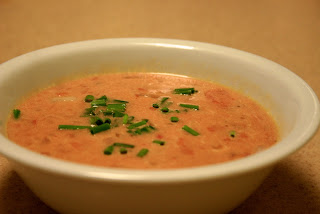
What emerged was a rich, creamy tomato soup that was tasty and comforting.  With some fresh herbs or a couple of croutons on top, I'd say my retro tomato soup was a score for Sunday's game!

Recipe:  You Little Tarte's Cream of Tomato Soup

Ingredients:

1 (28 ounce) can Red Pack crushed tomatoes
2 tablespoons tomato paste
1 cup heavy cream
4 cups chicken stock
1 tablespoon olive oil
1 onion, finely chopped
2 cloves garlic, minced
1/2 teaspoon dried oregano
1/4 teaspoon dried crushed red pepper flakes
Freshly ground black pepper
Kosher salt

Heat the oil in a large saucepan over medium heat.  Saute the onions, until softened, about 5 minutes and then add the garlic.  Saute for 1 minute.  Add the tomato paste and saute with the vegetables until it is melted, about 2 minutes.  Add the crushed tomatoes, chicken stock, oregano, red pepper flakes, and salt and pepper to taste.  Bring to a boil and then simmer for 15 minutes.  Add the cream and correct seasonings.  Continue to simmer for 5 minutes.

Thursday, February 3, 2011

Everything but the Kitchen Sink

I'm still cooking with Red Pack tomatoes, and, I have to admit, my little project has opened up a whole new world of possibilities for me.  I just never thought that canned tomatoes could bring so many people together.  I've had a lot of new visitors to the blog, and I've gotten far more creative with tomatoes.  I'd say that the Tomato Bowl has been a real touchdown for me.

So, here we are.  It's Thursday so it must be tomatoes.  What to do, what to cook?  My fellow bloggers have all been very creative, and I'm feeling like they've raised the bar to a level that's a real challenge.  Now, I love a challenge so bring it on Green Bay.  I can take you down with one arm tied behind my back.  Or, rather, I can take you down with a can of tomatoes...

When I was growing up, meatloaf was never a favorite in our house.  In fact, I think that meatloaf is universally disliked by kids the world over.  What made meatloaf more fun in my house was that my dad hated meatloaf, and my mother would make it from time to time just to annoy him.   To this day, I cannot imagine why she bothered with the meatloaf in the first place.  At dinner she was the only one  who wasn't moving the food around her plate in an artful manner.

Skip forward to 2011.  I have outgrown my dislike of meatloaf. In fact I like it a lot.  Part of the reason I now like meatloaf is that I have also discovered that meatloaf doesn't have to taste like my mother's.  You can doctor it up, and it's really quite tasty.  Not so much for my kids.  Charlie doesn't like meatloaf but doesn't count for these purposes.  He's away at college, and when he's home I try to make all his favorites so meatloaf is off the menu.  Kate tolerates meatloaf, although it's clearly not a favorite.  Ted and I both like it so it's two against one, and we win because we're bigger.

The key to meatloaf are the mix-ins.  You have to give it some pizazz or it's just meat in a loaf which isn't very appealing.  A couple of months ago Fine Cooking Magazine did a feature on how to make a great meatloaf, and my newest try is culled from their suggestions.  I have to say, Ted and I really like it, and Kate, well she tolerates it.

Now for the tomatoes.  Yesterday I was talking about tomatoes with my sister Jill.  Actually we were probably talking about how difficult teenage girls are and somehow that morphed into tomatoes.    Anyway, she suggested I make a tomato relish for the Tomato Bowl.  When I googled "tomato relish" there were several recipes that popped up and suggested serving the relish as a side dish to meatloaf.   I think it would also be nice on a hamburger, if you are so inclined.

Sunday is fast approaching.  It's a tight race between the Pittsburgh bloggers and the Green Bay bloggers, with Green Bay slightly ahead.   I think our team will pull it out.  Even if we don't, Pittsburgh will have their seventh ring.  So there.

Recipe:  You Little Tarte's Meatloaf
(Adapted from Fine Cooking, 2011)

Ingredients:

2 tablespoons olive oil
1 medium onion, chopped
2 large cloves garlic, finely chopped
1/2 cup fennel, chopped
1/2 cup mushrooms, chopped
3/4 cup red wine
4 ounces sliced sourdough bread (*I used olive bread)
1 cup milk
2 pounds ground beef
2 large eggs, lightly beaten
1 tablespoon Worcestershire sauce
2 1/4 teaspoons kosher salt
1/2 teaspoons freshly ground black pepper
1/3 cup scallions, chopped
1/3 cup kalamata olives, chopped
1/2 cup gruyere cheese
2 tablespoons fresh thyme, chopped
1/4 cup fresh italian parsley, chopped
2 teaspoons fennel seed, coarsely chopped
3 tablespoons ketchup

Preheat the oven to 375.

Heat the oil in a large skillet over medium-low heat.  Cook the onions, garlic, fennel and mushrooms, stirring frequently, until softened, about 8 minutes.  Add the wine and simmer briskly until almost dry, about 4 minutes.  Remove from the heat and put the vegetables in a large bowl.

In a shallow dish, soak the bread in the milk for about 5 minutes.  Lightly squeeze the milk out of the softened bread and then finely chop it.  Put the bread in the bowl with the vegetables.

Add the meat and the eggs to the bowl with the vegetables and the bread.  Add the thyme, parsley, fennel seed, Worcestershire, cheese, scallions, olives, salt, and pepper.  Use your hands to gently mix all the ingredients until just combined, trying not to compact the mixture as you do this.

Line the bottom of a 9x13 inch baking sheet with parchment.  Transfer the meatloaf mixture to the baking sheet and form it into a 10x4 rectangular block.  Spread the ketchup over the top and slightly down the sides of the meatloaf.

Bake until an instant read thermometer inserted in the center of the meatloaf registers 160, 40 to 55 minutes.  Transfer to a cutting board and cut into 3/4 to 1 inch thick slices.


Recipe:  Tomato Relish
(Adapted from Tyler Florence)

Ingredients:

1 tablespoon olive oil
1 onion, finely diced
2 cloves garlic, minced
2 bay leaves
2 red bell peppers, cored, seeded, and diced small
1 (14-ounce) can Red Pack diced tomatoes
1/4 cup flat leaf parsley, chopped
1 (12 ounce) bottle ketchup
1 tablespoon Worcestershire sauce
kosher salt and freshly ground black pepper

Warm the olive oil in a large skillet over medium heat.  Saute the onion, garlic, and bay leaves until soft.  Add the red peppers and cook them until they are soft.  Add the tomatoes, parsley, ketchup, Worcestershire, salt and pepper.  Simmer the relish for 5 minutes to pull all the flavors together.  Remove from the heat and serve along side the meatloaf.

Wednesday, February 2, 2011

Whoopsie

So, the other day I gave you links to everyone on the Steelers Tomato Bowl team but it turns out that, hard as it is to believe, I forgot someone.

Also on the Pittsburgh bloggers team is Evelyn's Corner  (http://evelynscorner.com/).  Now, the interesting thing is that Evelyn   is a Steelers fan living in Wisconsin.  That must make for some interesting grocery store banter these days.  Evelyn, you are a braver person than I am.  Here in Pittsburgh, if you're rooting for the "wrong" team you can barely leave your house.  It's probably a good thing it's so cold in Wisconsin because then you can stay home and not feel like you're hiding from your neighbors.

So, you should all check out Evelyn's Corner.  The recipes sound really good and I think you'll like the blog.

Birthday Wishes and Tomatoes

Today, February 2nd, is Ina Garten's birthday.  I think she's a little older than I am but since my birthday is on the 8th, I'm going to stretch and say that we're practically twins.  Well, not really, but it makes for good copy.  Anyway, I just thought I would start this post out with a little birthday greeting to my favorite Barefoot Contessa, Ina.

Now, on to the business at hand -- Red Pack tomatoes.  Yes, I am still cooking with Red Pack tomatoes and I have to say that it's been going quite well.  I never really thought about how many recipes call for canned tomatoes until I started actively seeking them out as an ingredient.  Canned tomatoes have to be up there on the most used ingredient list along with salt and pepper.


So, here it is, February and Ina's birthday and all I can think about is summer.  I love the summer.  I even love the hot, humid Pittsburgh summer.  Let's face it, once you've withstood a Pittsburgh winter, any kind of summer is welcome.  Even one that's less than, shall we say, Mediterranean.

But getting back to the summer.  One of my favorite things about the summer are the fresh tomatoes.  They're just delicious.  Ted has become Mr. Tomato Farmer in the past couple of years and our crop has been pretty impressive.  Last summer my friend Ellen gave me a couple of heirloom tomato plants to add to my garden and they yielded a ton of tomatoes.  All of those tomatoes led to a lot of caprese salads.  As far as I am concerned, with the exception of homemade ice cream, there is no food that says summer quite like a caprese salad.   Perfection.  (Really cute sandals also say summer but that's for another day.)

But alas, it is winter and the fresh tomatoes have all taken a long trip to get to my neighborhood Giant Eagle.  Truly, the only thing they have in common with summer tomatoes is that they are red.   So, this got me thinking about how I could have that feeling of summer in the dead of winter.

Enter the caprese salad.  I was thinking about Red Pack tomatoes and it occurred to me that canned tomatoes are picked at the height of their tastiness.  Why not use diced tomatoes and make a caprese bruschetta?  I took my idea for a whirl and I have to tell you that it was pretty good.   Not mid-summer   sitting in  the backyard eating a tomato just off the vine good, but quite tasty nonetheless.  I felt warm and toasty and I almost could feel the sun beating down.  (Well, not really but it was close.)

Anyway, you should take this recipe out for a spin.  Make the tomato mixture early so the flavors have a chance to blend and then put it together just before serving.  If you serve this on Sunday, I think you'll have more to cheer for than just the Steelers.

Recipe:  You Little Tarte's Mid-Winter Caprese Bruschetta

Ingredients:

1 14 ounce can Red Pack petite diced tomatoes, lightly drained
1/2 cup fresh basil, chiffonade
1/3 kalamata olives, cut in half lengthwise
1/4 teaspoon freshly ground black pepper
1/2 teaspoon kosher salt
4 teaspoons fruity olive oil, divided
1 teaspoon balsamic vinegar
8 ounces fresh mozzarella cheese, sliced into 9 pieces and cut in half
1 garlic clove
1 baguette, sliced into 18 pieces

In a medium mixing bowl, combine the tomatoes, basil, olives, salt, pepper, olive oil, and vinegar.  Let rest in the refrigerator for an hour or two.

Preheat the oven to 375.

Rub one side of each slice of bread with the garlic clove and then brush the same side with the olive oil.  Place the slices on a parchment lined baking sheet and place in the oven for 7 - 10 minutes, until golden brown.

Top each toast with a tablespoon or two of the tomato mixture and then place a piece of the mozzarella on top.  Put the toasts back on the baking sheet and return to the oven for 1 -2 minutes, until the cheese is slightly melted.

Serve warm.


Tuesday, February 1, 2011

Old Clothes

As you have probably noticed, I love braised food.  Chicken, beef, lamb.  It doesn't matter.   I love it all.  I think braising is the perfect way to cook in the winter.

Having now gone on about my love of braising, I was trying to think of a braised dish I could prepare using canned tomatoes.  (Yes, we are still competing in the Tomato Bowl.)   Also, since I live in Pittsburgh, I have been thinking about what to make to eat during the Steelers victory on Sunday.  In a true lightbulb moment it came to me.  Ropa Vieja, which means "old clothes," is the perfect choice.  It can be made ahead and feeds a crowd.   It's beyond tasty, and, yes, ropa vieja calls for canned tomatoes.  Score!

Now, just let me tell you, ropa vieja is not something you're going to be able to throw together in 20 minutes.   It's a process, so leave yourself time.  It can be made a say or two ahead but it still will take you a lot time to make.  First, there's the braising.  Then there's the sauteing and the shredding.  After that there's simmering and then more sauteing.  You get the picture.

But the end result is so worth it.  The meat comes out meltingly tender and the braising liquid is rich and delicious.  Serve it over some yellow rice and you'll have the most gourmet tailgate (in your living room) party ever.

Recipe:  Ropa Vieja
(Gourmet Magazine, January, 1995)

Ingredients:

For braising beef:

3 pounds flank steak, trimmed
2 quarts water
2 carrots, chopped coarse
1 large onion, chopped coarse
2 celery ribs, chopped coarse
1 bay leaf
3 garlic cloves, crushed lightly
1 teaspoon dried oregano
1 teaspoon ground cumin
1 teaspoon salt
1/4 teaspoon whole black peppercorns

2 green bell peppers, cut into 1/4 inch strips
1 red onion, cut into 1/4 inch strips
4 tablespoons olive oil
2 cups braising liquid, additional if desired

a 14 - 16 ounce can of whole tomatoes in juice, chopped, Red Pack brand, of course
2 tablespoons tomato paste, also Red Pack brand
 3 cloves garlic, minced
1 teaspoon ground cumin
1/4 teaspoon dried oregano
2 red bell peppers, cut into 1/4 inch strips
2 yellow bell peppers, cut into 1/4 inch strips

Accompaniment:

For yellow rice with toasted cumin:

2 tablespoons olive oil
2 teaspoons cumin seed
1/4 teaspoon crumbled saffron threads
2 cups long grain rice
4 cups water
3/4 teaspoon salt

To braise beef:

In a 5-quart dutch oven combine all braising ingredients and simmer, uncovered, 1 1/2 hours, or until the beef is tender.  Remove pot from heat and cool meat in liquid for 30 minutes.  Transfer meat to a platter and cover.  Strain braising liquid through a colander, pressing on solids, into a bowl.  Return braising liquid to the pot and boil until reduced to 3 cups, about 30 minutes.

In the pot cook the green peppers and onion in 2 tablespoons olive oil over moderate heat, stirring until softened.

While vegetables are cooking, pull the meat into shreds about 3 by 11/2 inches.  To onion mixture add shredded meat, 2 cups braising liquid, tomatoes with juice, tomato paste, garlic, cumin, oregano, and salt and pepper to taste and simmer, uncovered, 20 minutes.

While stew is simmering, in a large skillet cook red and yellow peppers in remaining 2 tablespoons olive oil over moderate heat, stirring occasionally, until softened.  Stir peppers into stew with enough additional braising liquid to this to desired consistency and simmer, uncovered, 5 minutes.

Serve ropa vieja over yellow rice.

To make the yellow rice:

In a heavy 3 quart saucepan heat olive oil over moderately high heat until hot but not smoking and saute cumin seed 10 seconds, or until it turns a few shades darker and is fragrant.  Stir in saffron and rice and saute, stirring 1 to 2 minutes, or until the rice is coated well.  Stir in water and salt and boil rice, uncovered and without stirring, until the surface of the rice is covered with steam holes and grains on top appear dry, 8 to 10 minutes more.  Remove pan from heat and let rice stand, covered, 5 minutes.  Fluff with a fork.

Let's Hear it for the Team

The Tomato Bowl is in full swing and my fellow Pittsburgh bloggers and I are busy at work whipping up recipes using Red Pack tomatoes.  I am certain that we are on the road to victory in the first ever Red Pack Tomato Bowl.  Winning this contest could bring a level of pride to Pittsburgh that will rival beating the Packers.  We are Pittsburgh.  Hear us roar!

I thought I would take a moment to introduce you to the Pittsburgh team.  Check out their blogs too.  Everyone is trying all kinds of things with Red Pack tomatoes and you just never know where the next big (tomato) idea may come from.

So, without further ado, Team Pittsburgh:
Eat PGH
Oh Food Baby
Just Roxy
Daily Rumpus

Take a look.  I think you'll enjoy these blogs.  I know I am.